Table of Contents
Prerequisites
- Supported in professional and group addition orgs.
- Need to Assign Permission Sets ( Sign Made Easy business user/Sign Made Easy Admin User).
Configuration and Permission
- After installing the Sign Made Easy app, you should be on the ‘Homepage’ of the app

Once you click on the Org Configuration
you will see the option
- Configure SME
Step 1 : Clicking on the “Configure SME” will Connect the App


- The selected logo is displayed in Sign emails and documents.

- Defines the subject field in emails sent from Sign made easy.
- Defines the content displayed in the body of emails sent from Sign made easy.

Contact Information fields – Defines the contact information displayed at the bottom of emails sent from Sign Made Easy:
- Company
- Address
- City
- State
- Zip/Postal Code
- Country
- Phone Number
- Website

Notification emails can be customized to display only the selected email option for both the user and sender.


Step 4 : In this page First you have to Go to the Object Manager and search Sign Transaction In the left sidebar, select “Fields & Relationships”.
Hit “Click the “New” button to create a new Lookup field. You need to choose the related object that you want to link to “Sign Transaction.”


Step 11 : Now,you can fill in all these required Fields and Add the URL of the Flow Add Document page then click on the save button.
Go to the home page or,Look for a search bar on the left side of the page.Type in “flows” in the search bar Once you find the “Add upload flows” option, click on view details and versions” and copy the URL of the detail page.
Example:/flow/hic_signeasy/Sme_AddAndUploadDocument?recordId={!Account.Id}


Step 14 : After opening any account, click on the Sign Document button that you created.

Adding Document for Esigning
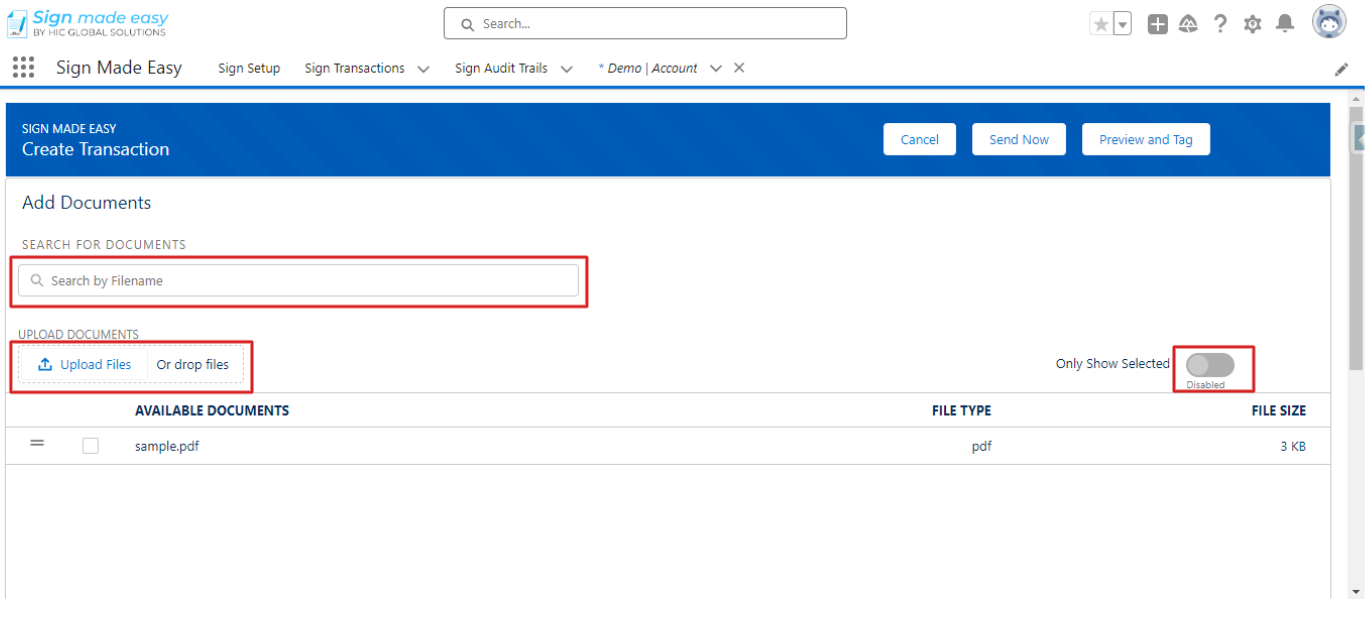
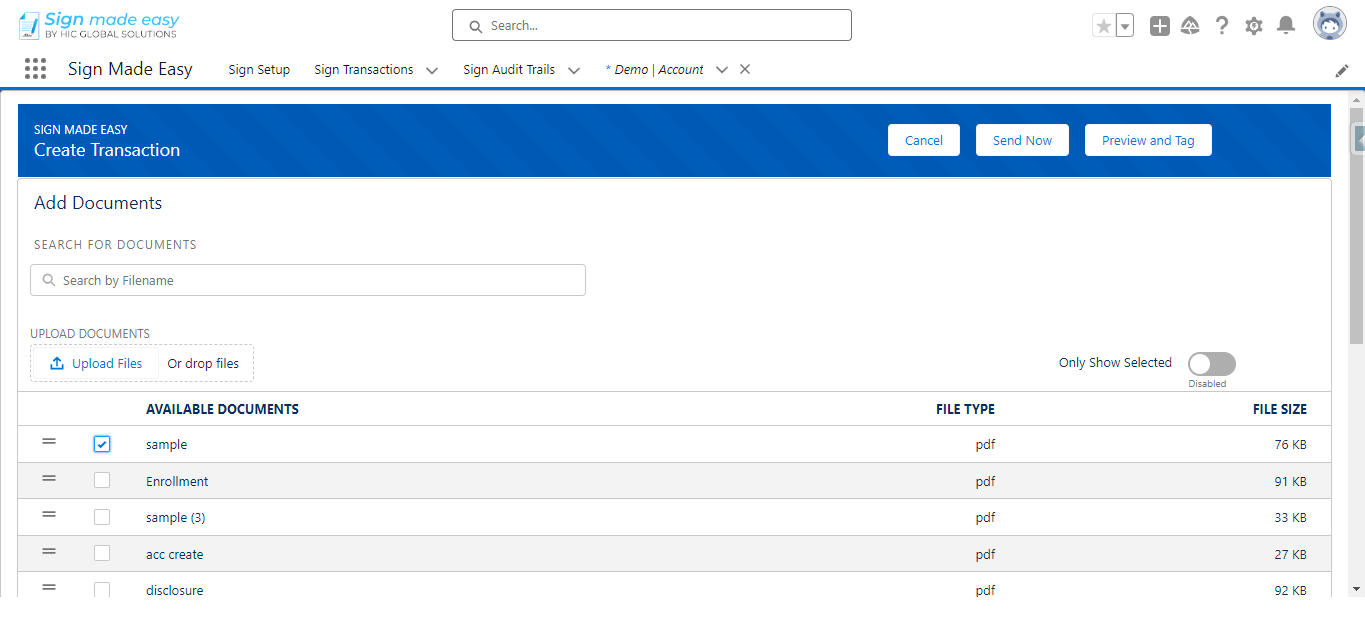
Step 15 : In this page First, you can Add Document
- To search for files in Salesforce and upload files like PDFs, DOCs, or DOCXs, file you can also drag and drop the files.
- Now, You can show all documents lists and you can select multiple documents you want for eSignature.
- Now click on the toggle button to only show selected available documents.
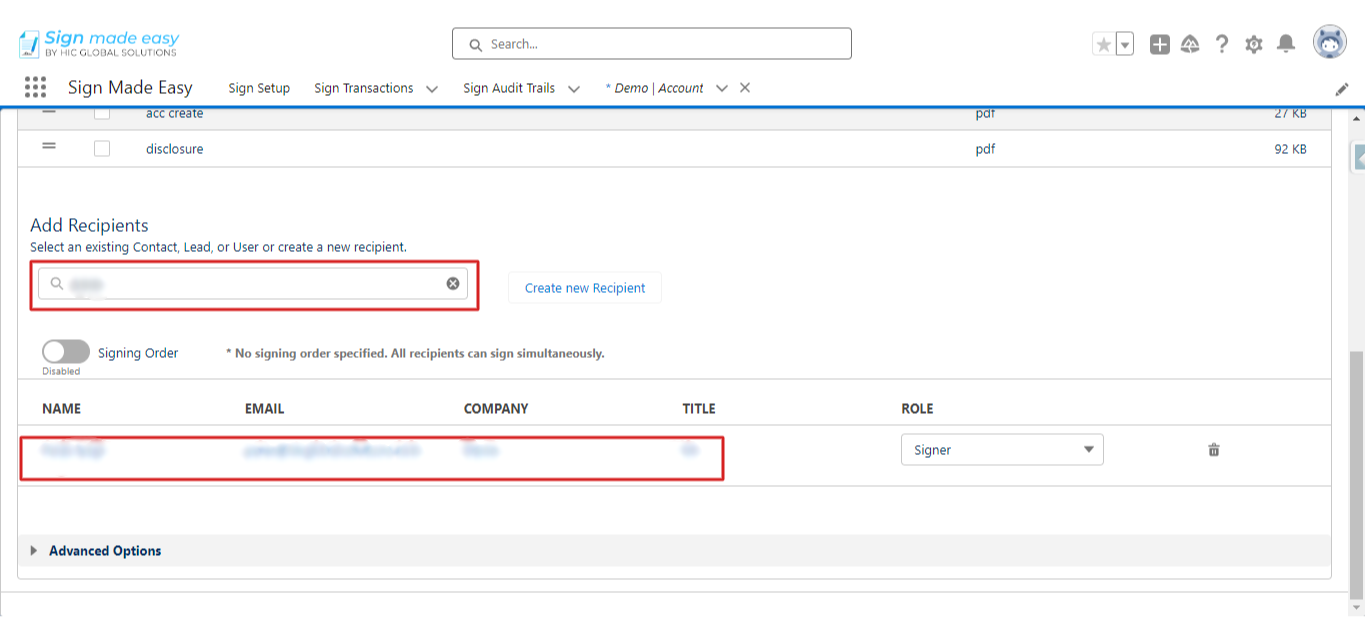
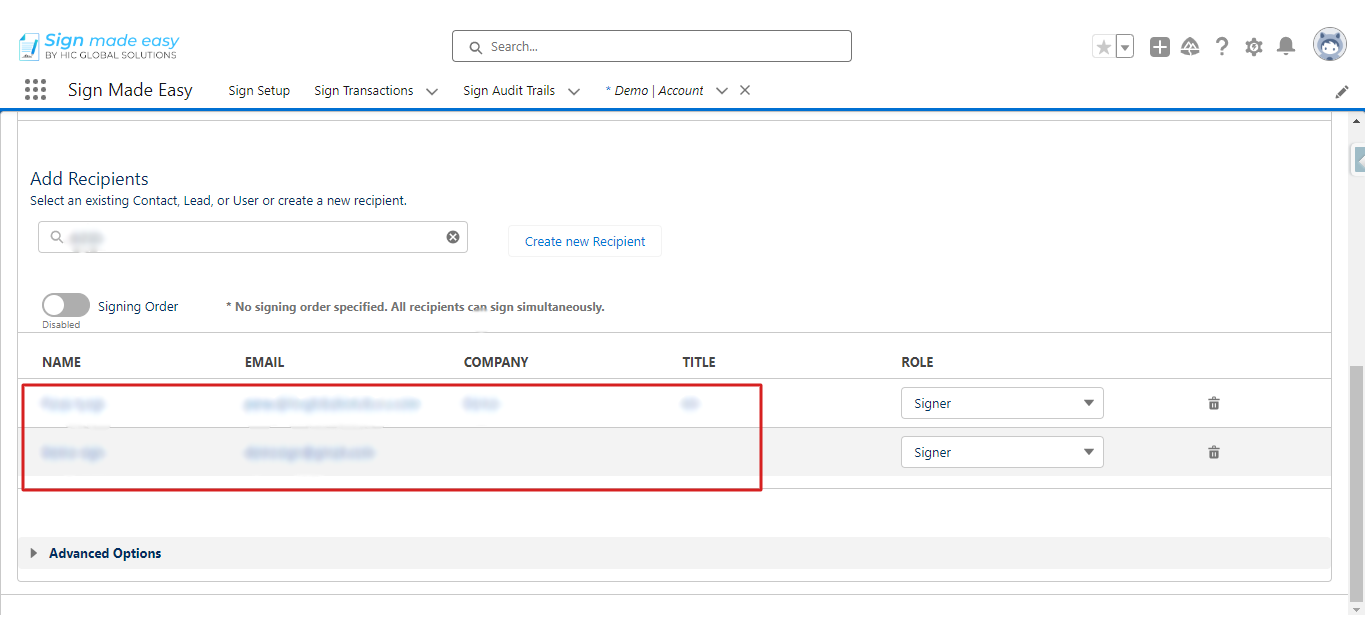
Adding Recipients
- Search the Salesforce object Contact.
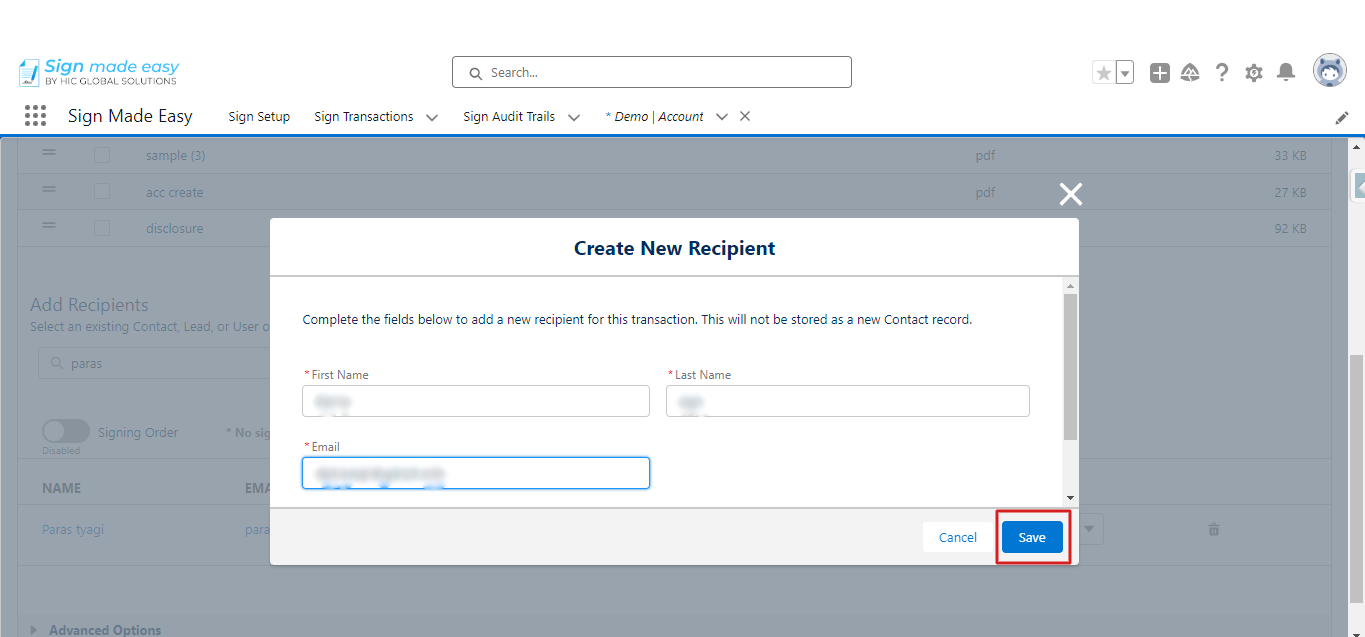
- If the Recipient is not a contact user in salesforce, Click on Create new recipient and complete the required fields to add a non-salesforce Recipient.
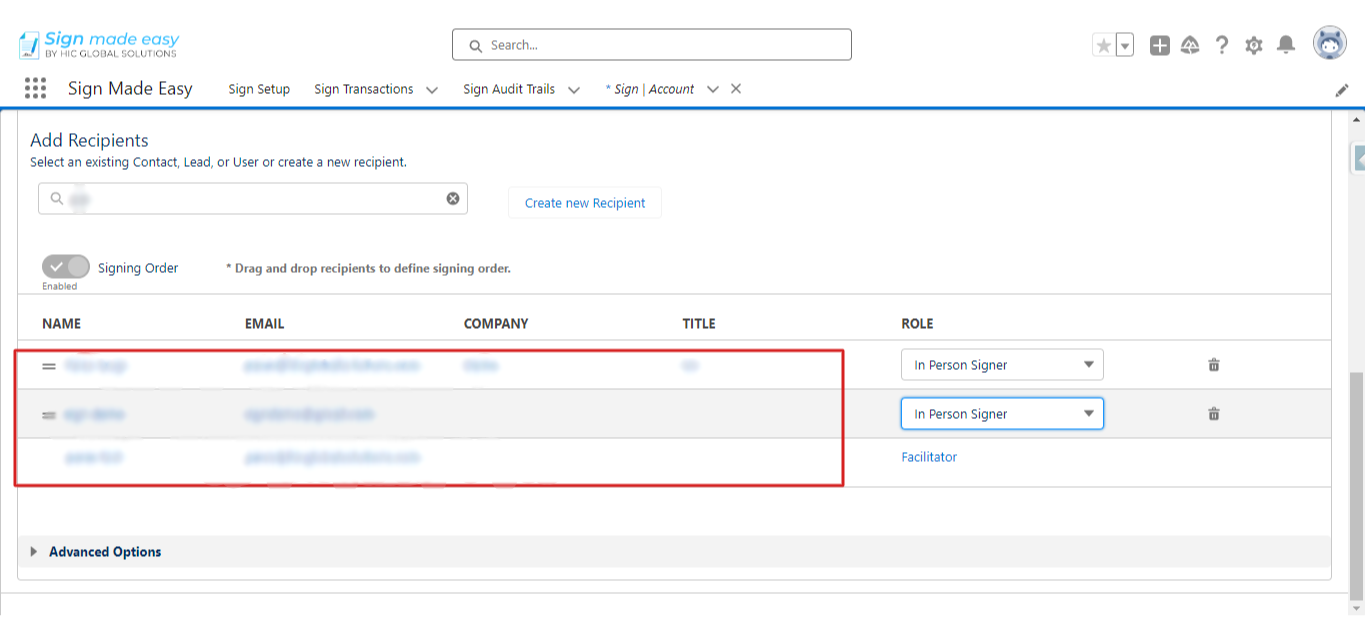
Step 17 : At this step, you should be on the Add Document page. You will see the Document and Recipient.
In the Recipient, the Role has three Options.
- Signer
- In Person
- CC
Signer : You can choose multiple signers. Click on the preview tag, proceed to the next page, and add the necessary signature tags to the document.
Afterward, click the ‘send’ button. The document will then be displayed in the email of the recipient you have added.
If you have not added the tags you can directly send the document in the Email from the add document page and click on the send button.
In Person Signing : You can choose the InPersonsigner, click on the preview tag,proceed to the next page and add the necessary signature tags to the document. After clicking on the Being In Person button. The document will be displayed on the next page and you have to complete the signing. Now the complete sign Email is sent to your email of the recipient you have added.
In this page First, you can Add Document
- To search for files in Salesforce and upload files like PDFs, DOCs, or DOCXs, file you can also drag and drop the files.
- Now, You can show all documents lists and you can select multiple documents you want for eSignature.
Now click on the toggle button to only show selected available documents
Now the second Option is Add Recipients:
- Search the Salesforce object Contact.
- If the Recipient is not a contact user in salesforce, Click on Create new recipient and complete the required fields to add a non-salesforce Recipient.
If you have not added the tags you can directly send the document in the Email from the add document page. Click on the Begin In person.
CC : You can select multiple CCs, But you need to Add one Signer or One In Person.
In the CC only Complete sign email is sent . two Signers and click on the Preview and tag button.
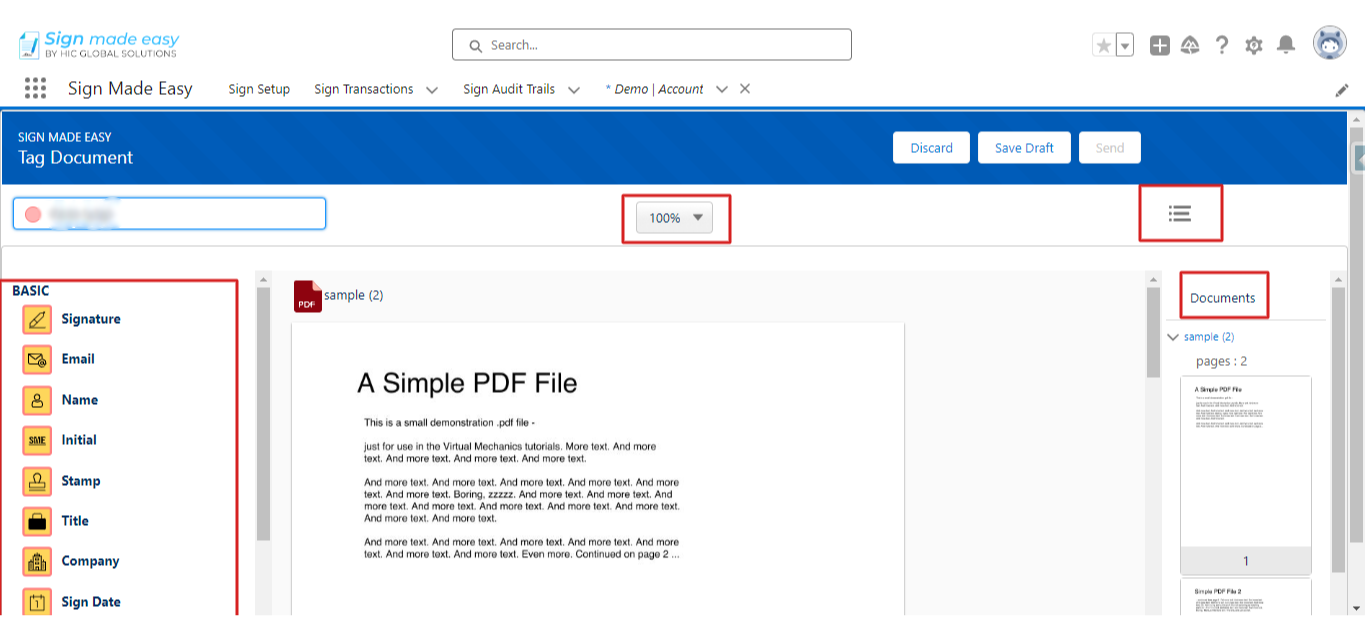
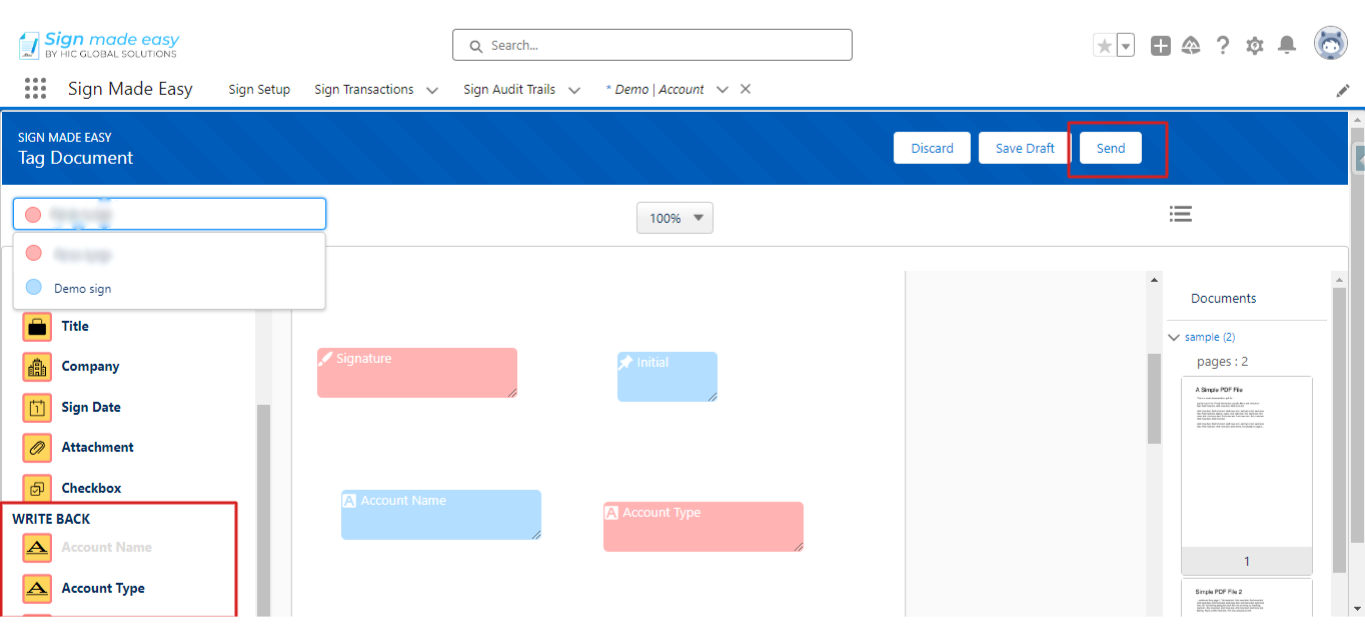
Step 19 : Now, on the next page, you will see the Document and the recipient you added. Also on the left side, you will see the tags. Drag and Drop the tags you need in the document sign
and click on the send the send button.
Also, you will see two buttons Discard & save Draft.
Discard : You have Go back to the previous page.
Save Draft : Your Document save in the Sign Transaction.
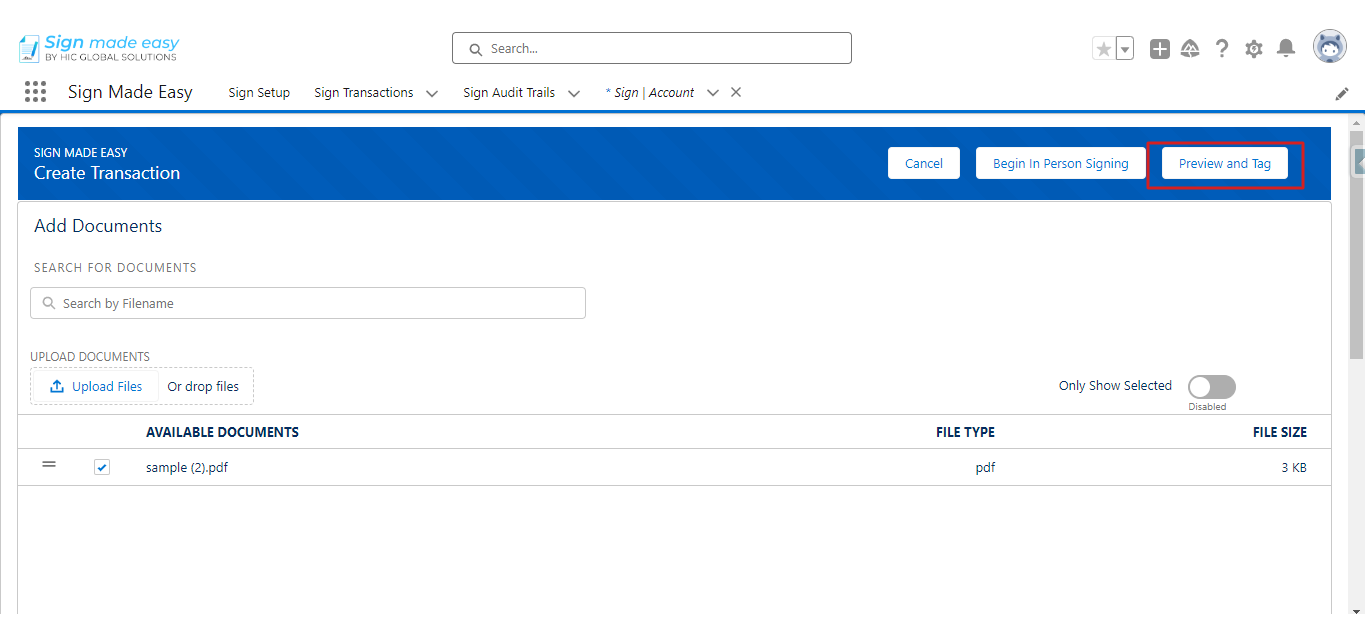
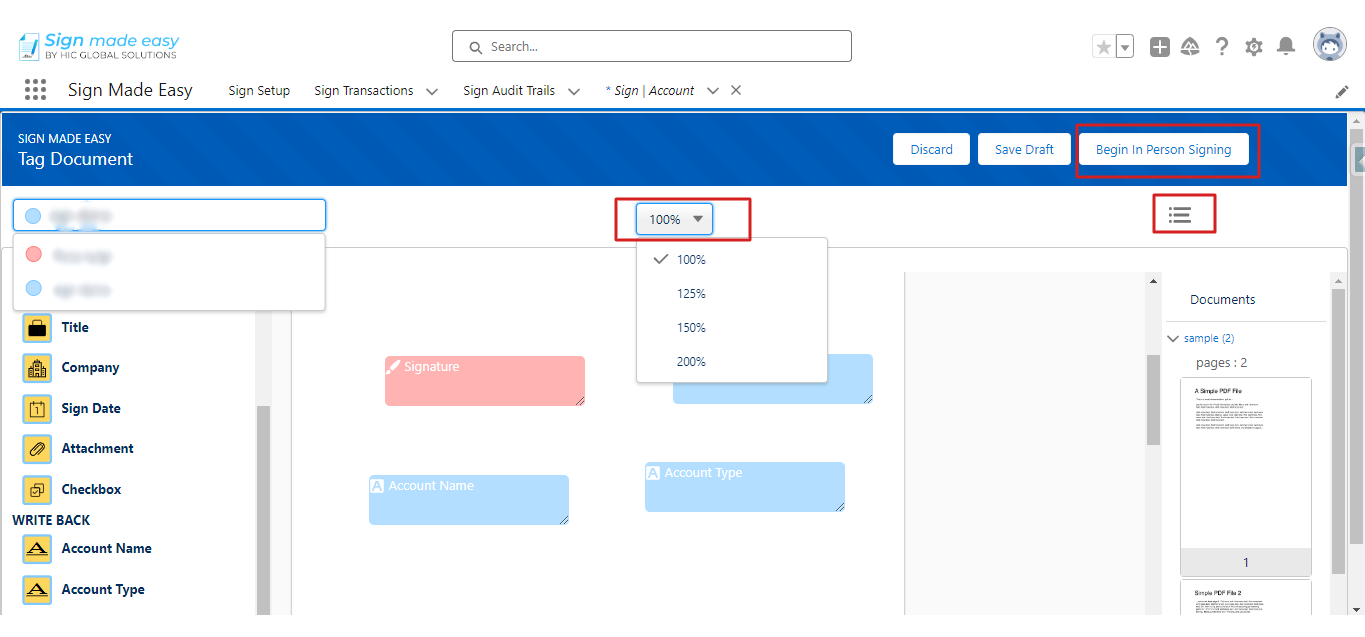
Step 21 : Now,Your added Document and the recipient will be shown on the next page. Also on the Left side tags are shown. Drag and Drop the tags you need in the document sign and click on the Being In person button.
Also, you can see two buttons Discard & save Draft.
Discard : You can Go back to the previous page.
Save Draft : Your Document save in the Sign Transaction.
Adding Email Recipients
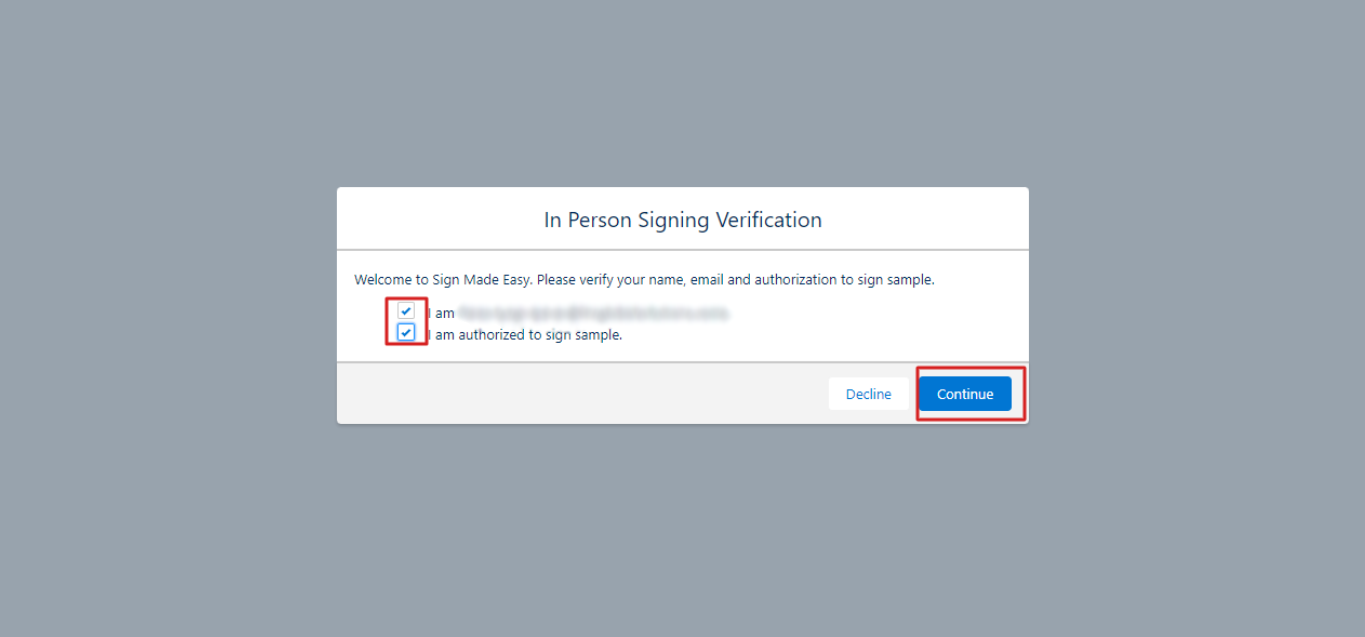
Now, you should be on the In-Person Signer verification page. Please select the checkbox next to ‘Recipient Email’ and then click on the ‘Continue’ button.
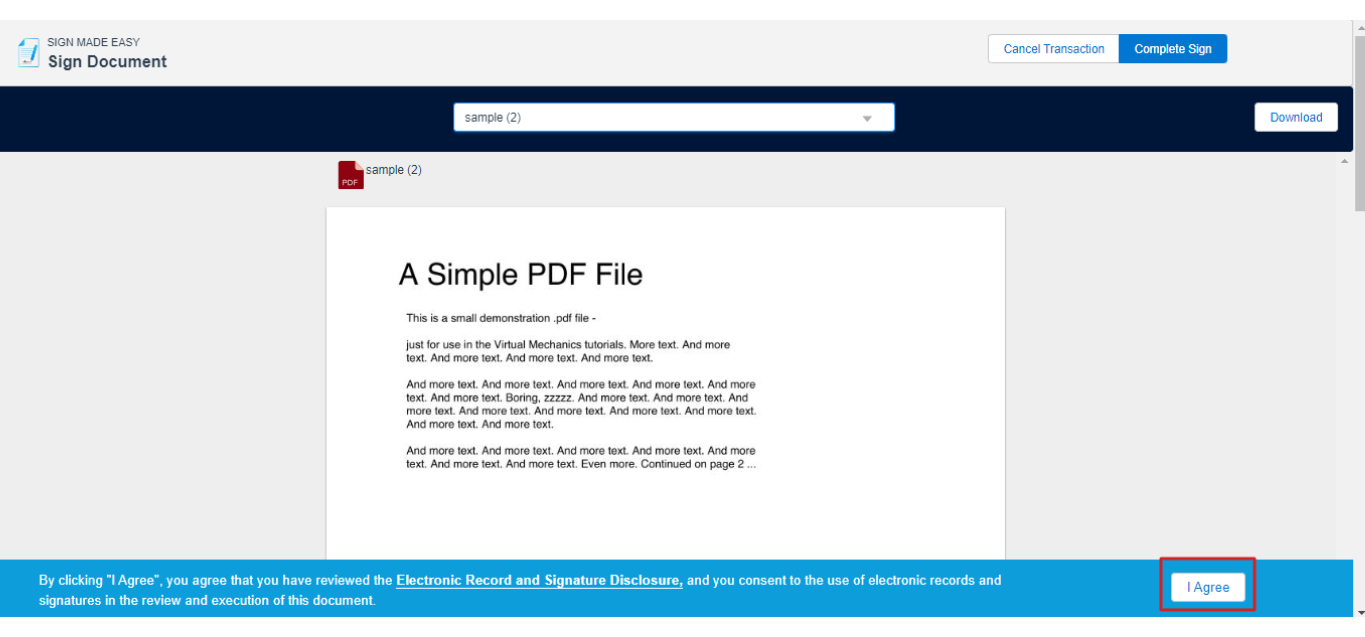
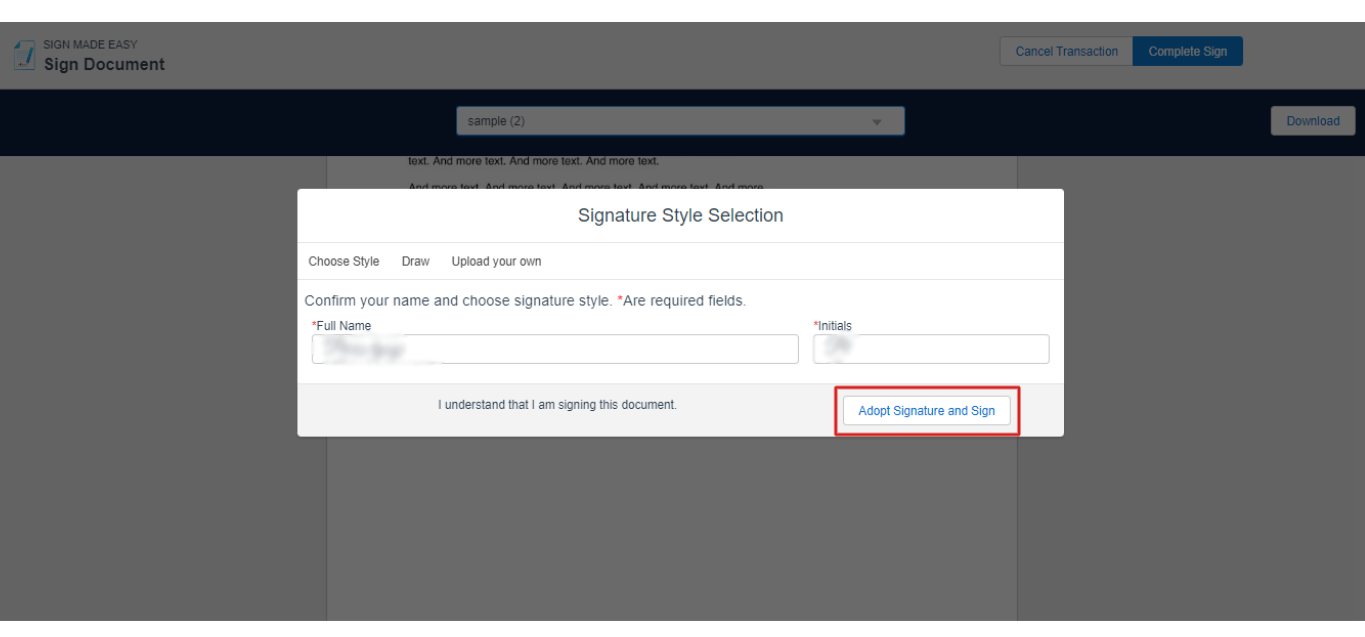
Step 22 : Click on the ‘Signature’ tag on the sign page, add your signature, and then click on the “Adopt Signature and Sign”.
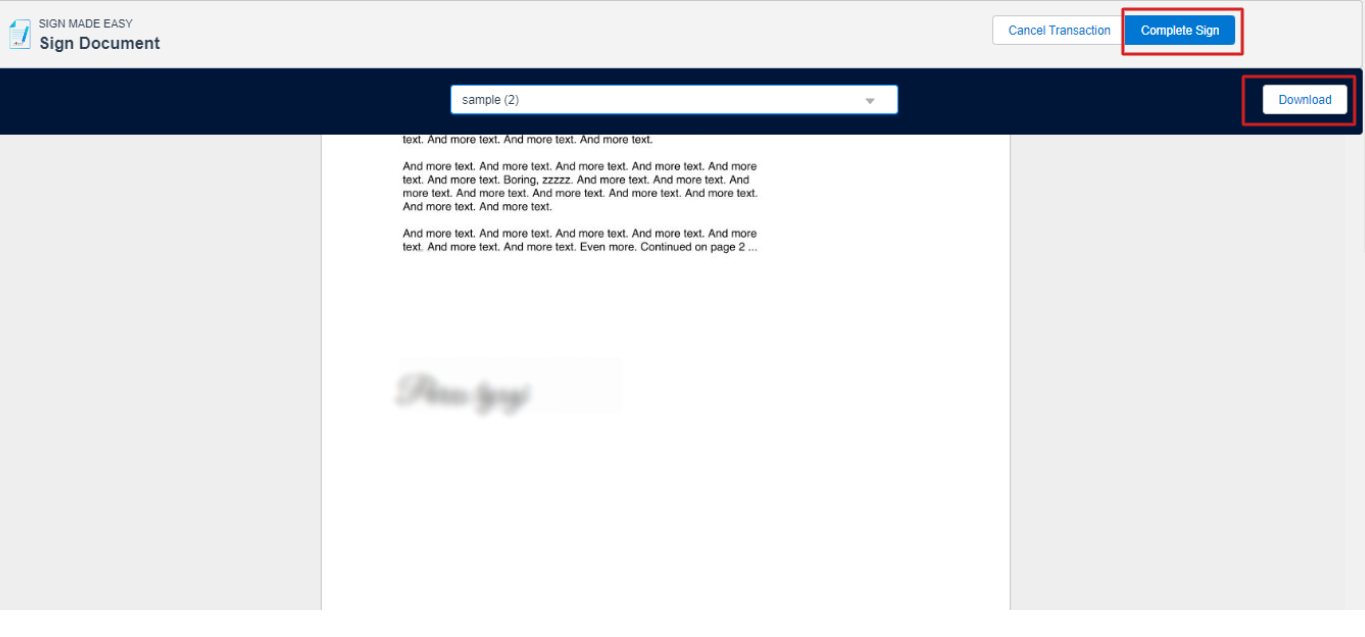
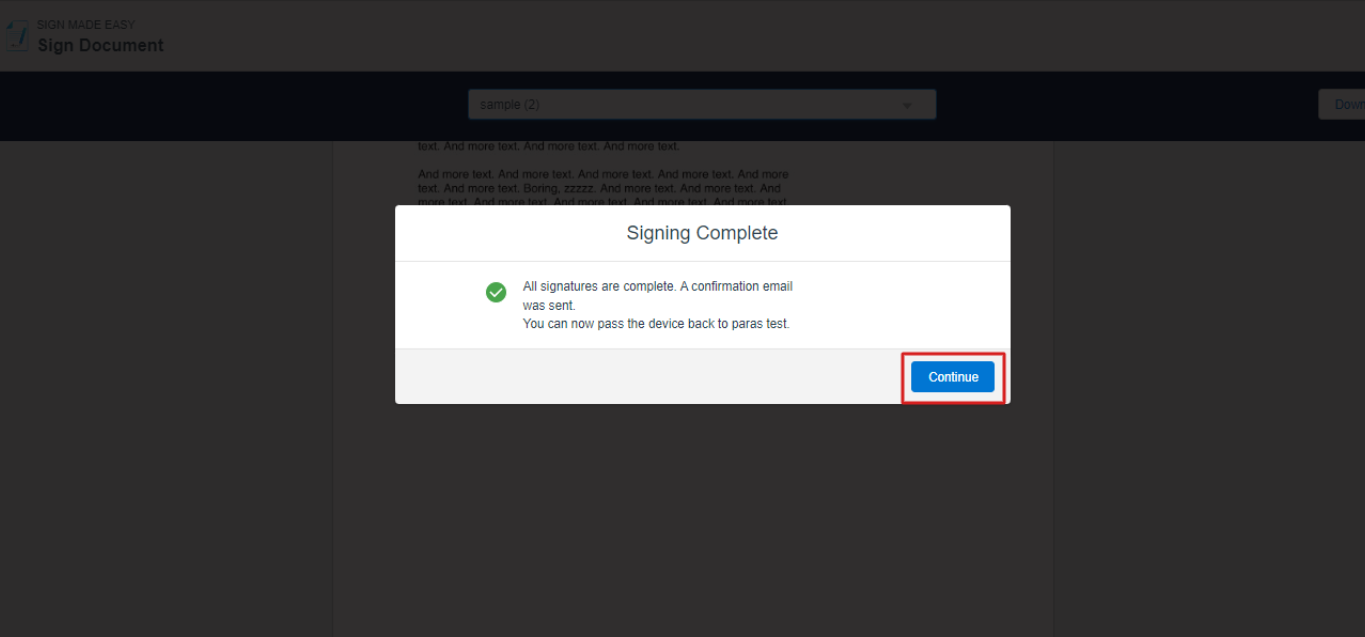
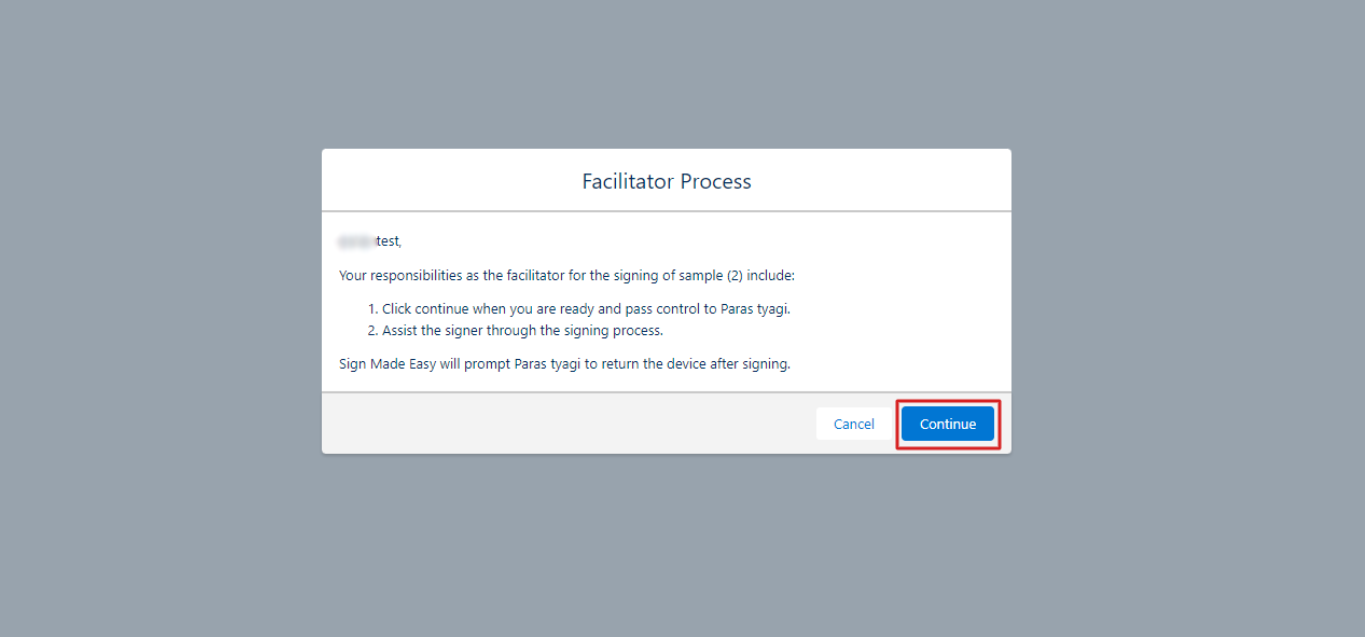
Step 24 : After completing the sign, now click on the Complete sign button. you can show the Popup then Click on the Continue button.
After that recipient will receive the Signed Document to their Email.
