Sign Made Easy allows users to create custom tags for Text, Number, and Dropdown field types. Users can configure tag properties, formatting options, and predefined values according to their specific requirements.
This feature provides greater flexibility by enabling users to create reusable tags tailored to their document workflows and business needs.
Step-by-Step Guide to Creating and Configuring Custom Tags
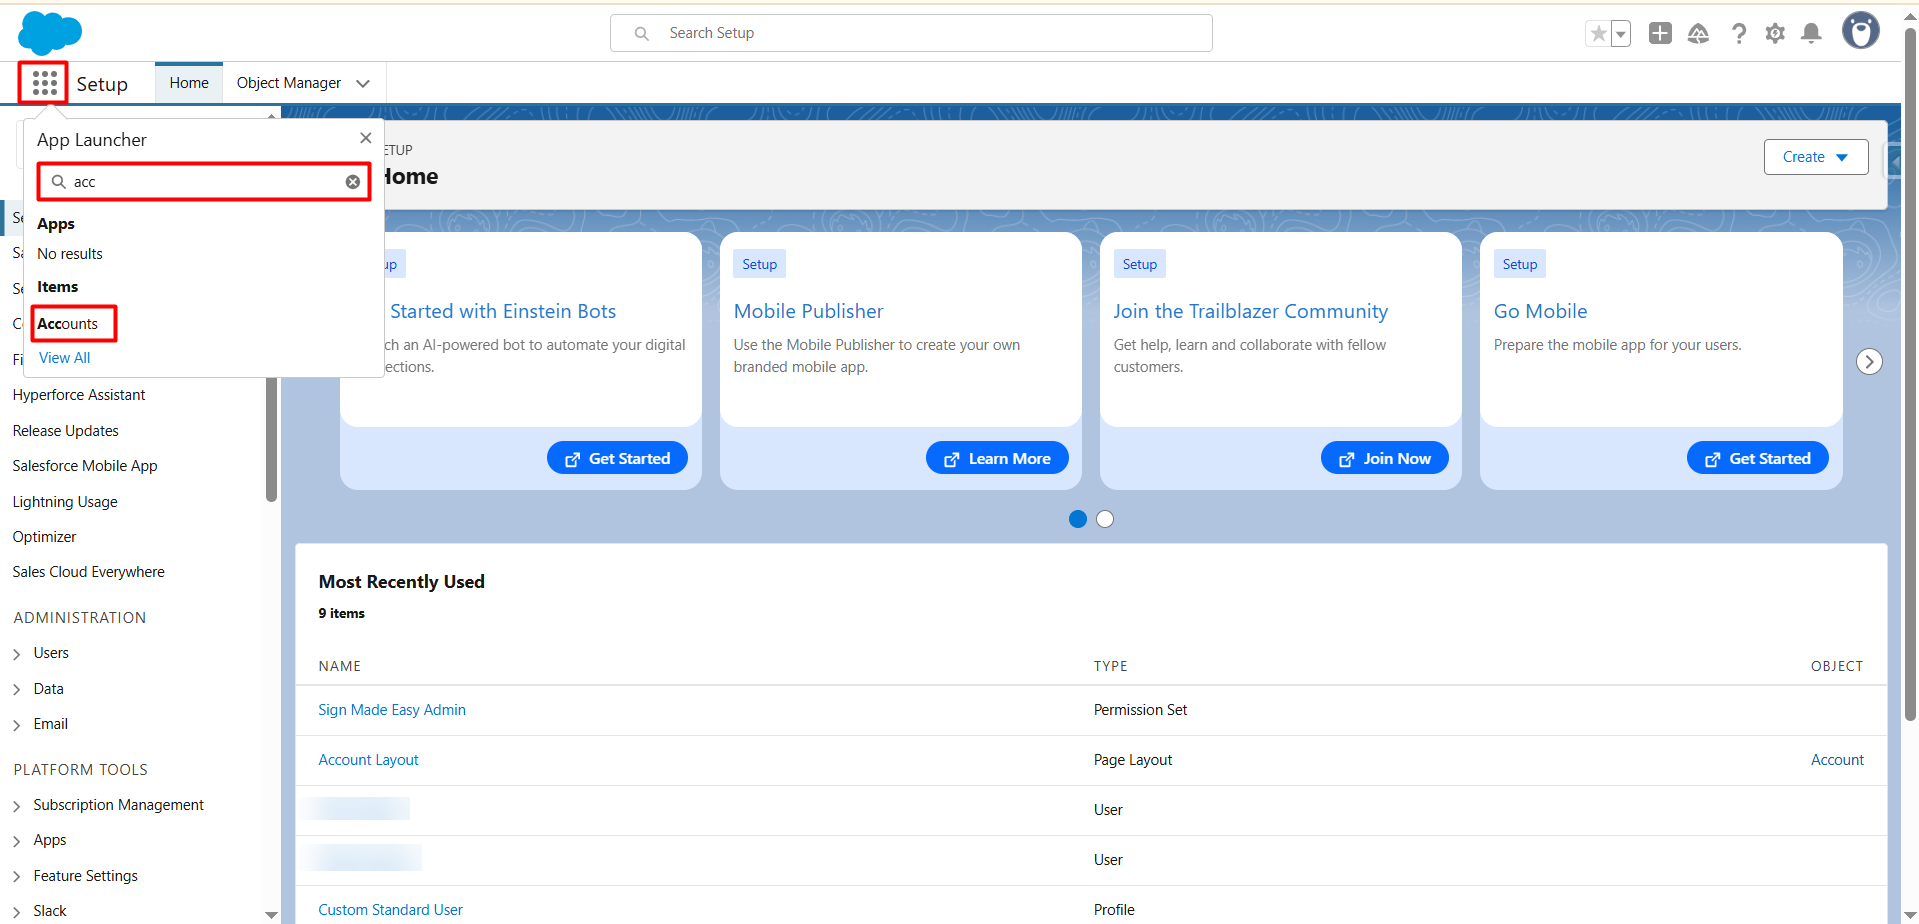
Step 1: Open the Salesforce Record
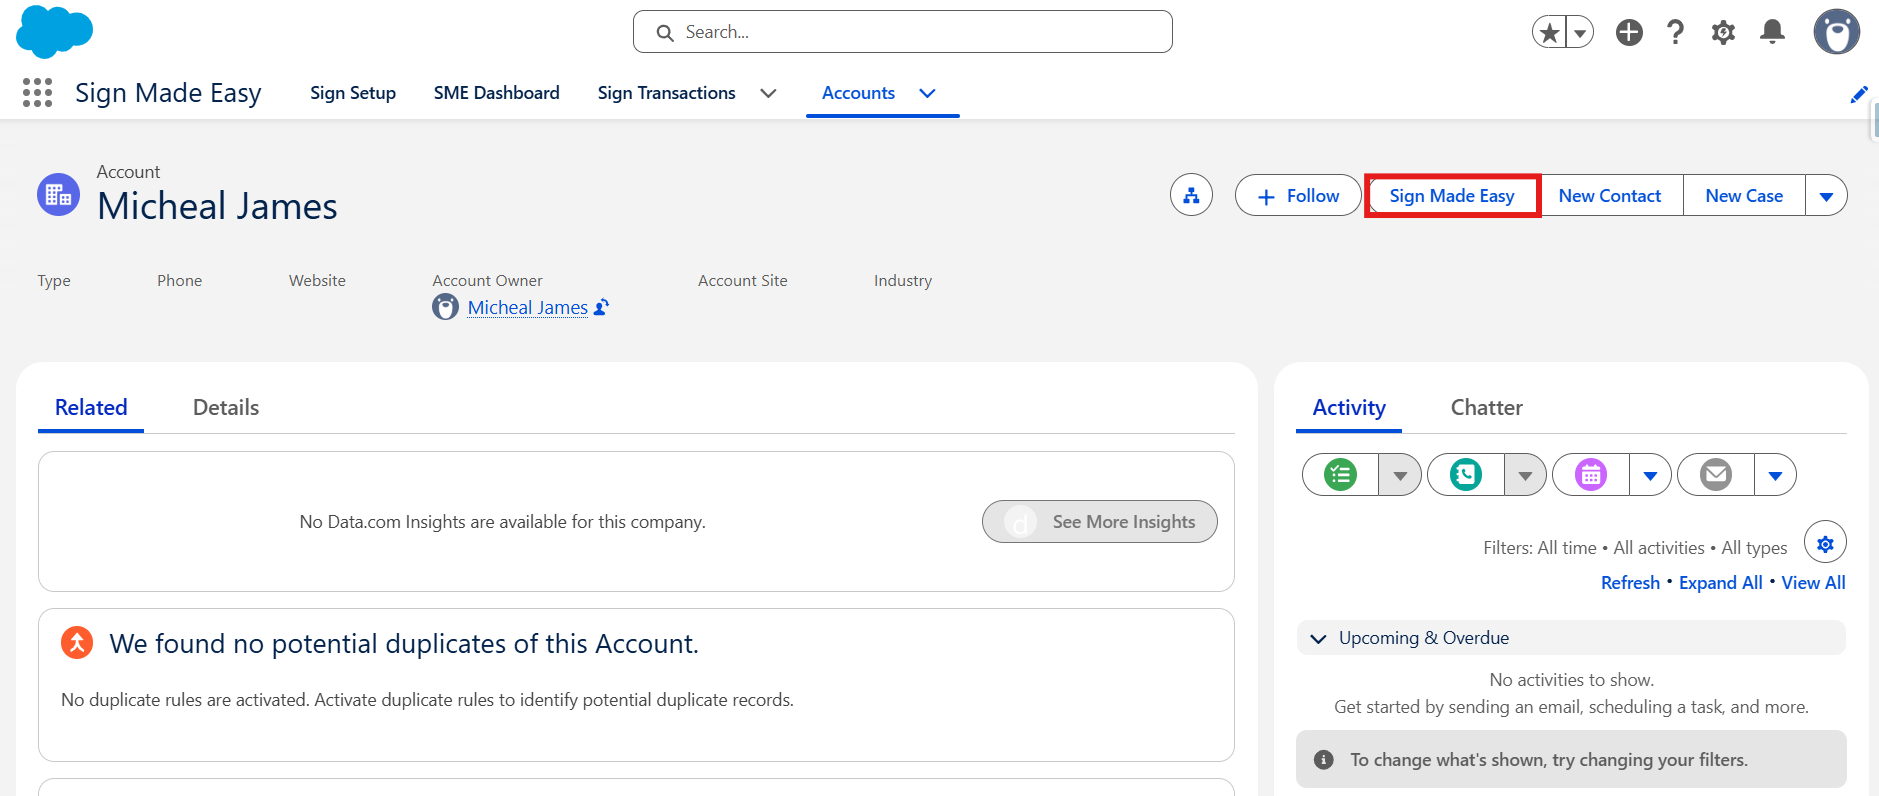
Open the Salesforce object on which the Sign Made Easy (SME) button is configured, then select the required record.
On the record page, click the Sign Made Easy button to open the Create Transaction screen, where you can add documents and configure recipient details.
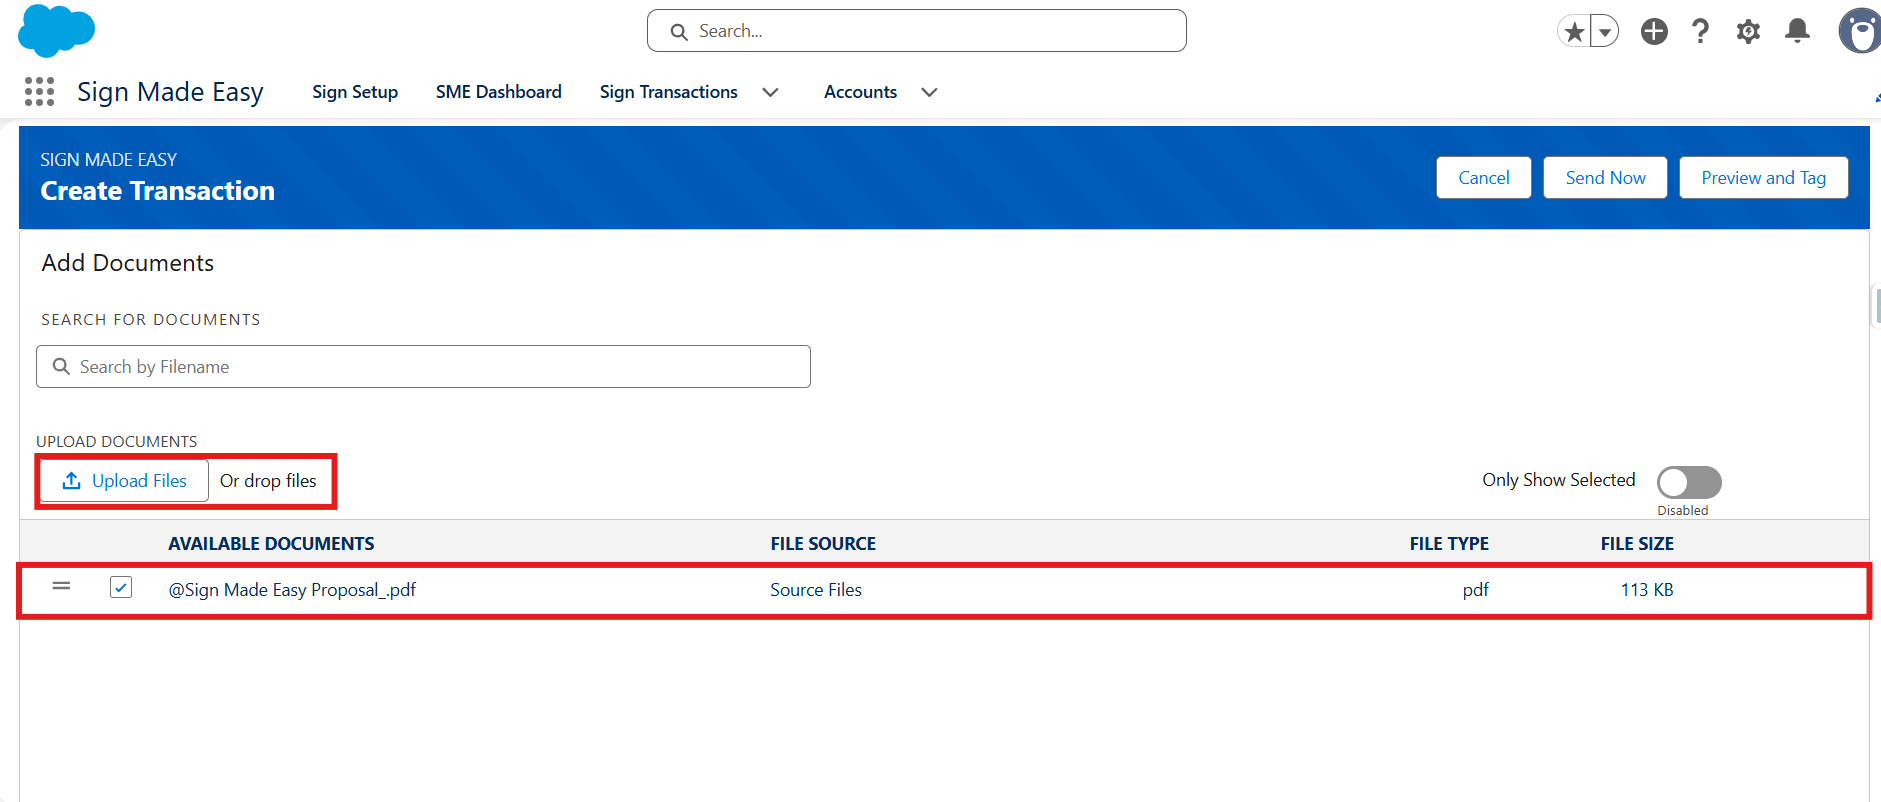
Step 2: Select a Document and Recipient
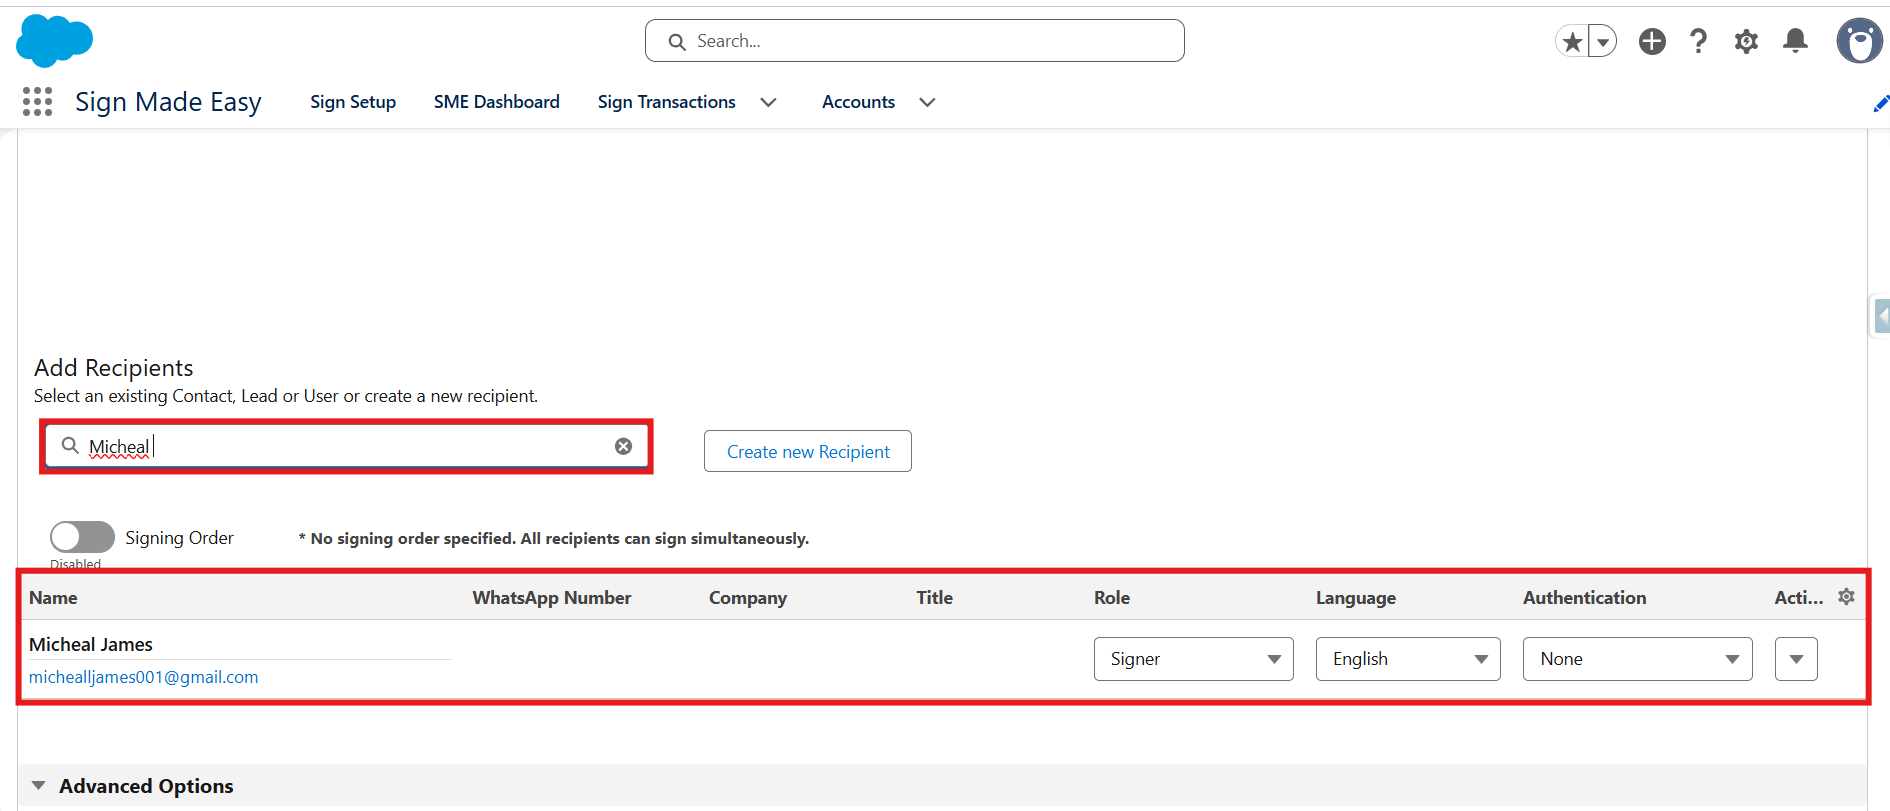
Select an existing document or upload a new one. Then, select a recipient from Salesforce by choosing a User, Contact, or Lead record. Alternatively, click Create New Recipient to add a new recipient.
Step 3: Open the Tagging Page
Click Preview and Tag to open the Drag-and-Drop Tagging page. Here, you can add basic tags to the document or create and configure custom tags according to your requirements.
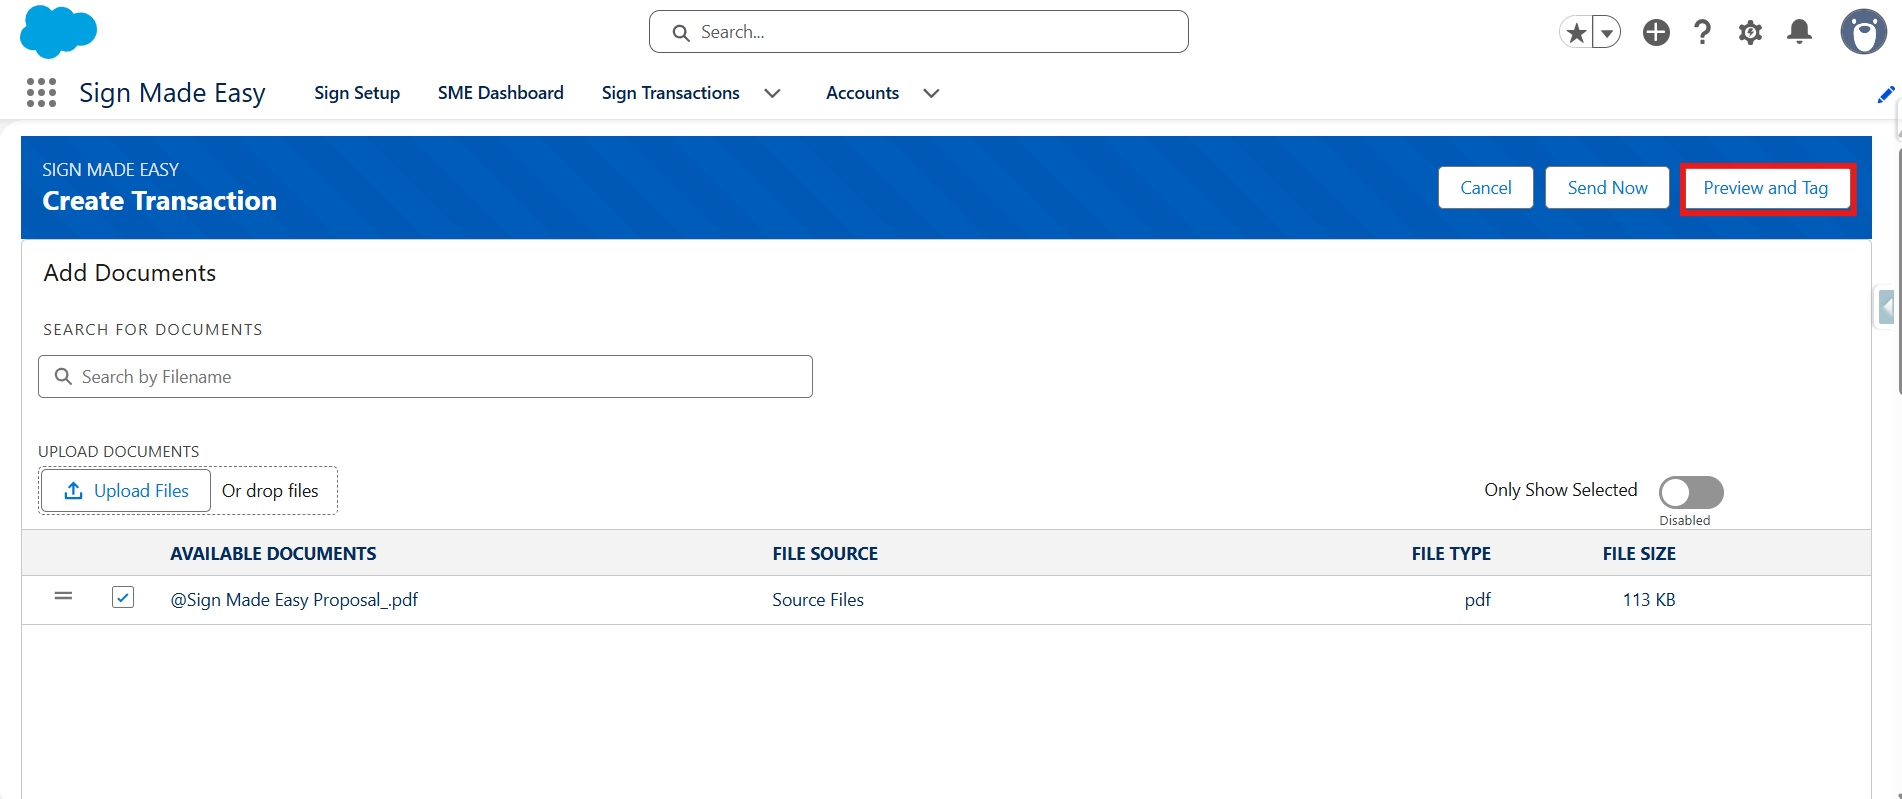
Step 4: Create and Configure a Custom Text Tag
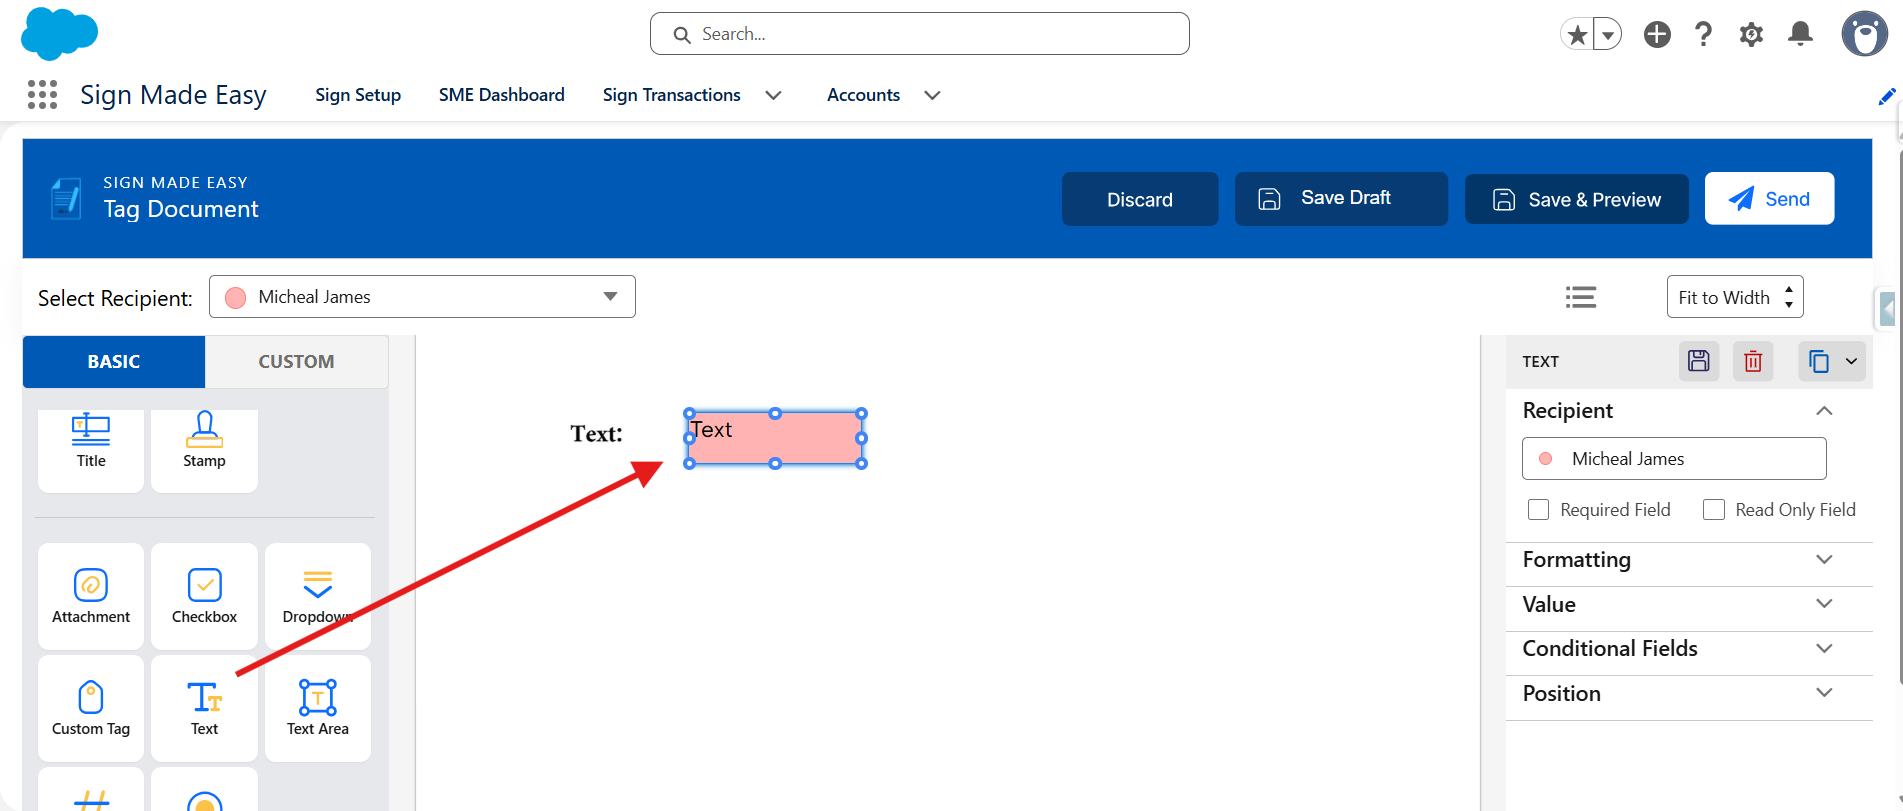
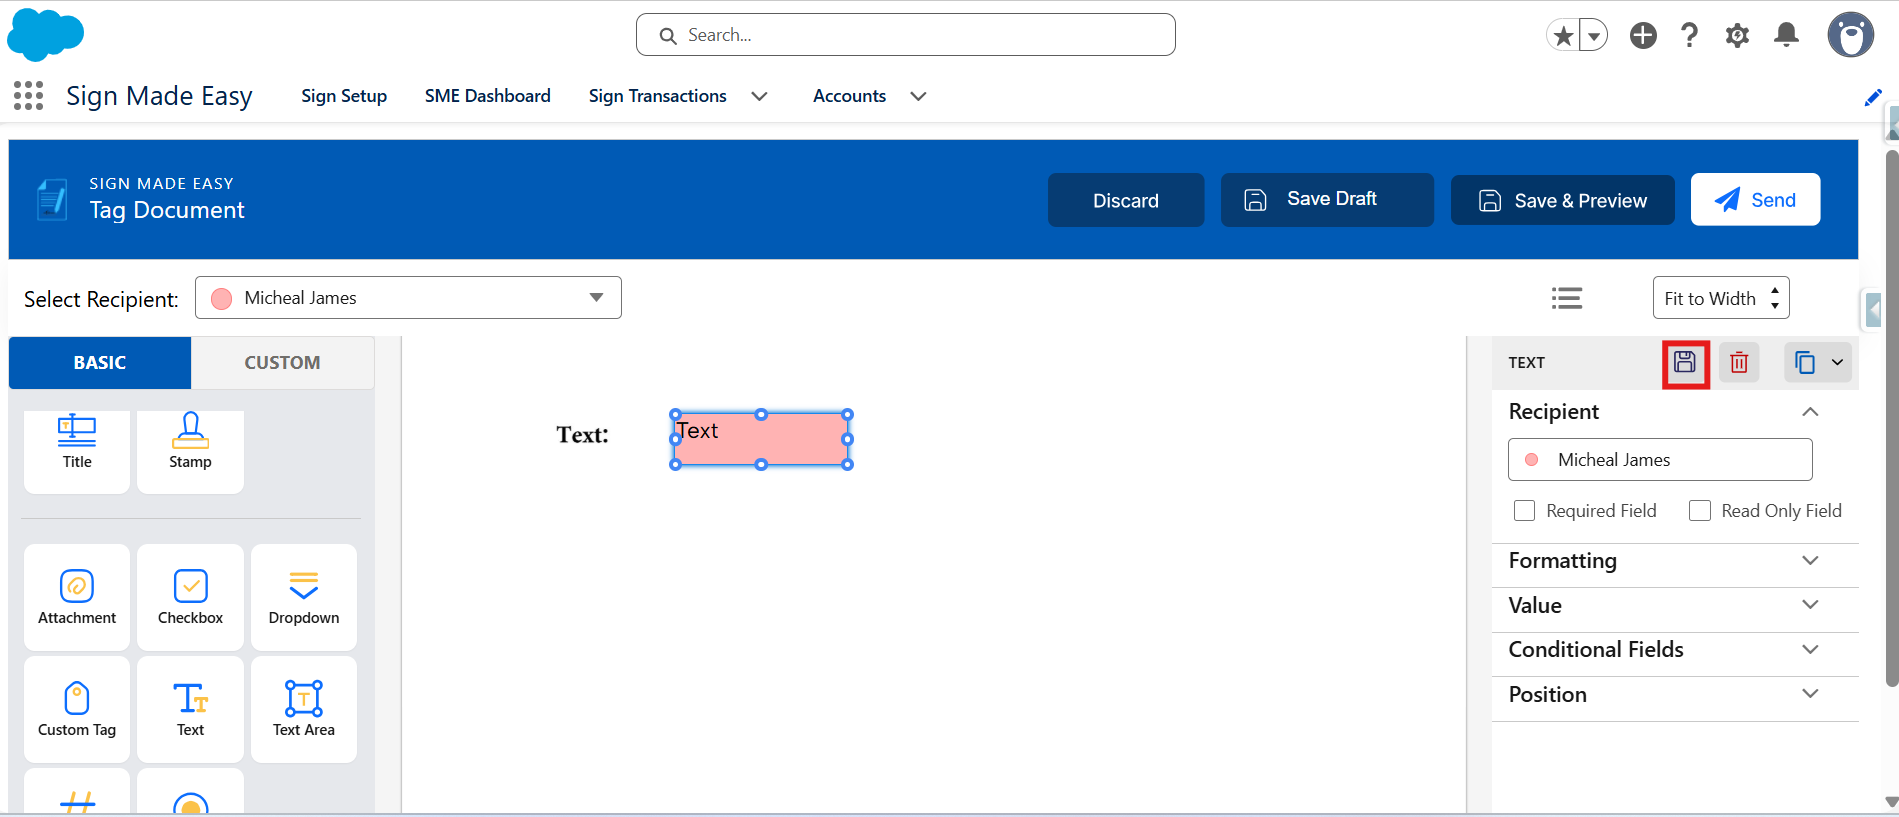
Drag and drop the Text tag onto the desired location on the document. Then, click the Save Custom Tag icon on the right side of the page to open the Create Custom Tag modal.
The Custom tag provides two action buttons, each serving the functions described below:
Cancel: Click this button to close the modal without saving the custom tag configuration.
Save Custom Tag: Click this button to save the custom tag with the configured properties and make it available for reuse.
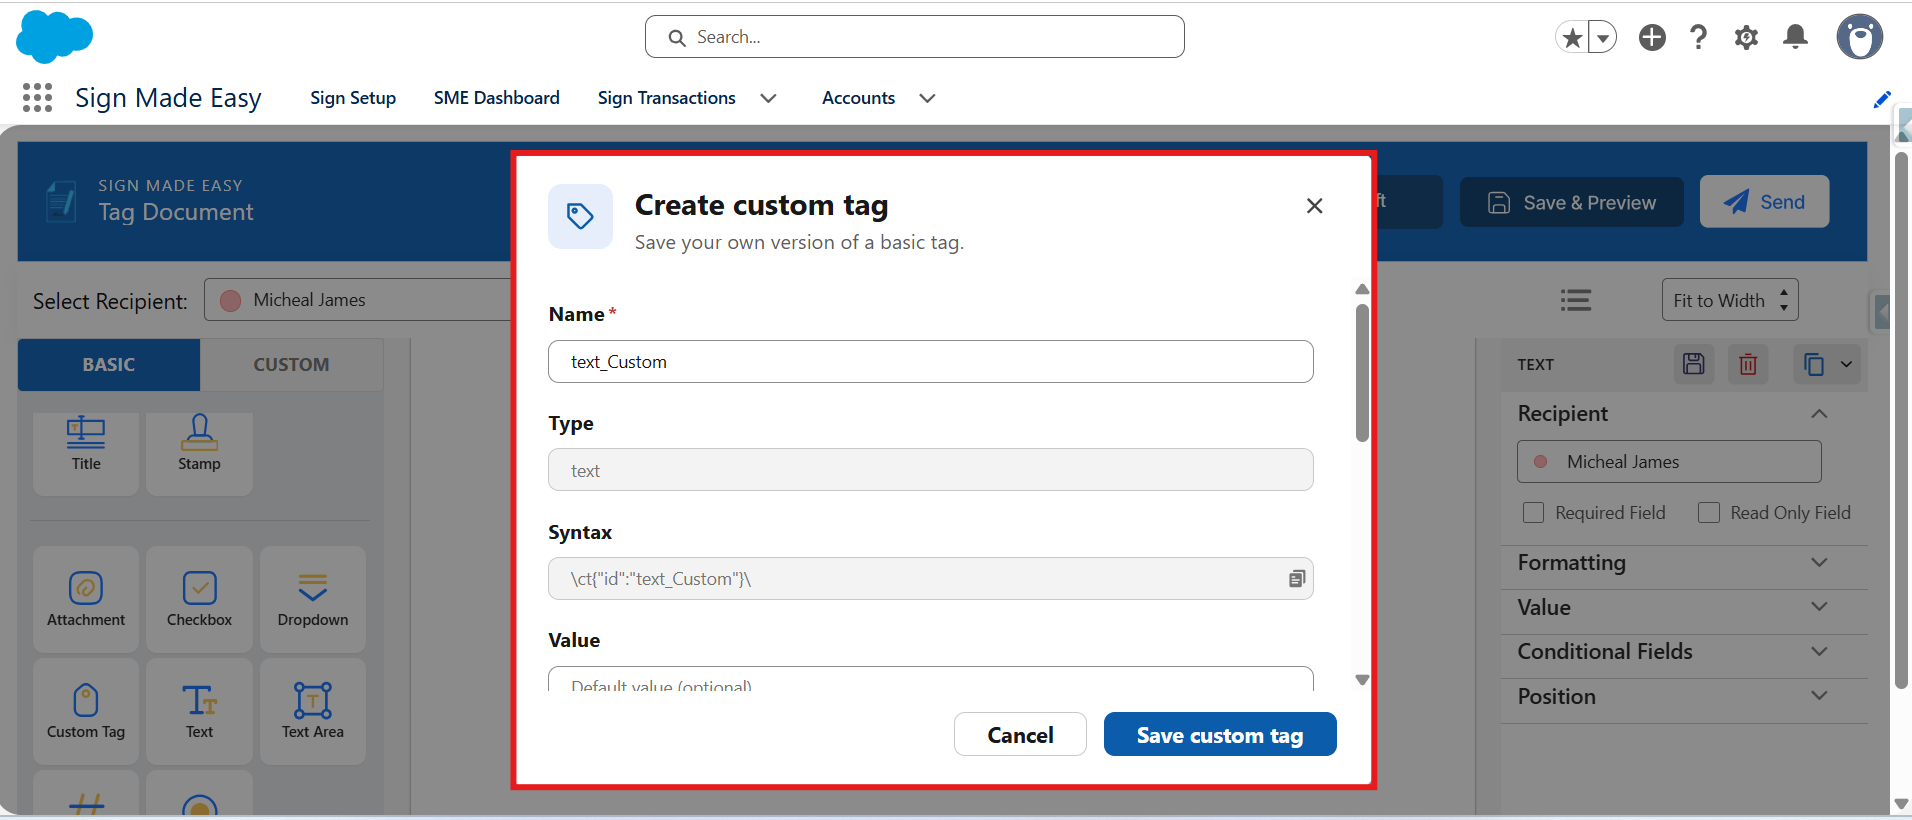
In this above modal, you can customize the tag by configuring the following properties:
| Property | Text | Number | DropDown |
| Name | ✅ | ✅ | ✅ |
| Value | ✅ | ✅ | ✅ |
| Merge Field | ✅ | ||
| Required | ✅ | ✅ | ✅ |
| Read Only | ✅ | ✅ | ✅ |
| Font Family | ✅ | ✅ | ✅ |
| Font Size | ✅ | ✅ | ✅ |
| Color | ✅ | ✅ | ✅ |
| Text Case | ✅ | ||
| Width | ✅ | ✅ | ✅ |
| Height | ✅ | ✅ | ✅ |
| Character Size | ✅ |
Note: You can also copy the custom tag syntax and use it directly into the document to use the custom tag.
Example :- \ct1{"id":"text_Custom"}\
After saving the custom tag, you can view it in the Custom section of the tag panel, where it is available for reuse in supported document workflows.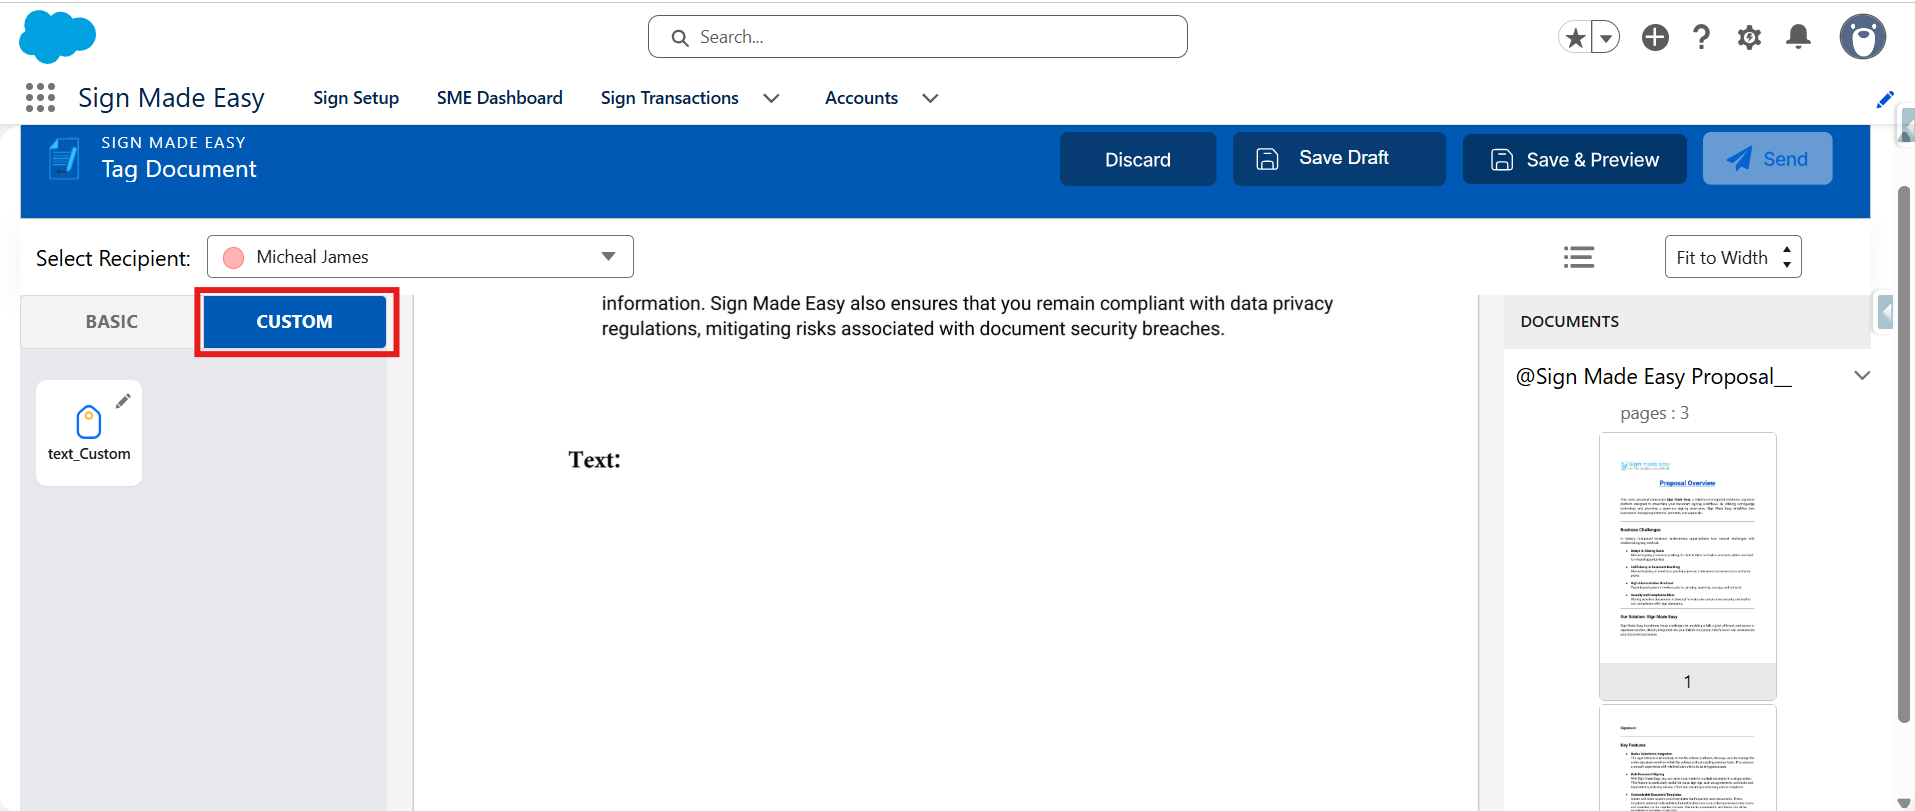
To edit the properties of an existing custom tag, click the Edit icon on the desired tag in the Custom section, as highlighted in the screenshot. You can then modify the tag's configuration according to your requirements and save it .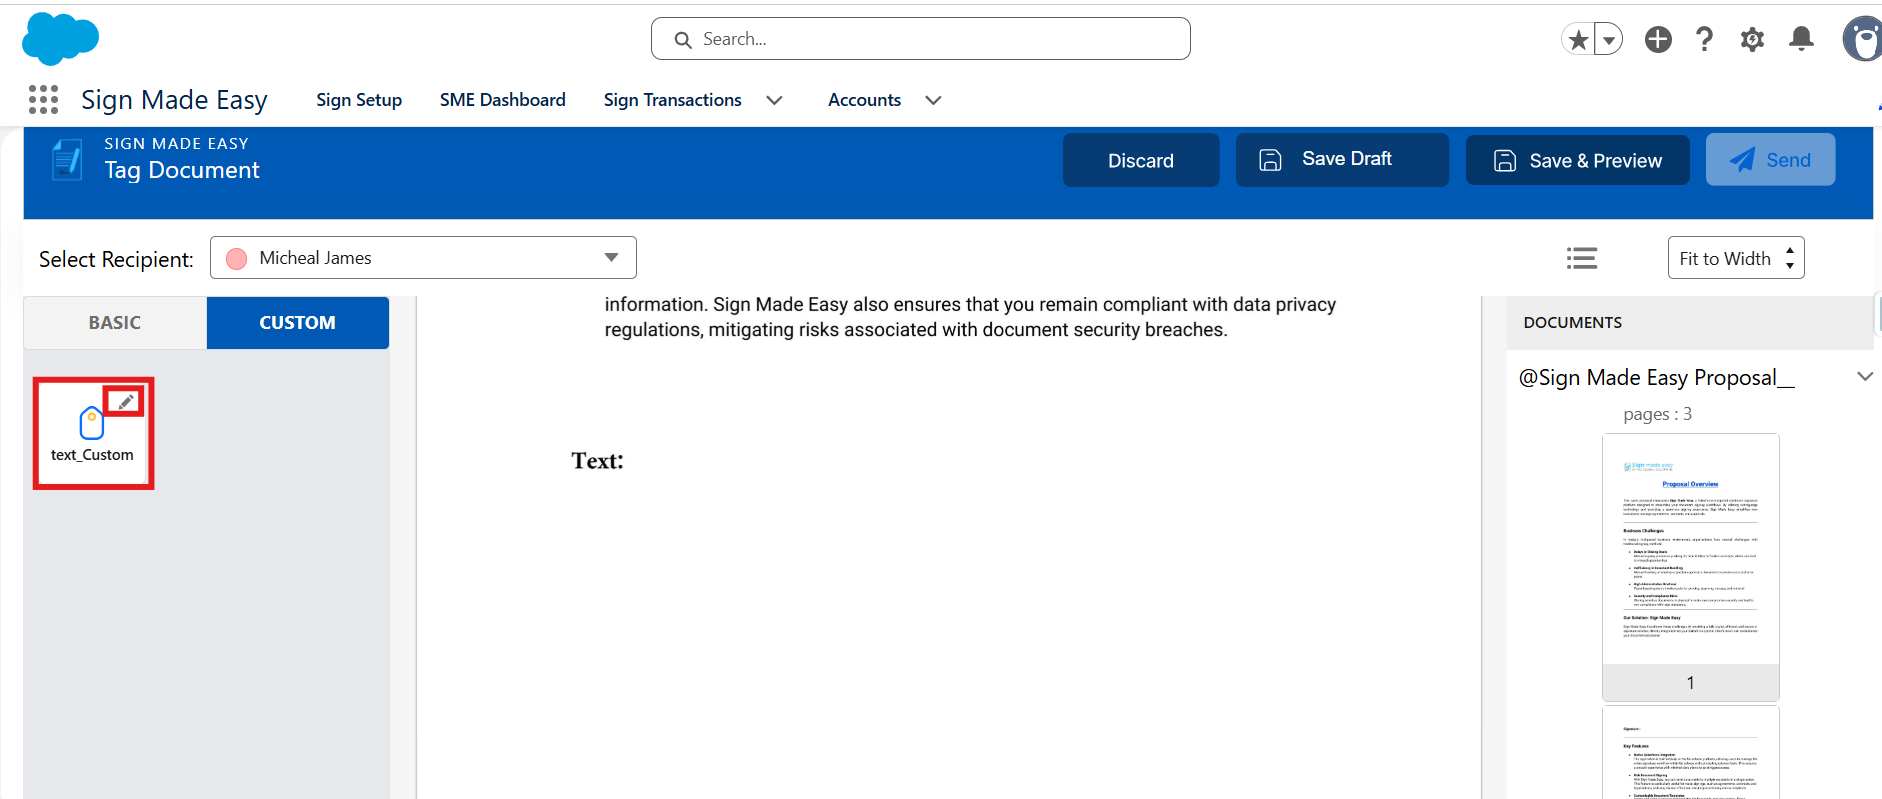
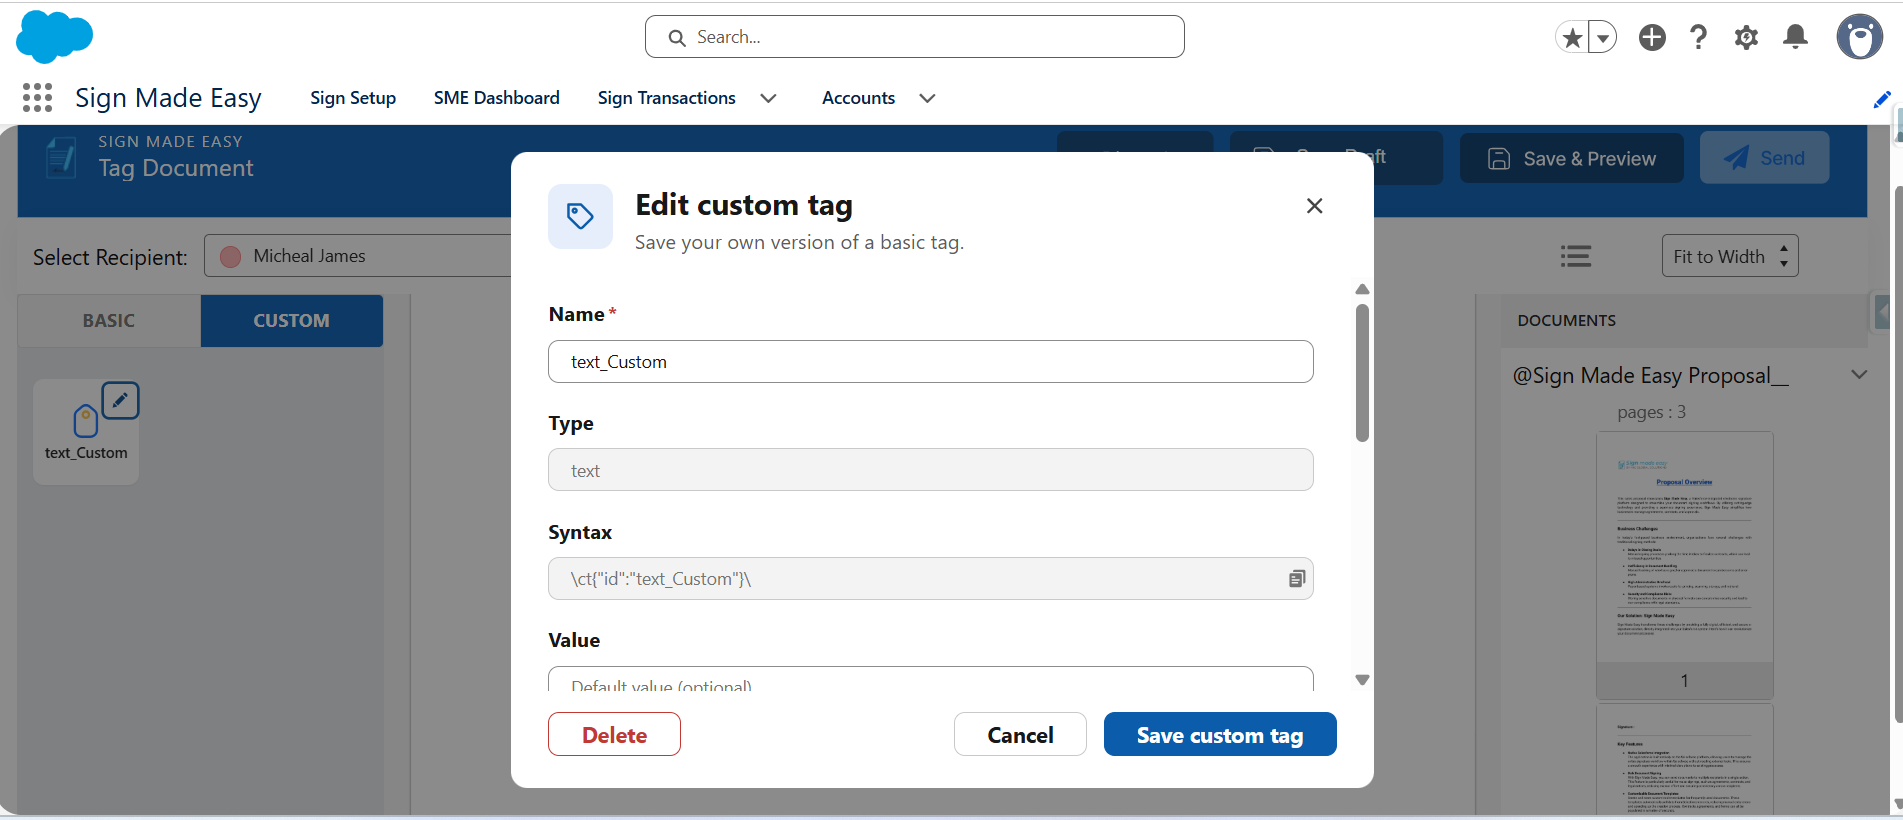
To delete an existing custom tag, click the Edit icon on the desired tag in the Custom section. In the Edit Custom Tag modal, click the Delete button to remove the custom tag.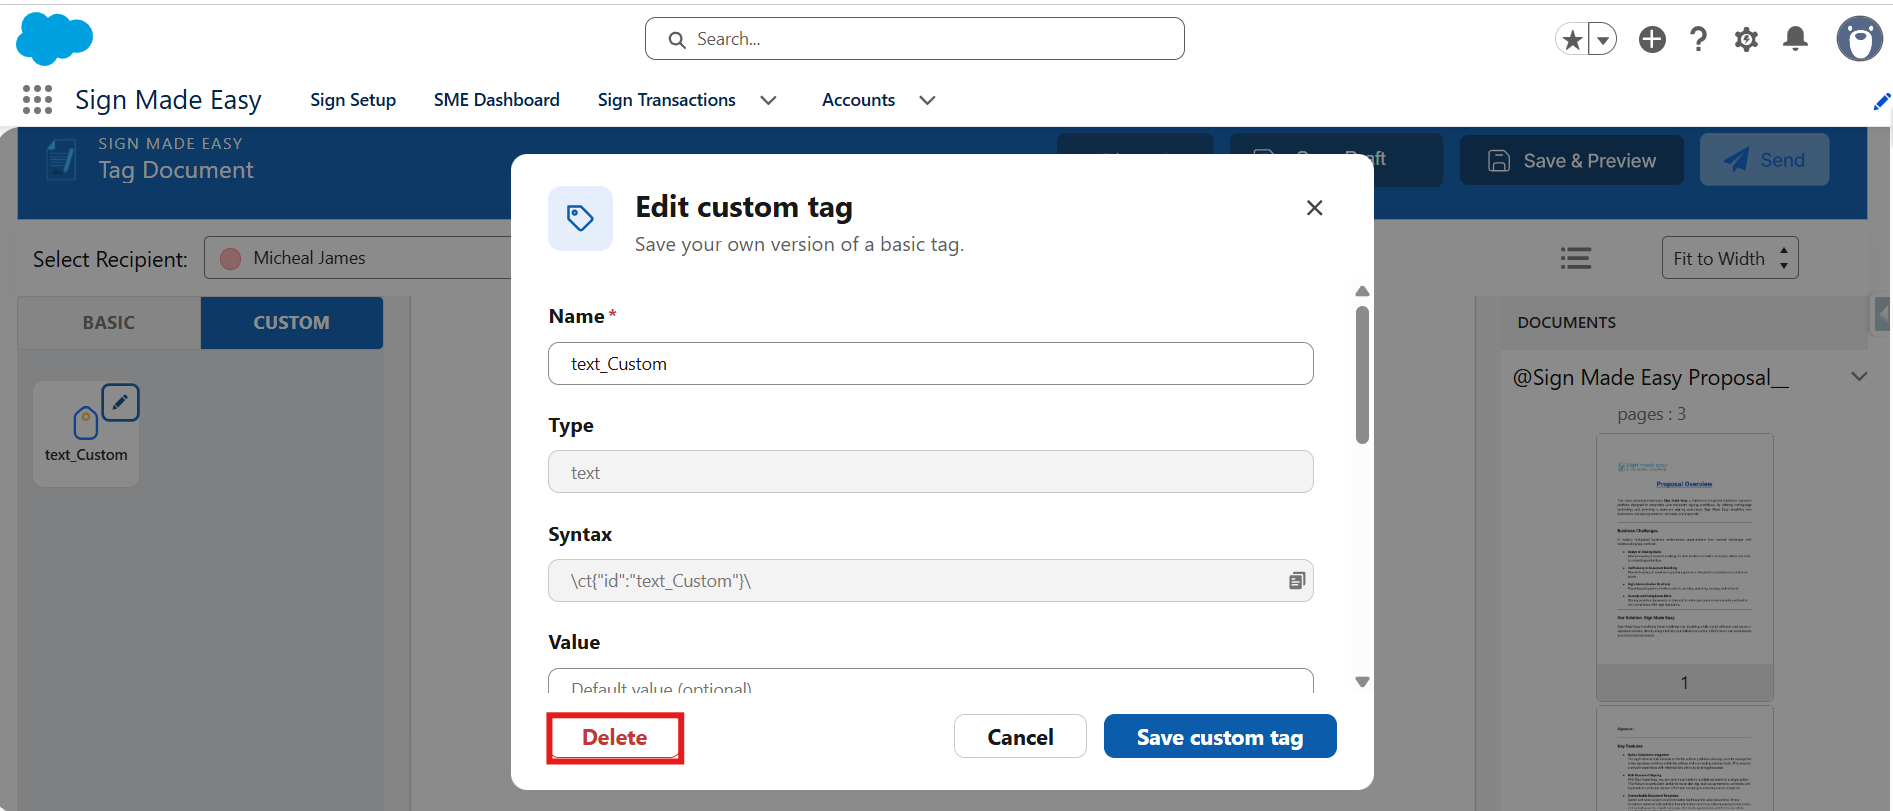
Once the custom tag has been created, you can drag and drop it onto the document from the Custom section or copy and use its syntax directly within the document, according to your requirements.
Was this article helpful?
That’s Great!
Thank you for your feedback
Sorry! We couldn't be helpful
Thank you for your feedback
Feedback sent
We appreciate your effort and will try to fix the article