Unlock advanced features and enhance your productivity by upgrading to Sign Made Easy PRO. Please contact our Support Team to access the advanced features of the SME PRO package.
Branded Email Sending is a feature that enables organizations to send signature request emails using their own SMTP server and email domain. By using a branded sender address, organizations can maintain a consistent brand identity while improving recipient confidence and email deliverability.
In-Depth Guide to Configuring Branded Email Sending
Step 1: To configure Branded Email Sending, open the App Launcher, search for Sign Made Easy, and launch the application. 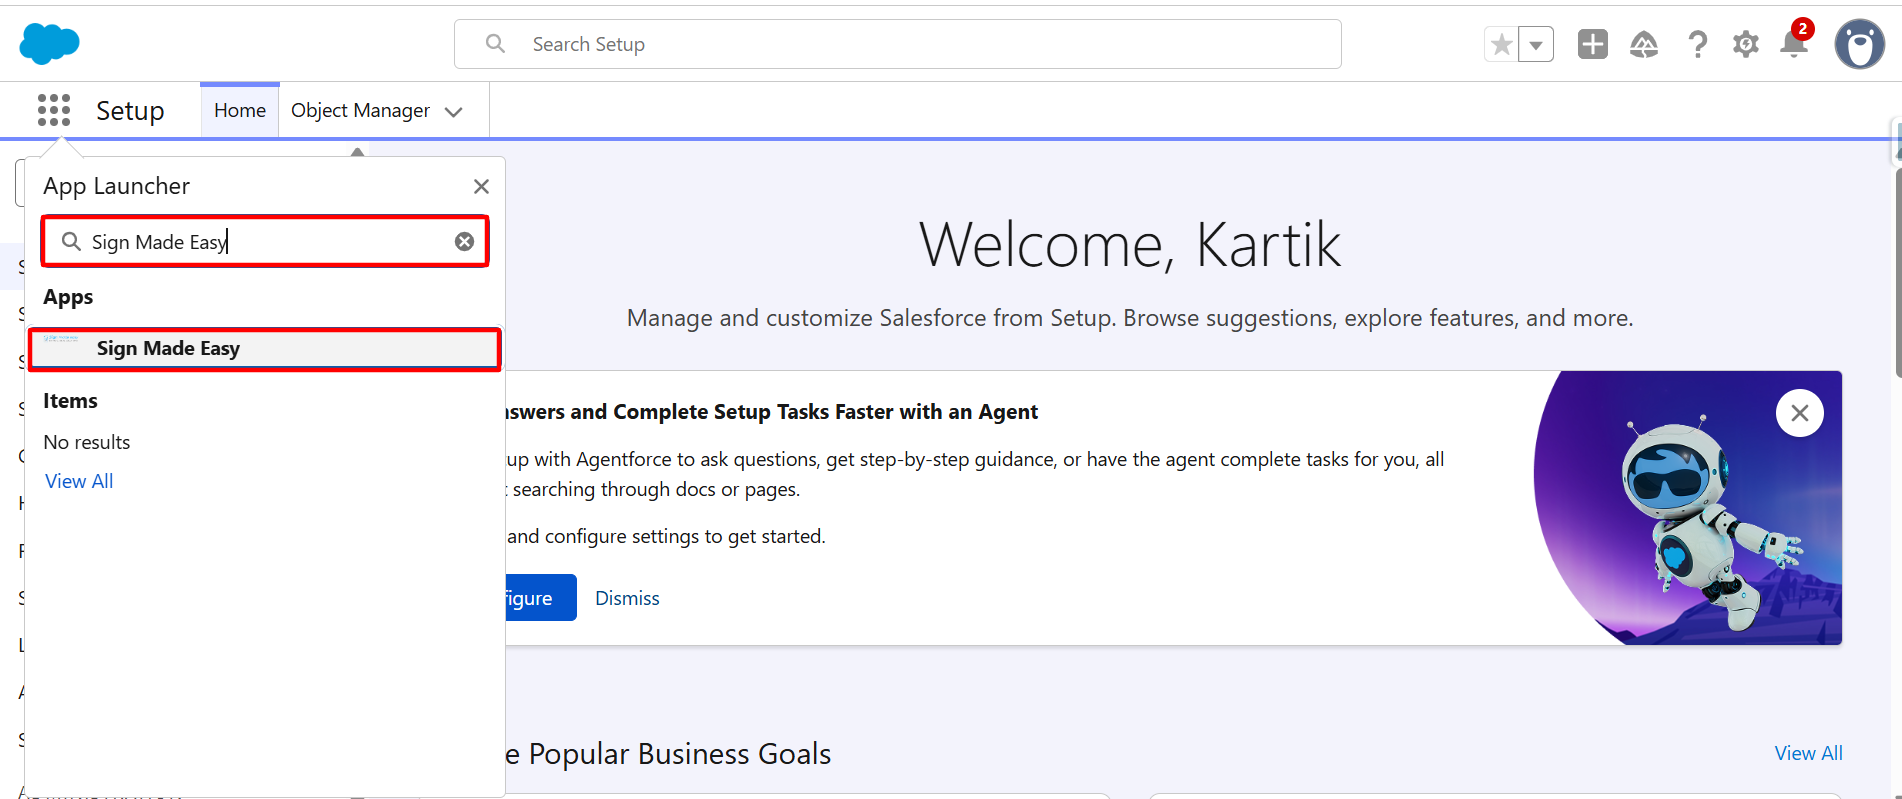
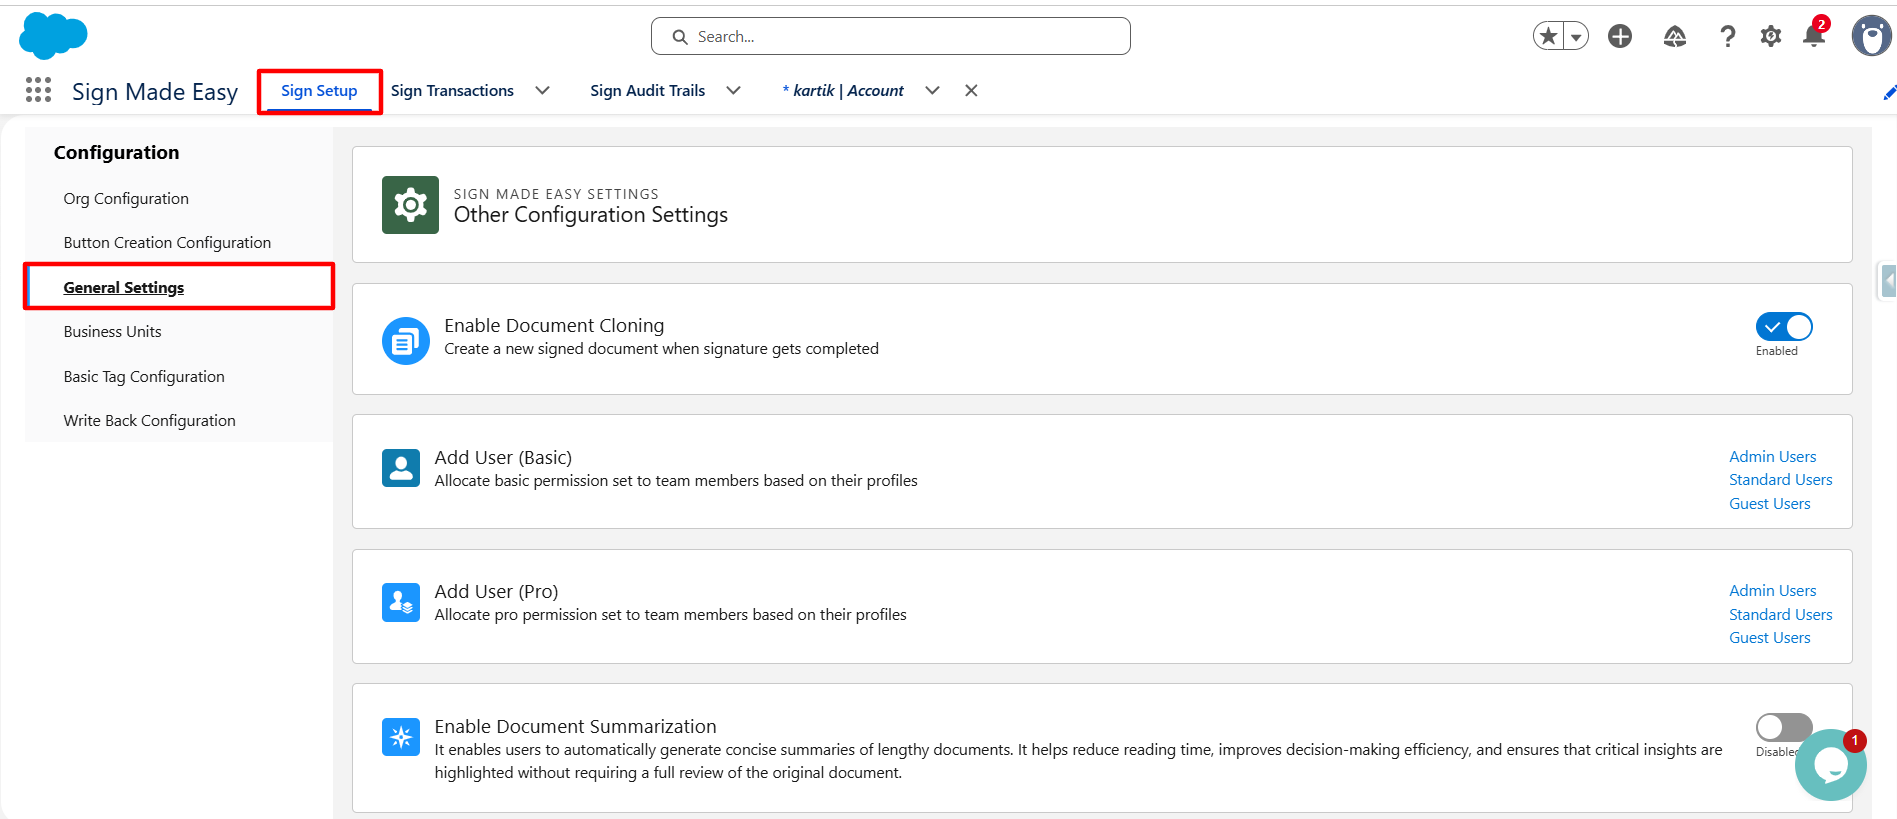
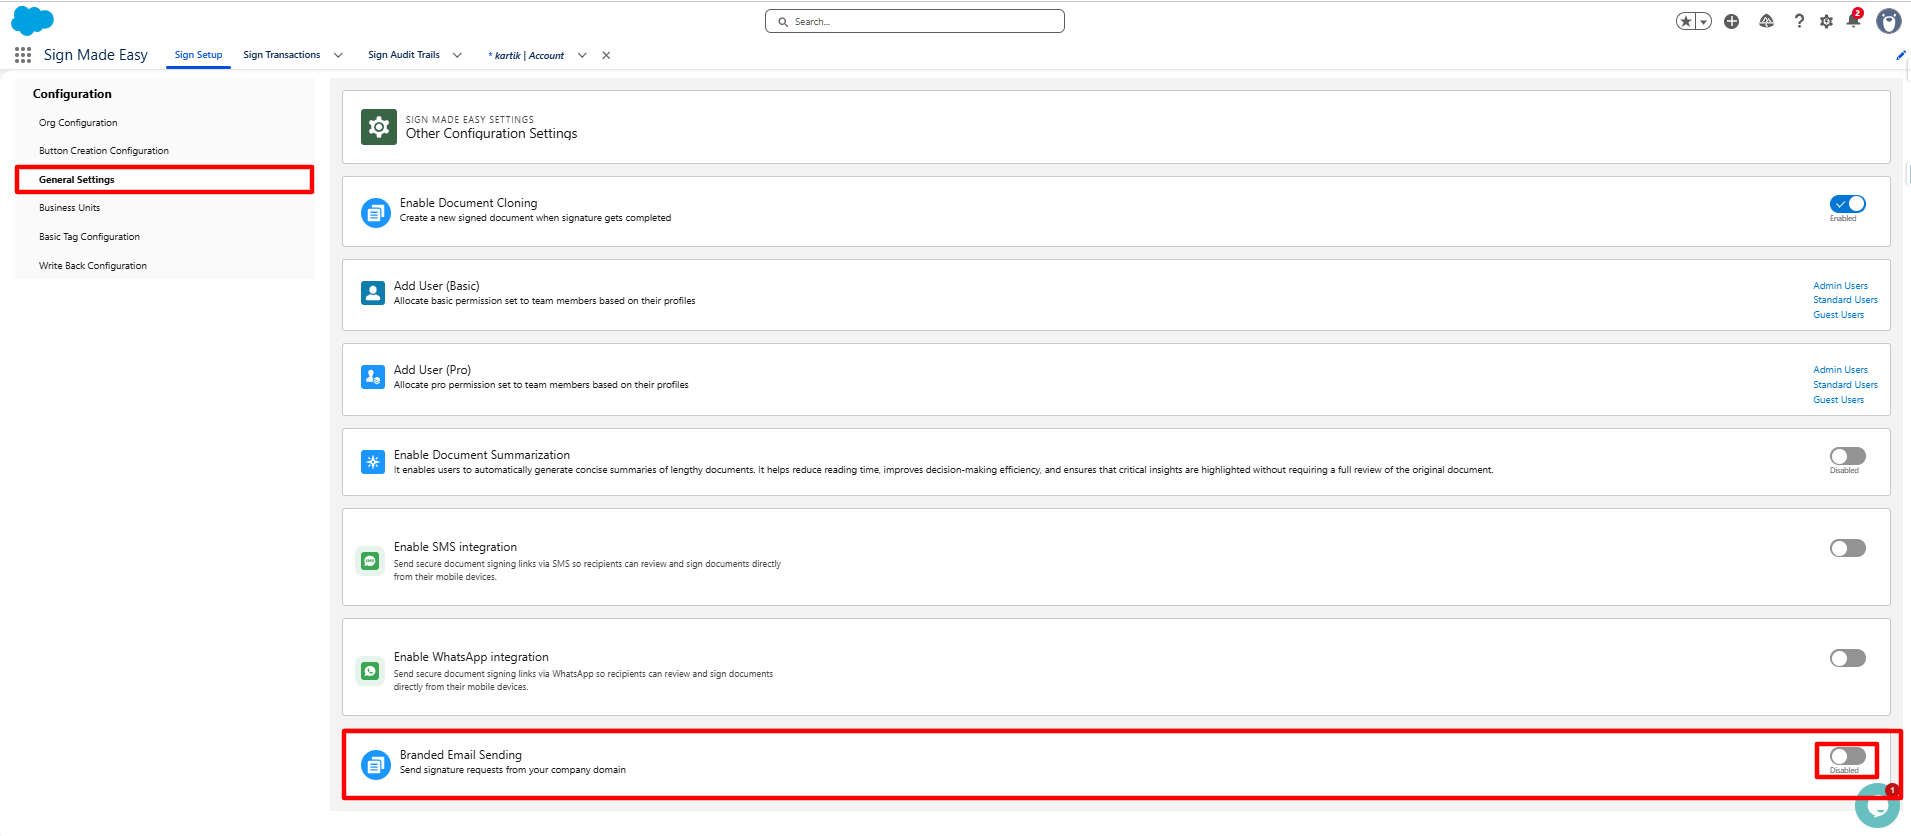
Step 2:- Navigate to Sign Setup > General Settings, then enable the Branded Email Sending toggle to configure email delivery using your organization's SMTP server.
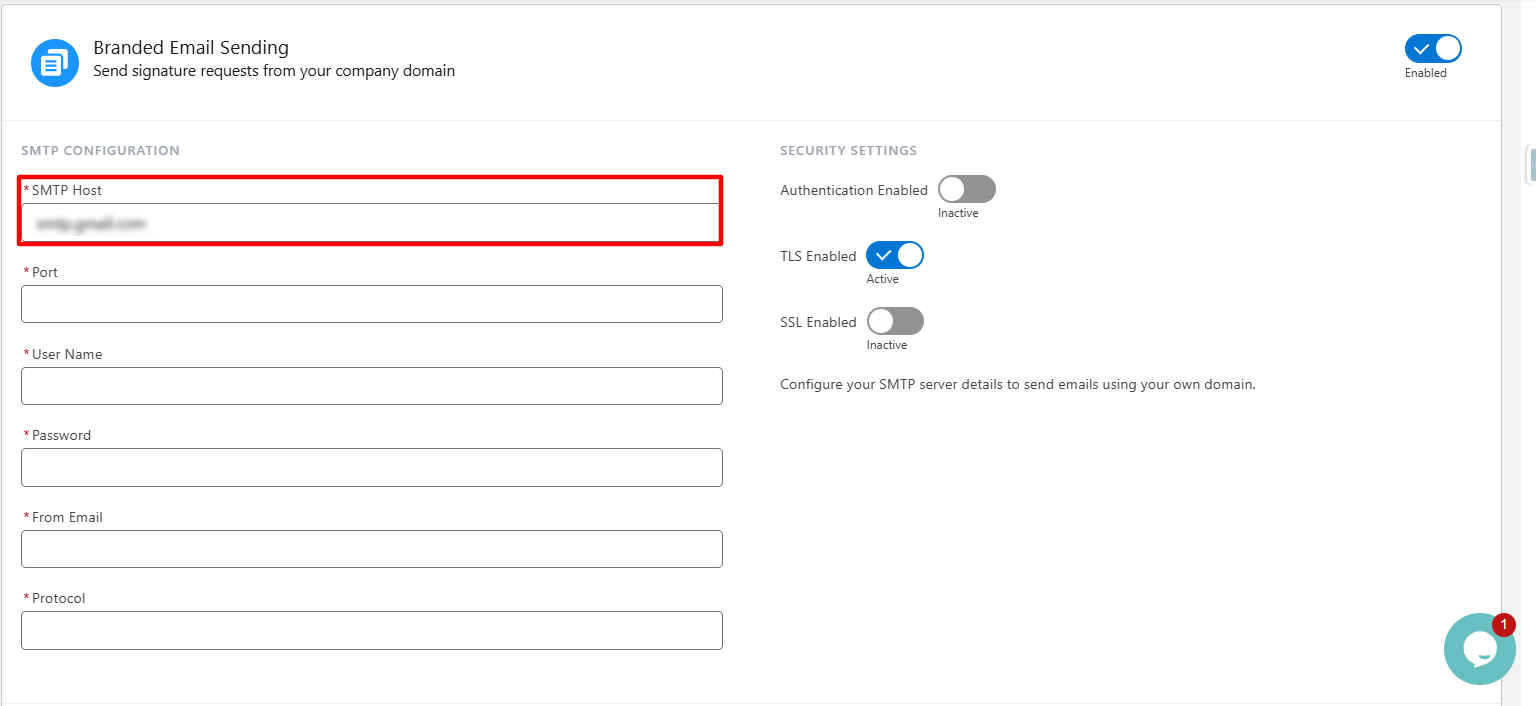
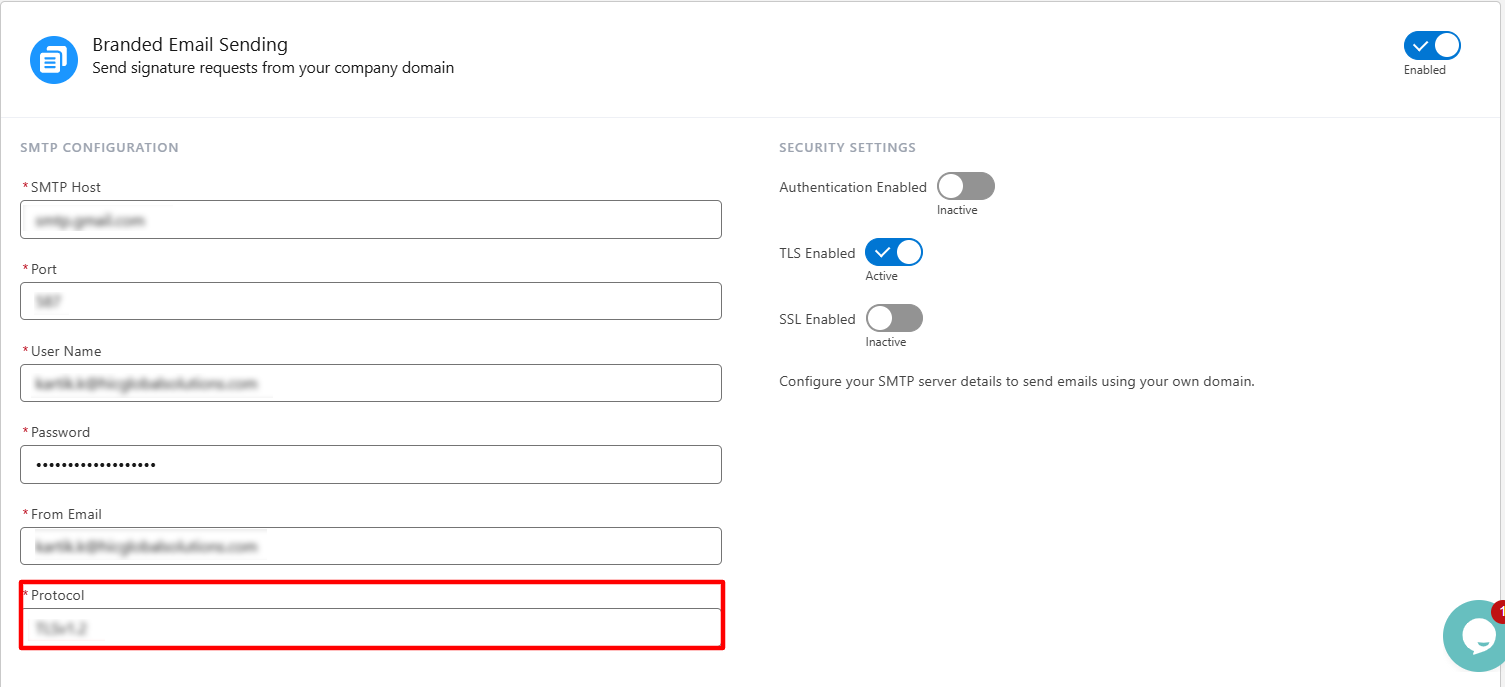
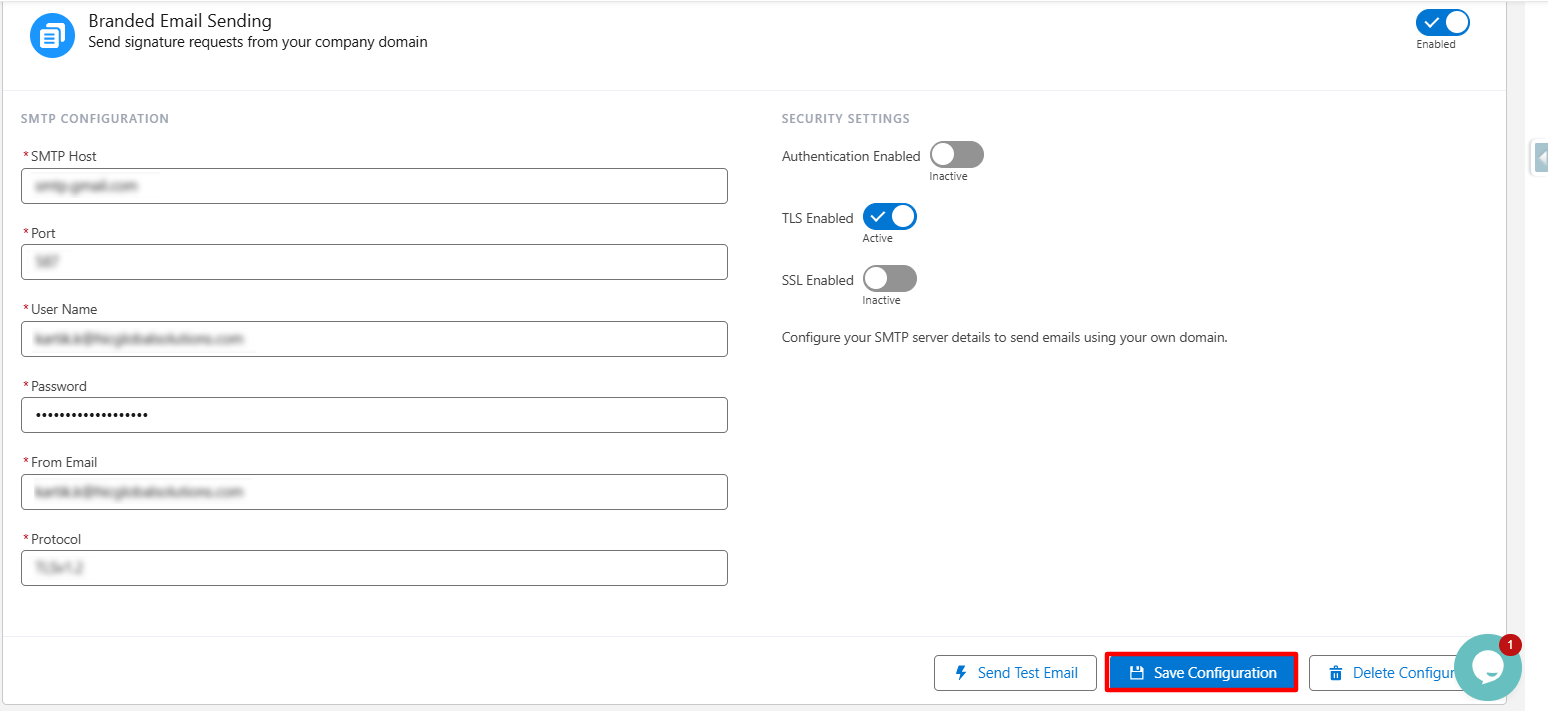
Step 3:- Enter the SMTP Configuration.
SMTP HOST
An SMTP Host is the address of the outgoing mail server that is responsible for sending emails on behalf of your organization. Specifies the hostname or IP address of the outgoing mail server used to send emails from your organization's domain.
Example:
Email Provider : Gmail
SMTP Host: smtp.gmail.com
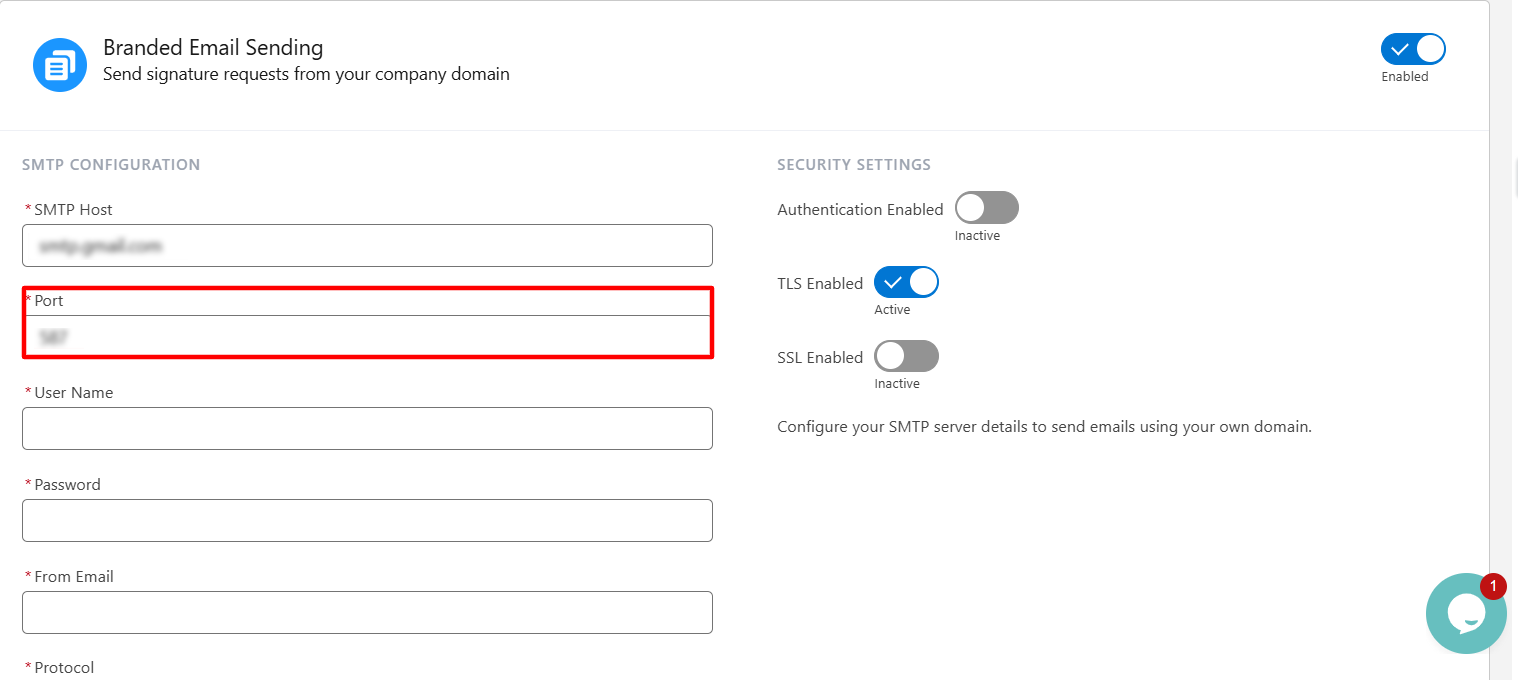
Port
Specifies the network port used to establish a connection with the SMTP server for sending emails.
Example:
587 : Used for SMTP connections secured with TLS (recommended by most email providers).
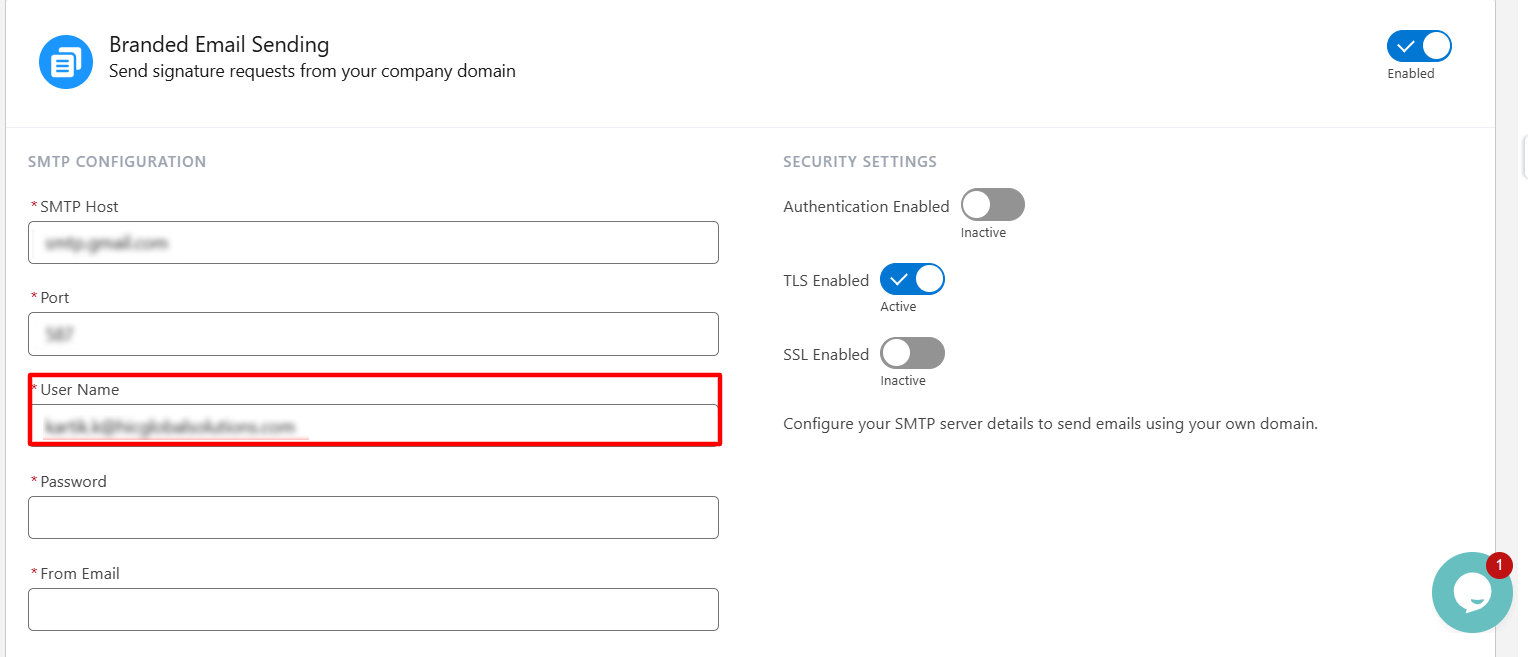
User Name
Specifies the user account used to authenticate with the SMTP server. This is typically the email address associated with the SMTP account.
Example:
- support@company.com
- noreply@company.com
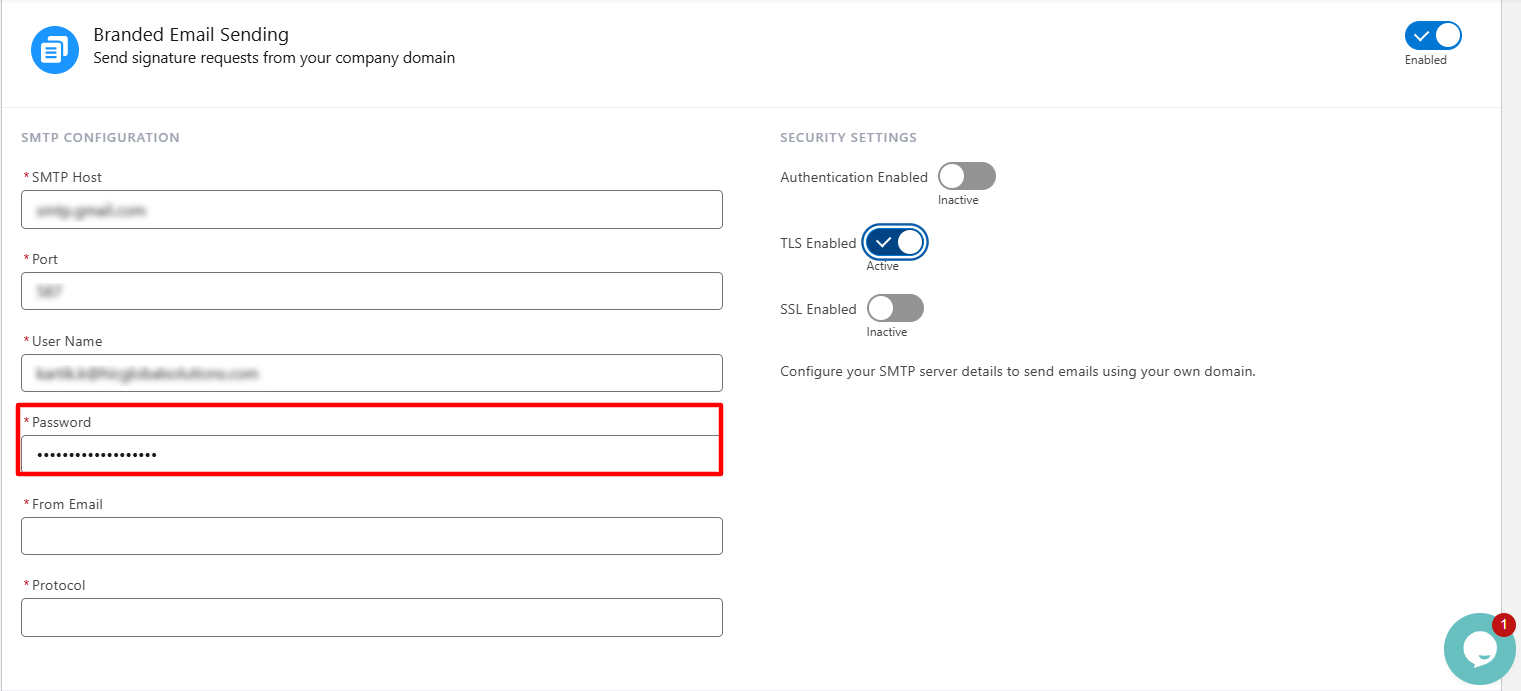
Password
Specifies the password or application password associated with the SMTP user account to authenticate with the SMTP server.
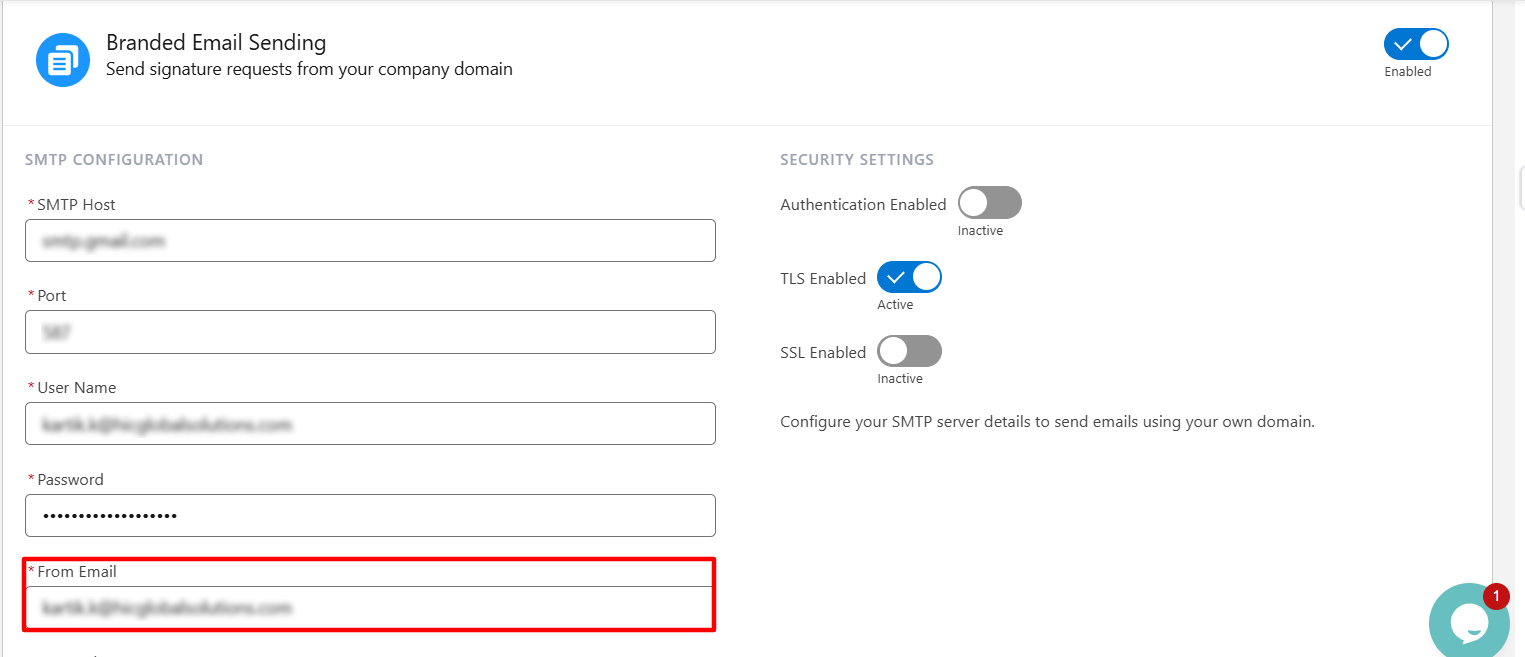
From Email
Specifies the email address that appears as the sender of outgoing signature request and notification emails.
Protocol: Specifies the communication protocol used by the SMTP server to send outgoing emails.
Example: TLSv1.2
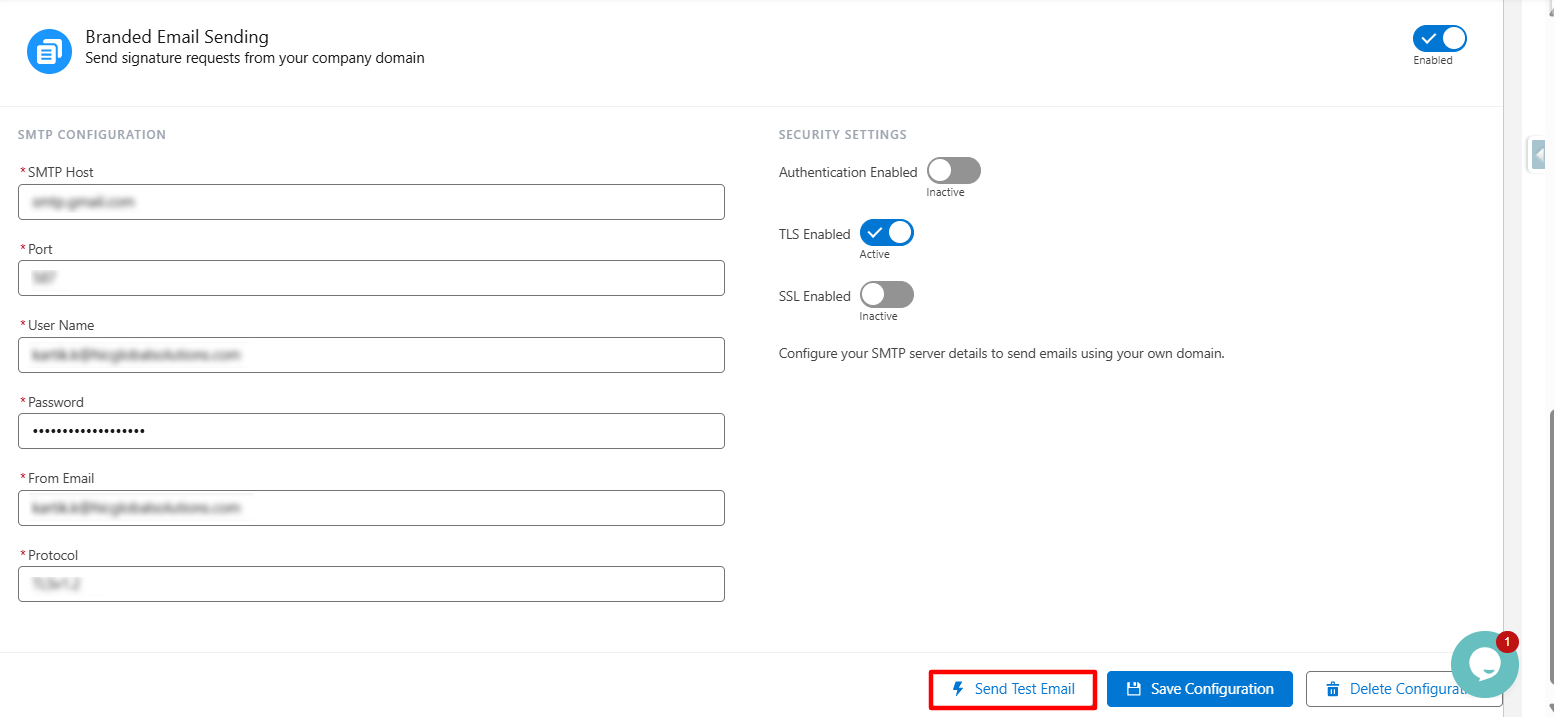
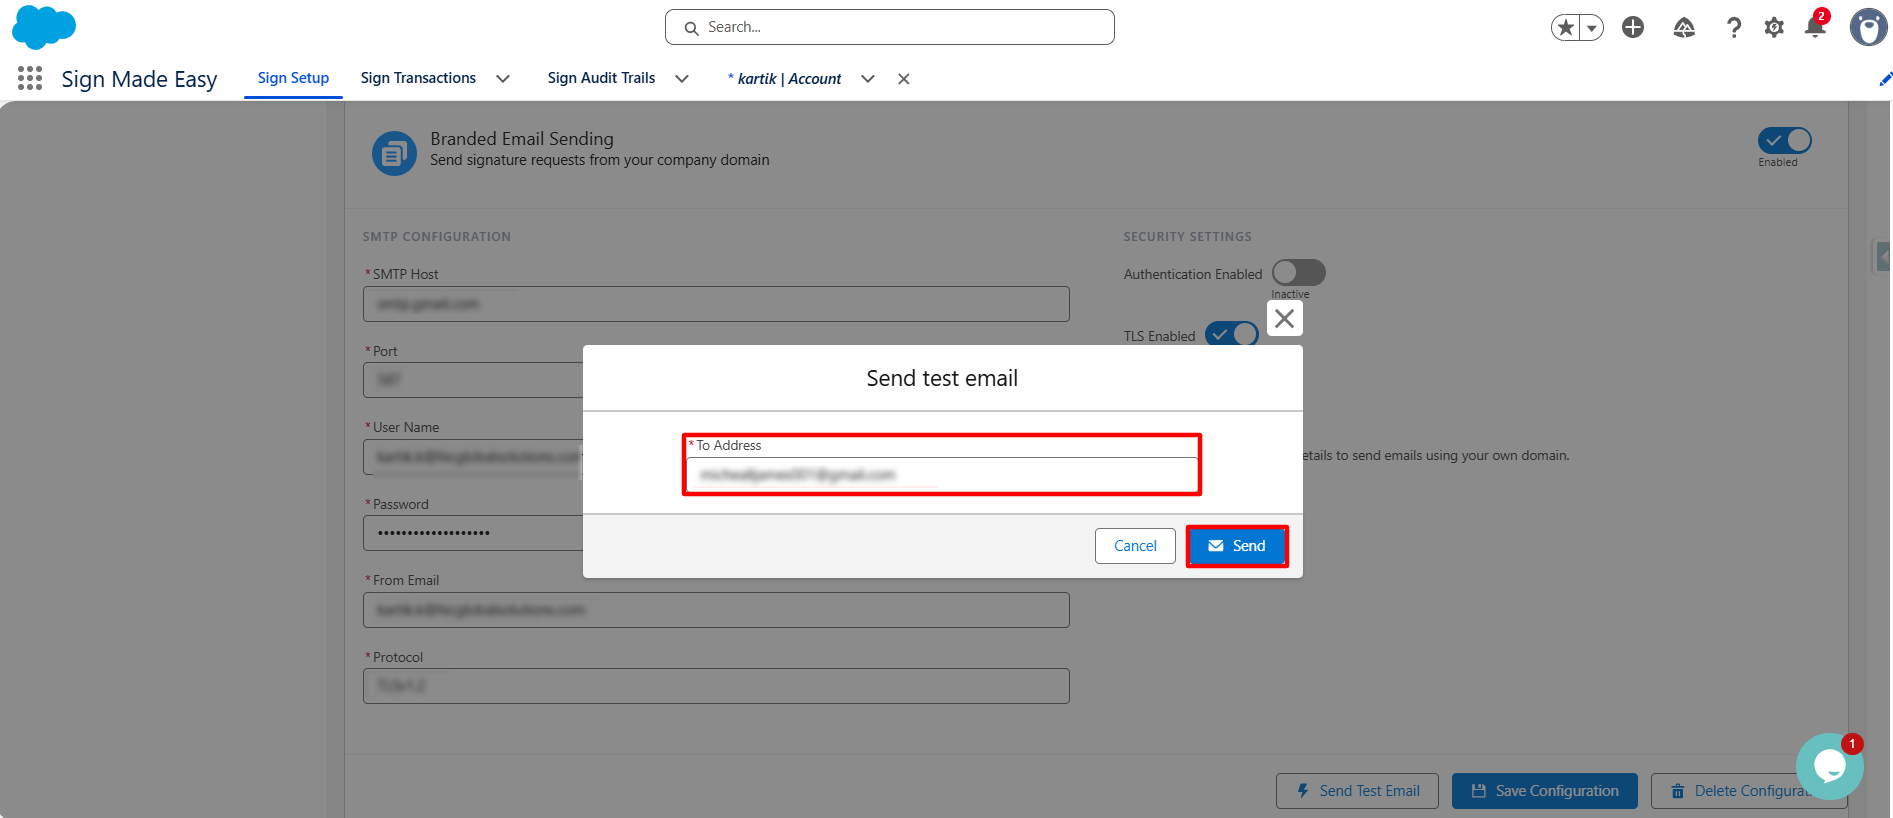
Step 4:- To verify the SMTP configuration, click Send Test Email, enter a valid email address in the To Address field, and click Send to send a test email.
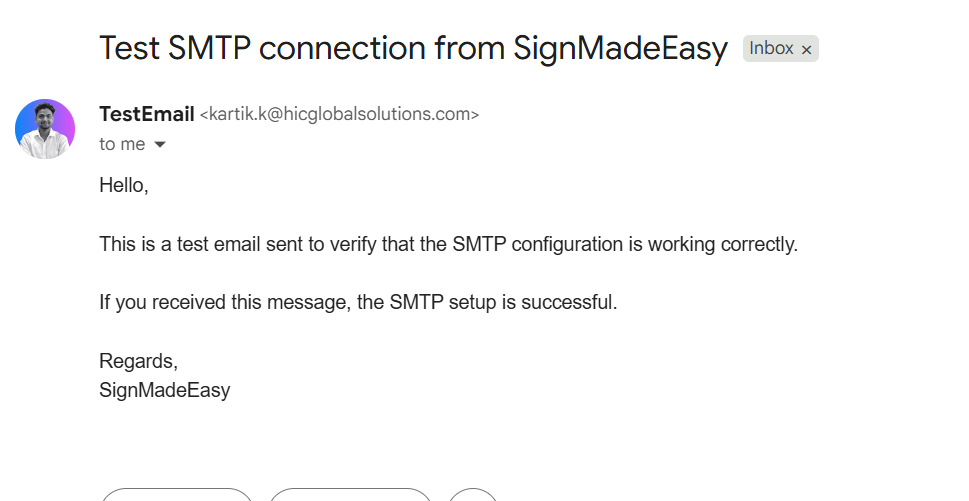
Step 5:- Ensure that the test email has been successfully delivered to the specified email address. Once the email has been verified, click Save Configuration to save the SMTP configuration.
Was this article helpful?
That’s Great!
Thank you for your feedback
Sorry! We couldn't be helpful
Thank you for your feedback
Feedback sent
We appreciate your effort and will try to fix the article