Unlock advanced features and enhance your productivity by upgrading to Sign Made Easy PRO. Please contact our Support Team to access the advanced features of the SME PRO package.
In-depth Guidance on Configuring, Managing, and Optimizing Business Units
Business Units
- It allows administrators to configure branding for Sign Made Easy transactions and emails for specific organizations, departments, or entities within a Salesforce org. For each transaction, users can either use the default Business Unit or select an alternative, providing a tailored branding experience throughout the signing process.
- It can be accessed and configured in the Business Units section of the Sign Setup page within the Sign Made Easy application.


Business Unit Configuration Instructions
- Click the 'Add New Business Unit' button to create a new Business Unit record.

Business Unit Name:- Specifies the name of the Business Unit. This name appears in the Business Unit picklist on the Create Transaction interface when creating a transaction record and must be unique.

The Add Business Unit page under Business Units provides three action buttons, each serving the functions described below:
- Go Back Button:- Navigates to the previous page without saving any changes.
- Cancel Button:- Discards any changes made and closes the current page.
- Save Button:- Save the new Business Unit record and applies the configured settings.

- After entering the desired unique Business Unit name, click the Save button to create the new Business Unit record.


A Business Unit cannot be deleted if it is associated with existing transactions. To prevent its use in future transactions, deactivate the Business Unit instead.
Business Unit Status:- Indicates whether a Business Unit is active and available for use in Sign Made Easy transactions and emails.


Note:- The default Business Unit automatically populates as the selected Business Unit for all Sign Made Easy transactions and emails. If the Multiple Business Units feature is enabled, users can choose a different Business Unit on the Create Transaction interface. Additionally, administrators can specify the Business Unit using the Button URL parameter in a native Sign Made Easy button.
Company Logo:- Displays the uploaded logo in sent emails when the corresponding Business Unit is selected while creating a transaction.
- Click Upload Files to add a new Company Logo for the Business Unit.
- Supported file formats are PNG and JPG.
- For optimal results, upload an image sized 1024 × 1024 pixels. The maximum file size allowed is 256 KB.
- The drag-and-drop functionality is also supported for uploading the logo.


Email Subject:- Specifies the subject for emails sent from Sign Made Easy.
Email Message:- Defines the content displayed in the body of emails sent from Sign Made Easy.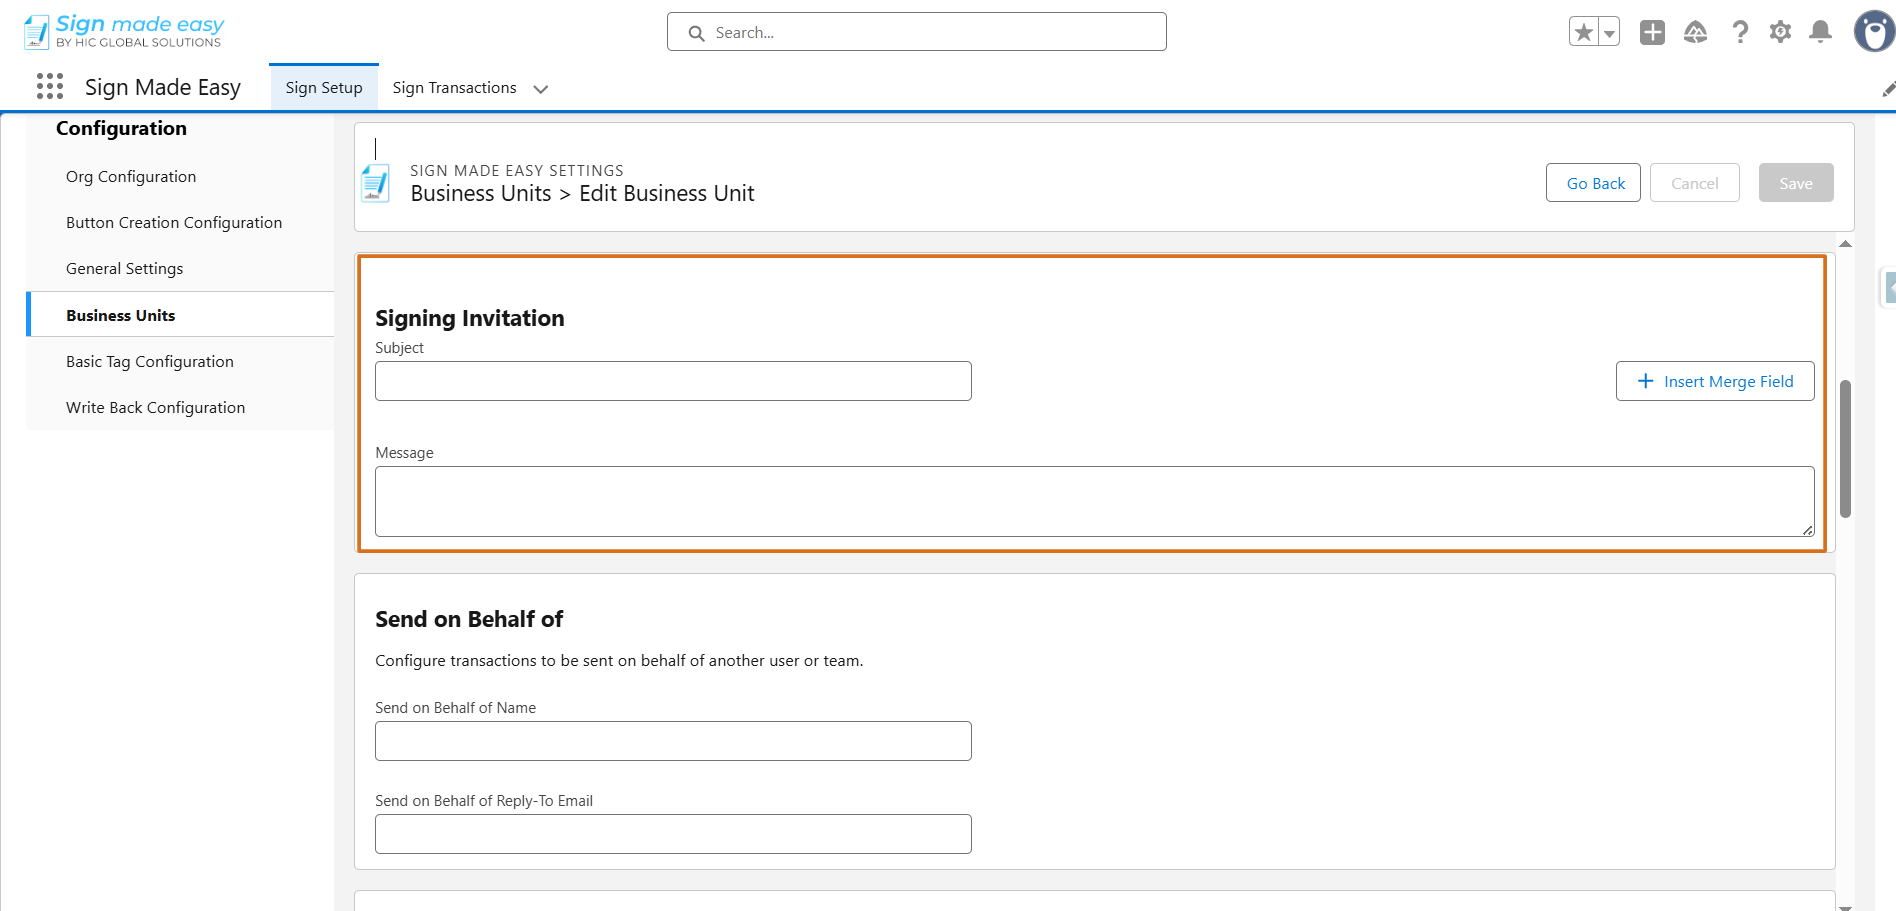
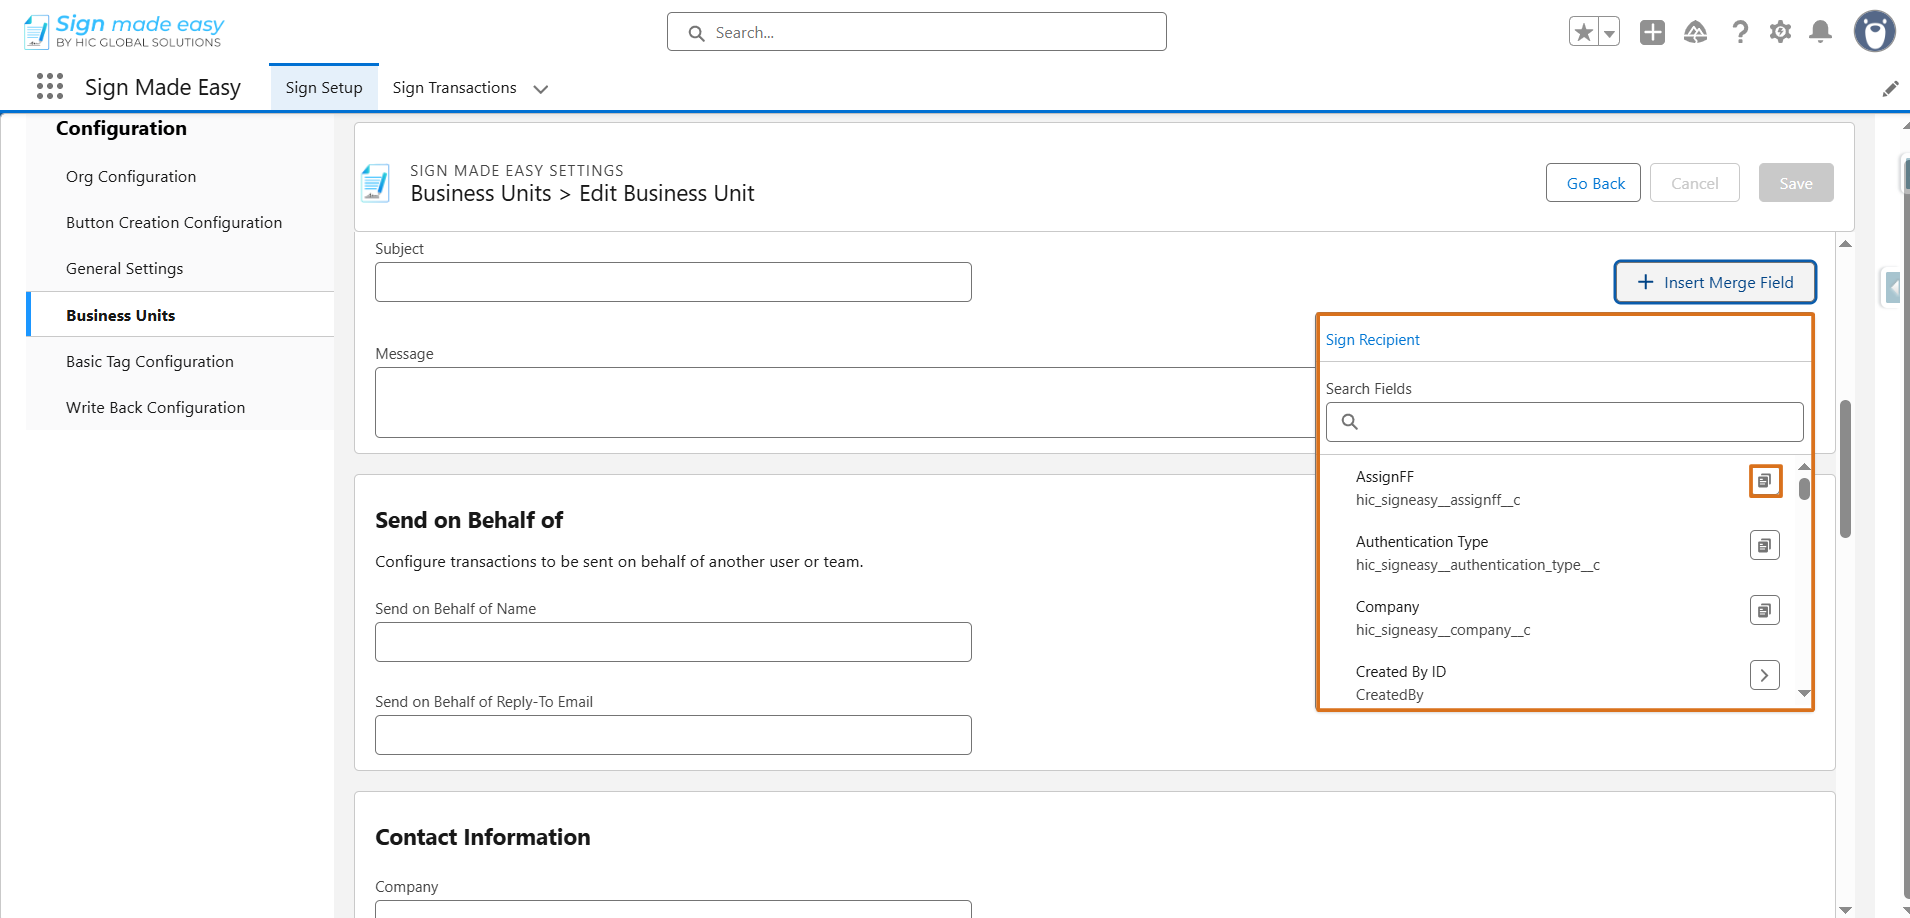
Merge Field Supported:- Merge fields can be used in the email subject and message, allowing dynamic content to be automatically populated for personalized communication.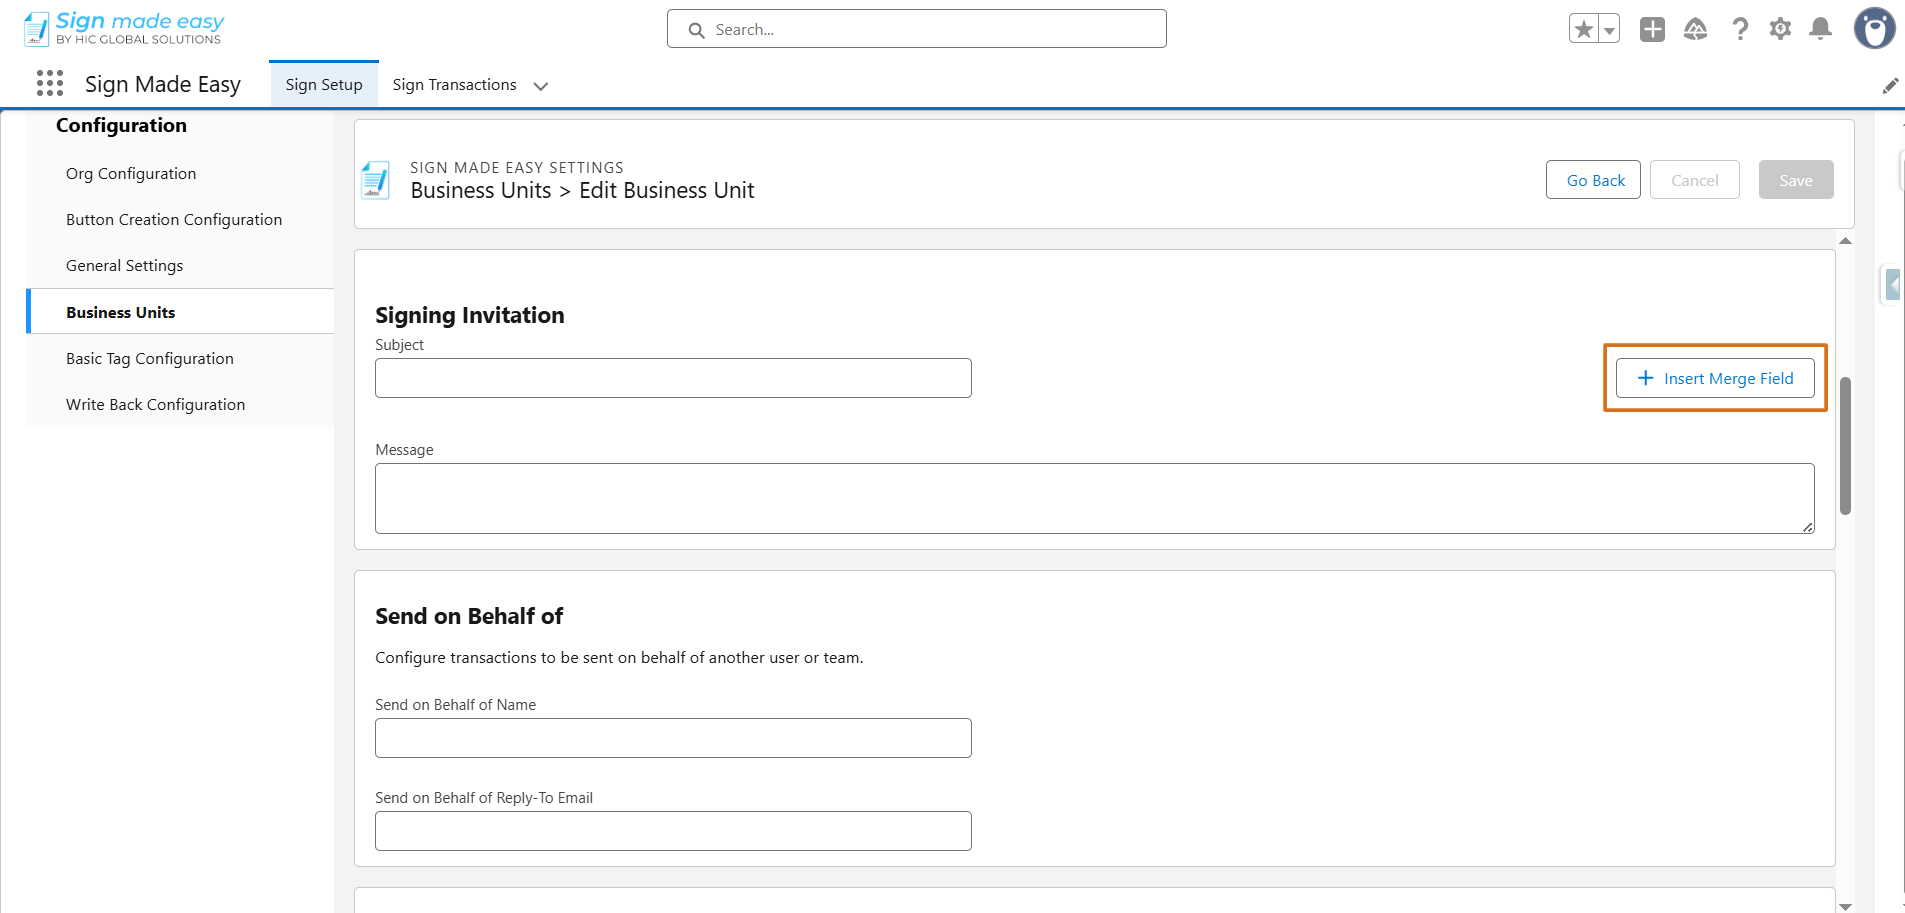
To include dynamic data in the subject and message, simply copy the field’s merge syntax and paste it into the subject or message where you want the data.
Send On Behalf Of Name/Send On Behalf Of Email:- Specifies the name and email address that will appear as the sender when emails are sent from Sign Made Easy, allowing recipients to identify the source of the communication.

Contact Information Fields:- Specifies the contact details displayed at the bottom of emails sent from Sign Made Easy. Configure the Business Unit’s contact information by entering values in the following fields:
- Company
- Address
- City, State, and Zip/Postal Code
- Country
- Phone Number
- Website

Sender Email Notifications
Manages the email notifications sent to the sender to keep them informed about the status and progress of transactions, including when a recipient views, signs, or completes the documents. The available options are as follows:
- Transaction is sent:- Sends an email notification when the transaction has been sent out for signature.
- Transaction is complete:- Sends an email notification when the transaction has been completed by all signers.
- Transaction is reassigned by signer:- Sends an email notification when a recipient chooses to reassign the signing responsibility.
- Transaction is expired:- Sends an email notification when the transaction reaches its designated expiration date.
Transaction is cancelled by Signer or Sender manually :- Sends an email notification when the transaction is cancelled by either the signer or the sender. - Transaction is completed by Signer:- Sends an email notification when each Signer has completed signing.
- Transaction is viewed by Signer :- Sends an email notification when a recipient opens and views the transaction.

Recipient Email Notifications
- Manages the email notifications sent to recipients, keeping them informed about transactions, including when documents are sent, signed, or completed. The available notification options are:
Signer Notifications:
- Recipient is Sent – Notifies the signer when an email is sent to the recipient for signature.
- Transaction is Reassigned – Notifies the signer when the transaction is reassigned to another recipient.
- Transaction is Expired – Notifies the signer when the transaction has expired
- Transaction is Complete – Notifies the signer when the transaction has been completed.
- Transaction is Cancelled by Signer or Sender – Notifies the signer when the transaction is cancelled by signer or sender.
- Signing Reminder – Sends a reminder to the signer to complete the transaction.
- Transaction Expiration Reminder – Sends an expiration reminder notification to the signer before the transaction expires.
CC Notifications:
- Transaction is Complete – Notifies CC recipients when the transaction is completed.
- Transaction is Expired – Notifies CC recipients when the transaction expires.
- Transaction is Cancelled by Signer or Sender – Notifies CC recipients when the transaction is cancelled by signer or sender.

Time Zone Conversion – Specifies whether the times for Expiration Reminder and Transaction Expiration are converted to the sender’s time zone when sending, or if they follow the time zone configured for the Business Unit.
Time Zone – Specifies the time zone in which reminders are sent and transactions expire when Time Zone Conversion is configured to use the Business Unit’s time zone.

- You have successfully configured the Business Unit record. Click the Save button to apply and save all changes.

- After saving the Business Unit configuration, click on Go Back button to return to the Business Unit home page.


Steps to Send a Document for E-Signature with a Business Unit:
Step 1: Open the App Launcher, search for the object where the SME button has been created, and select it to proceed. If the SME button has not been created yet, Click Here for instructions on creating the SME button.

Step 2:- Navigate to the record page of the selected object from which you intend to initiate the SME process. If no record exists, create a new one by clicking the New button before proceeding.

Step 3: Next, click the button you created. The Create Transaction interface will appear, allowing you to add documents and enter recipient details.


Note: Maximum of three documents and up to five recipients can be added to each transaction record.
- You can change the selected business unit by selecting a different option from the Choose Business Unit picklist.

Step 4 :- Now, click the Send Now button to email the document directly to the recipient.

Step 5 :- After the documents are sent, recipients will receive an email notification. To complete the e-signature process, they must open the email and click the View Document button.

Step 6 :- By clicking "I Agree," you confirm that you have read and reviewed the terms and conditions of Sign Made Easy through the Electronic Record and Signature Disclosure. You also consent to the use of electronic records and signatures for reviewing and executing this document .

Step 7 :- To complete the transaction, enter the required values in the tags if you have been added to the document. Simply click on each tag and provide the necessary information.
Step 8 :- Click the Complete Sign button to finalize the signing process. Once completed, the document will be marked as fully signed. A confirmation email will be sent once all recipients have completed their signatures.

Step 13:- To view detailed transaction and recipient actions, click on 'To view the audit trail link'.


Hence, The eSignature process for the documents has been successfully completed.
Note :- For detailed information on sending documents for E-signature, please Click Here.
Was this article helpful?
That’s Great!
Thank you for your feedback
Sorry! We couldn't be helpful
Thank you for your feedback
Feedback sent
We appreciate your effort and will try to fix the article