Unlock advanced features and enhance your productivity by upgrading to Sign Made Easy Pro. Please contact our Support Team to access the advanced features of the SME PRO package.
Note:- To access the Sign Template functionality, the SME Pro permission set must be assigned to users, including System Administrators. For the SME Pro permission set guide, please Click Here.
Automating the End-to-End Workflow for Seamless Document Signing
Step 1 :- Now, create a Sign Template record by Clicking Here and following the guided steps.
Note:- To send templates through automation, set the “Sending Experience” in the Sign Template options to “Send Now.” If you select a different option, you will need to use the flow button, and the template will be sent through the standard document sending process.
Step 2:- Once the Sign Template record has been created, proceed with the subsequent steps to send the template through automation.
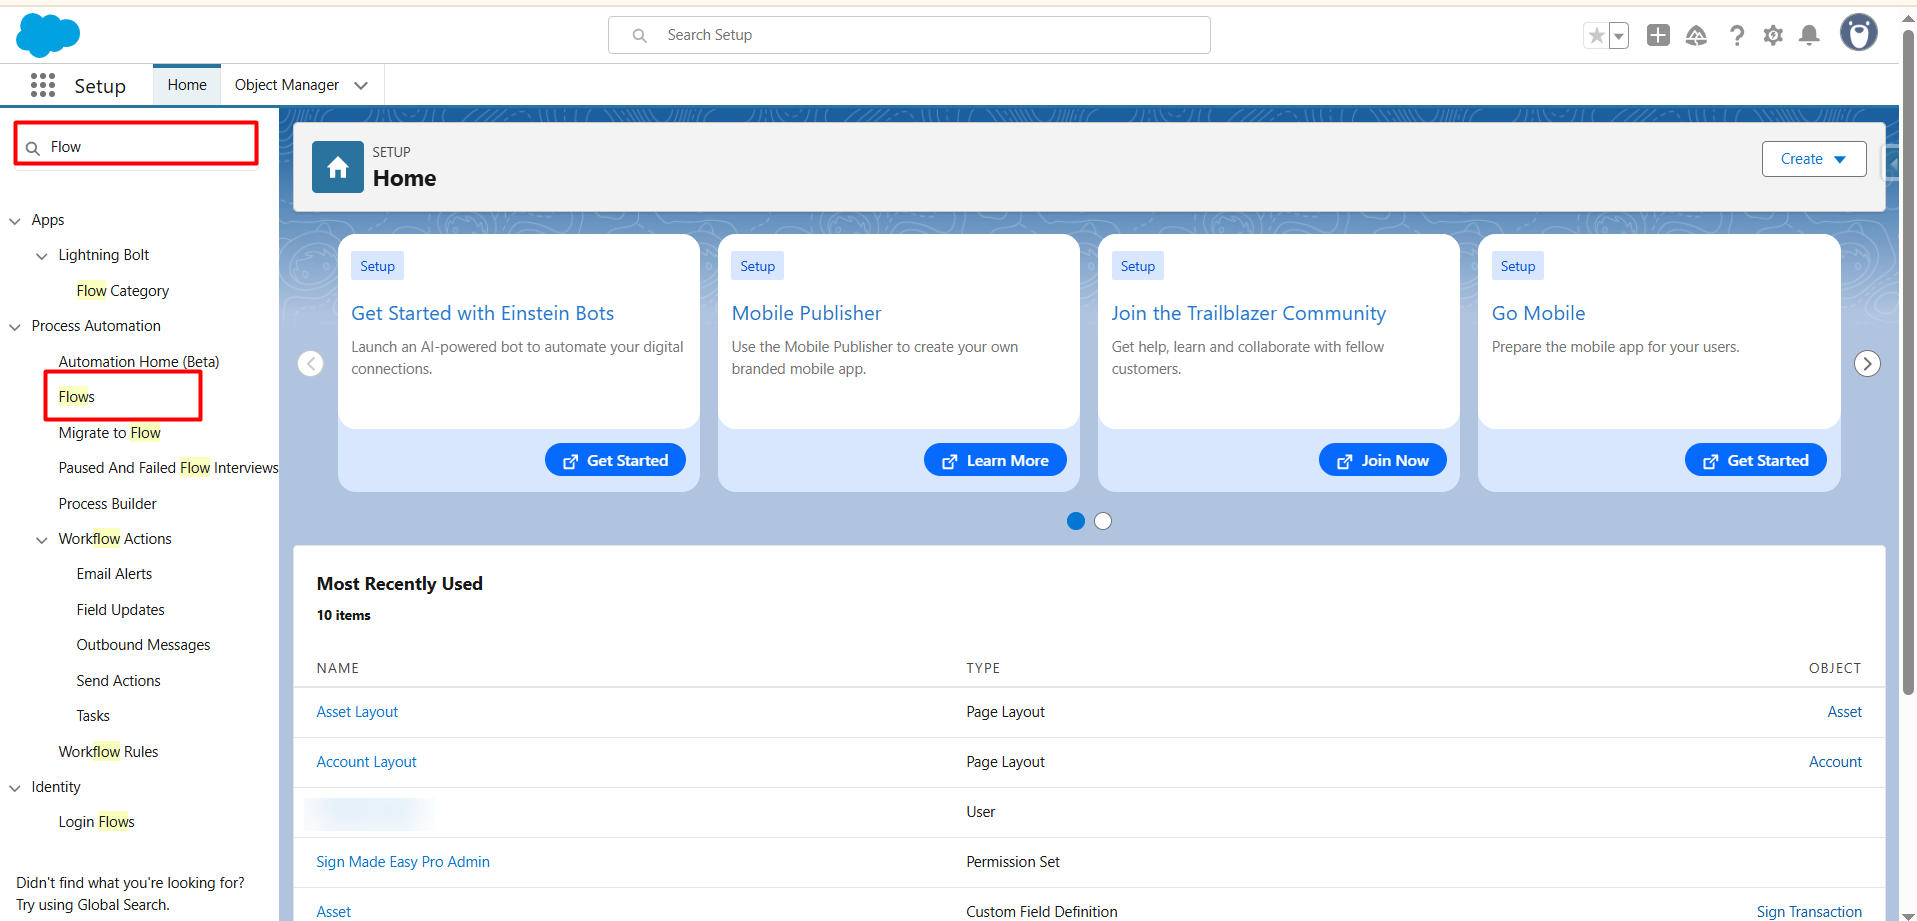
Step 3:- Click the Gear icon in Salesforce and select Setup.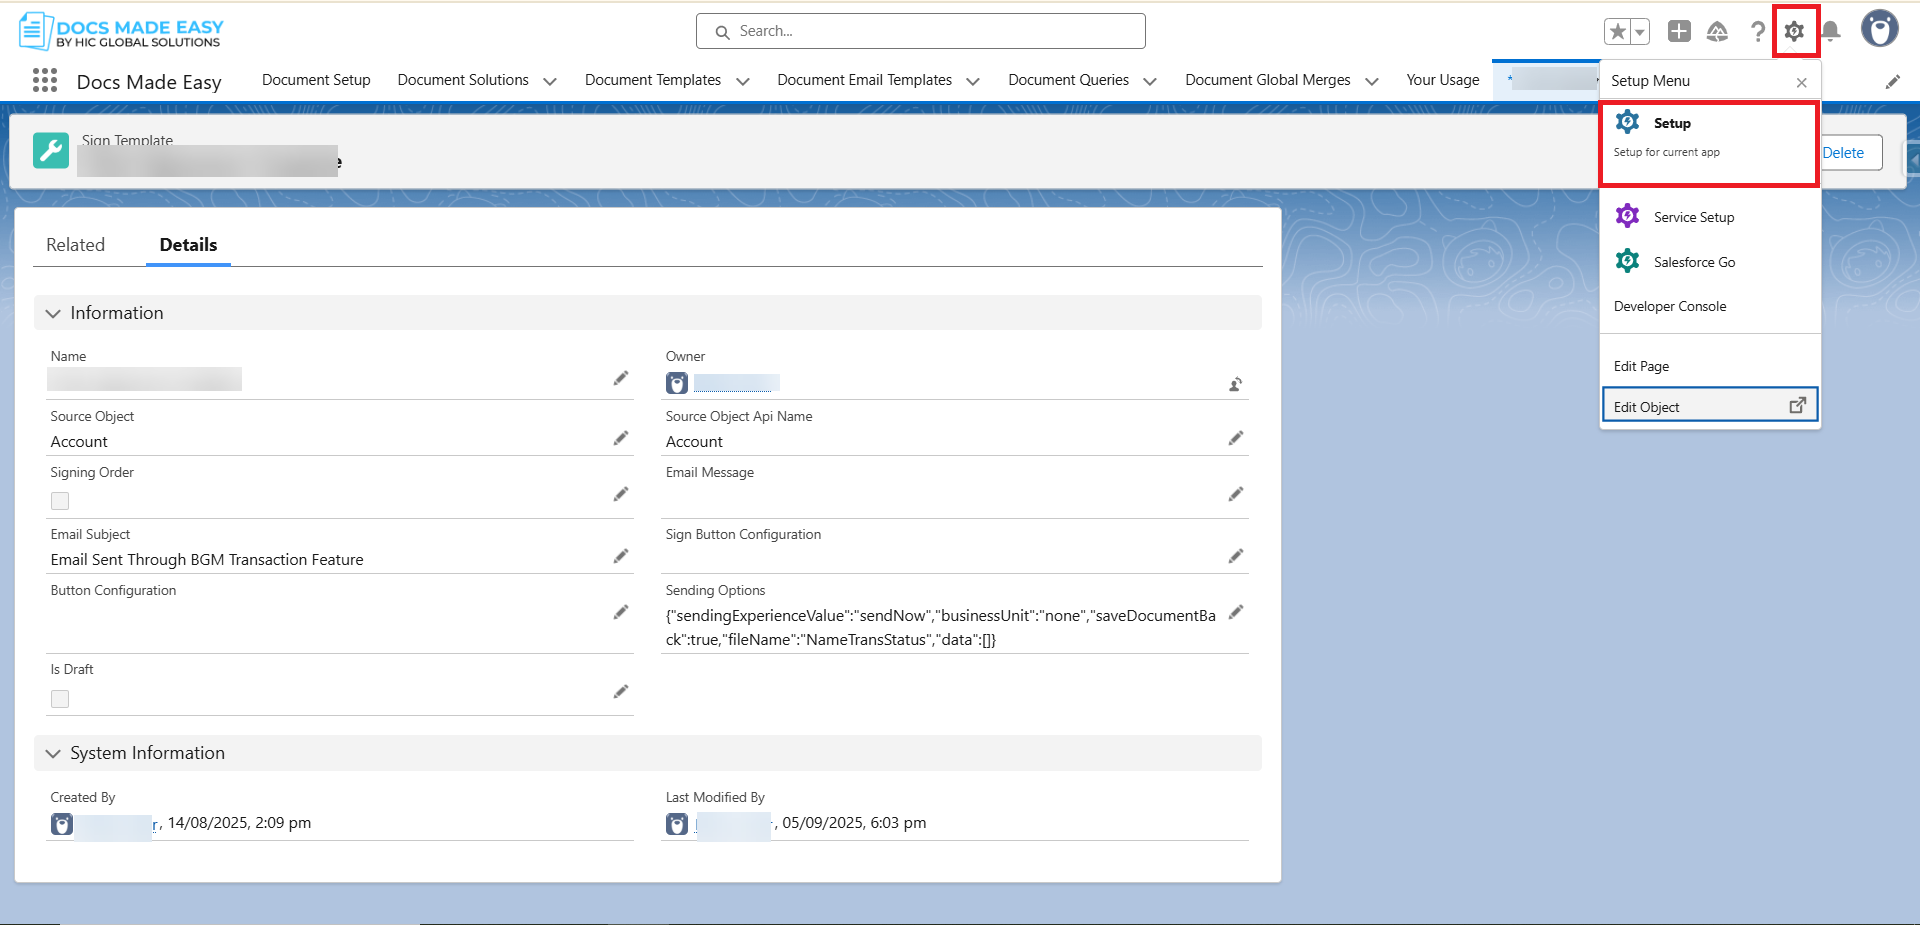
Step 4 :- In the Quick Find search bar, enter Flow and open it to create a Record-Triggered Flow that automates the sending of templates for e-signature.

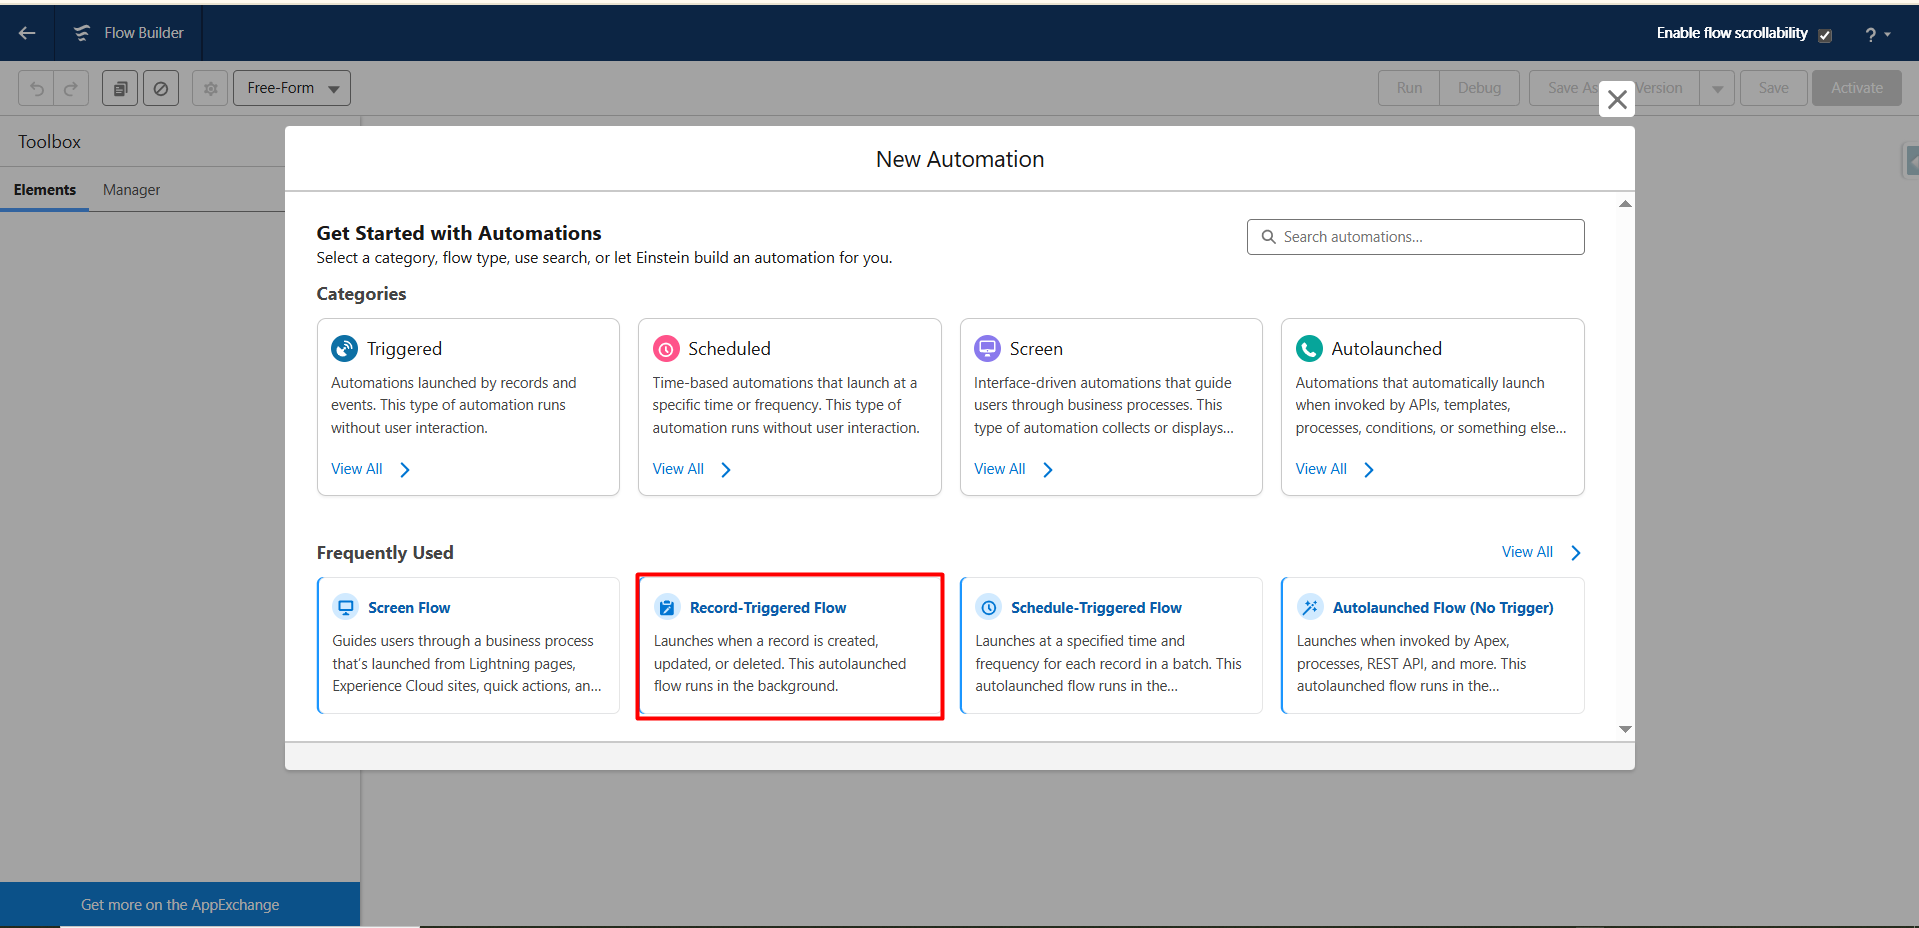
Step 5:- Now, select Record-Triggered Flow to proceed with creating automation that runs when a record is created, updated.
- Record-Triggered Flow
This option is used to build automation that starts automatically whenever a record action (create, update, delete) occurs. It does not require user interaction and executes behind the scenes.
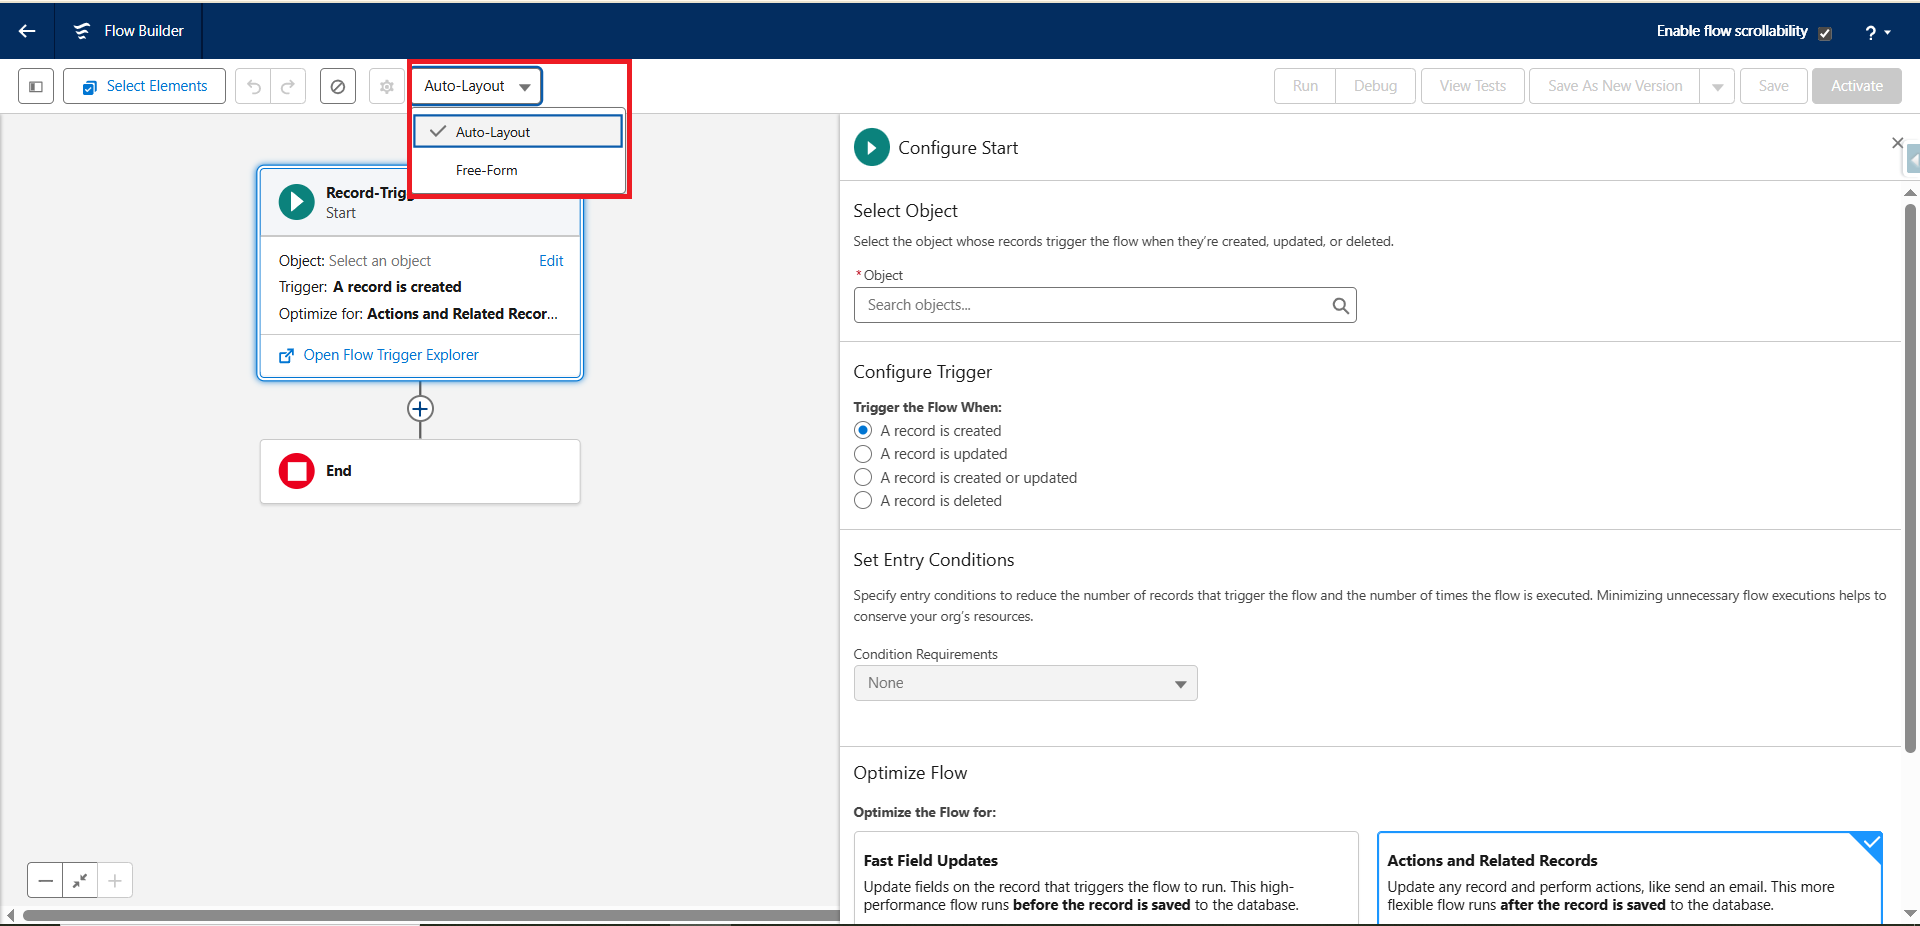
Auto-Layout (Selected):
- When this option is enabled, Flow Builder automatically organizes and arranges the flow elements in a structured and clean vertical layout.
- This makes the flow easier to read and maintain, especially for beginners or for processes with many elements.
- Connections between elements are created automatically.
Free-Form (Alternative Option):
- Allows you to manually place flow elements anywhere on the canvas.
- Provides more flexibility in organizing complex flows.
- Useful when you want custom positioning or a visual layout that reflects process logic.
Choose a layout based on your preference either Auto-Layout for an automatically organized structure or Free-Form for manual placement of elements.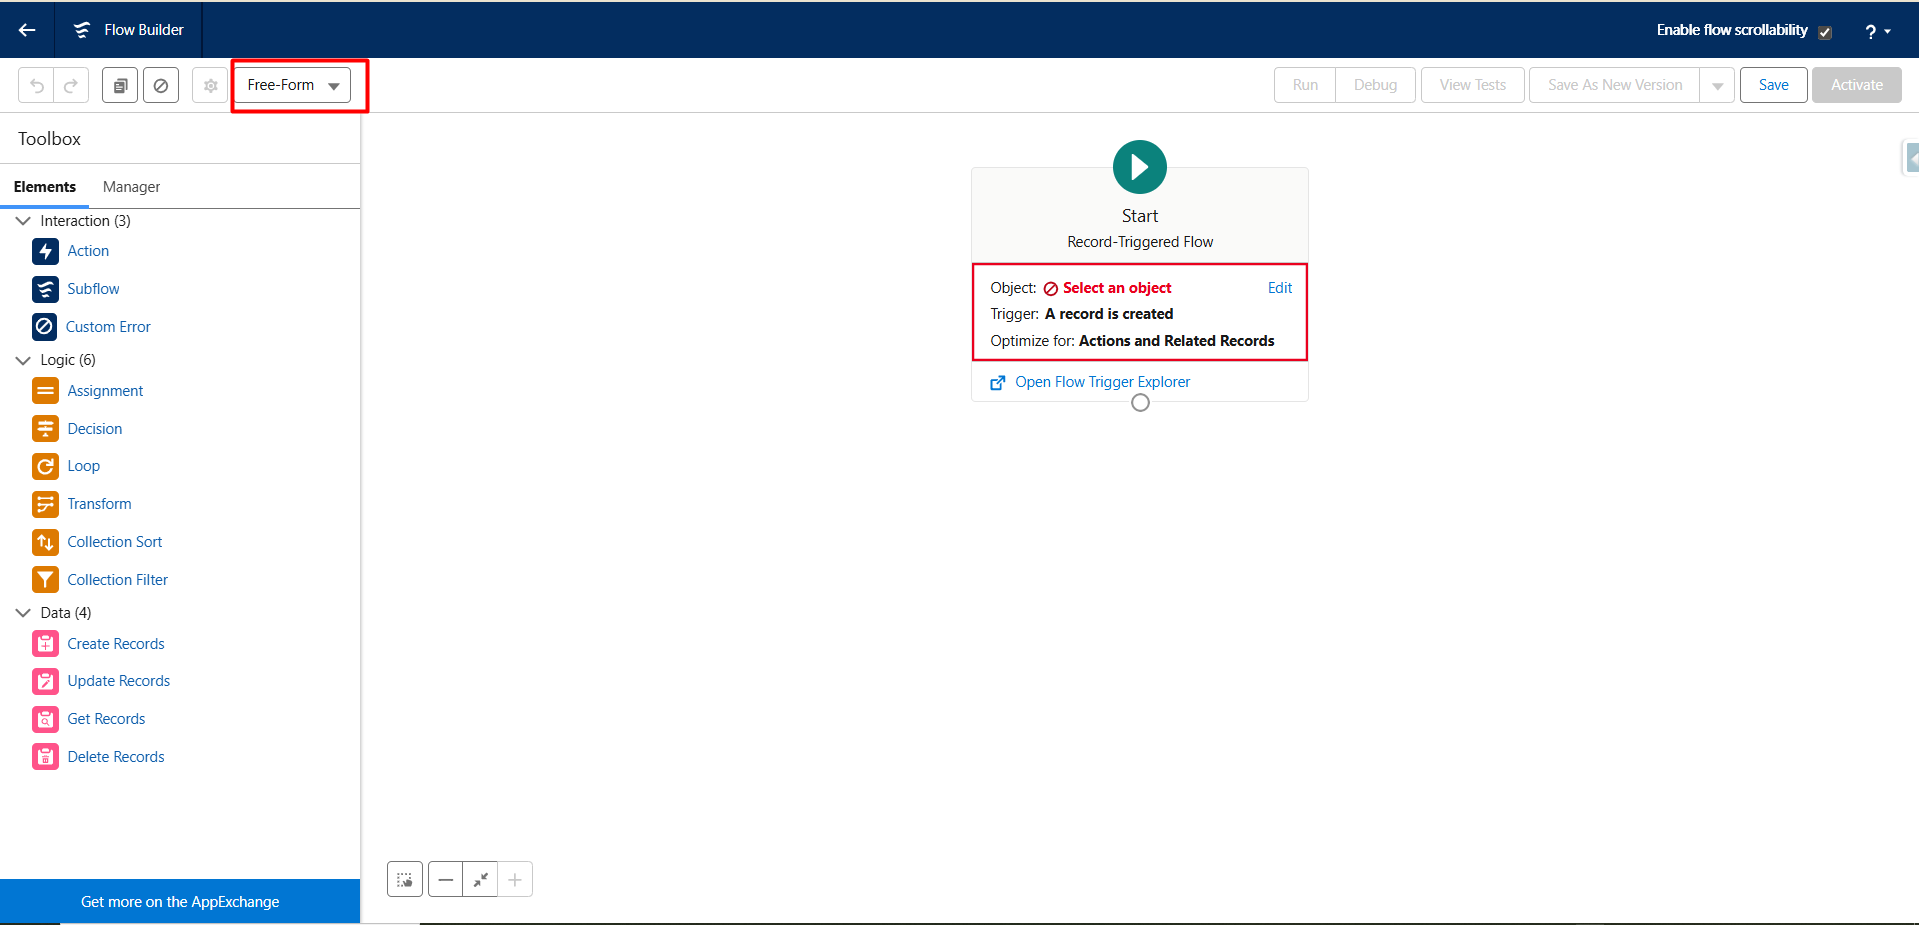
Step 6:- Next, select Edit in the Flow to configure the conditions that will trigger the automation.
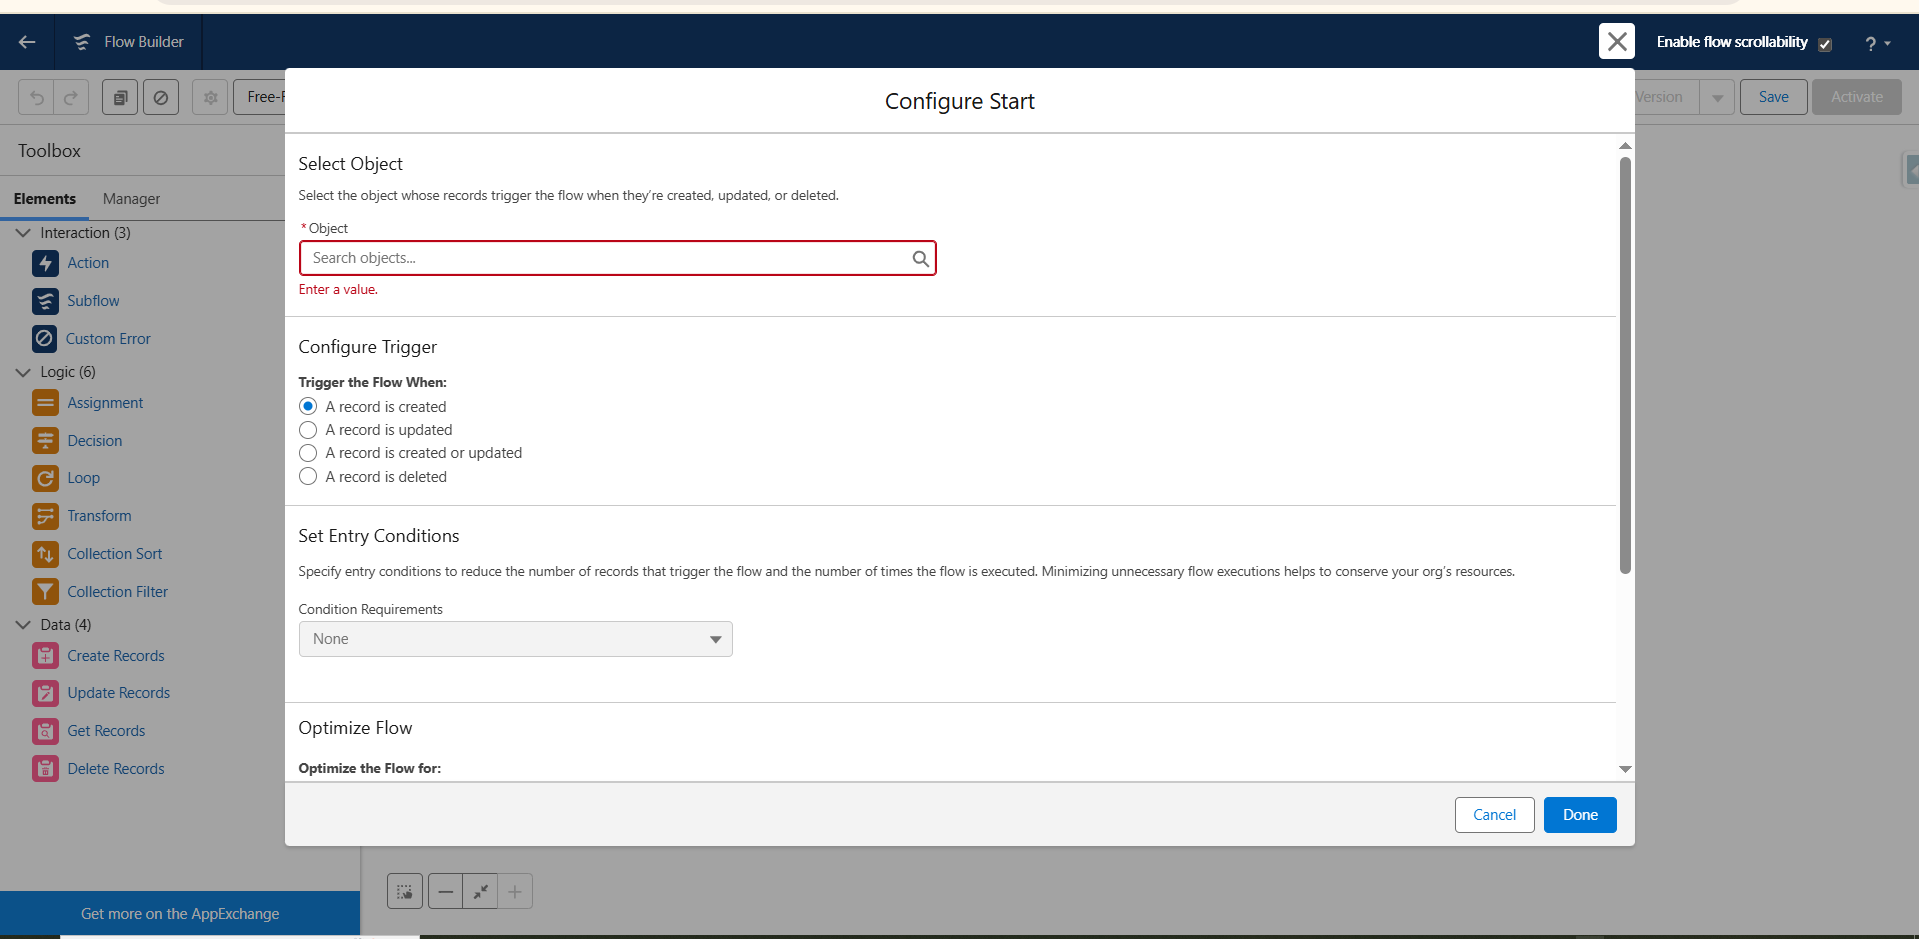
Step 7:- The Start element defines the entry point of the flow, specifying the object to monitor, the event that triggers it (create, update, or delete), and the optimization mode for execution.
Components of the Start Trigger
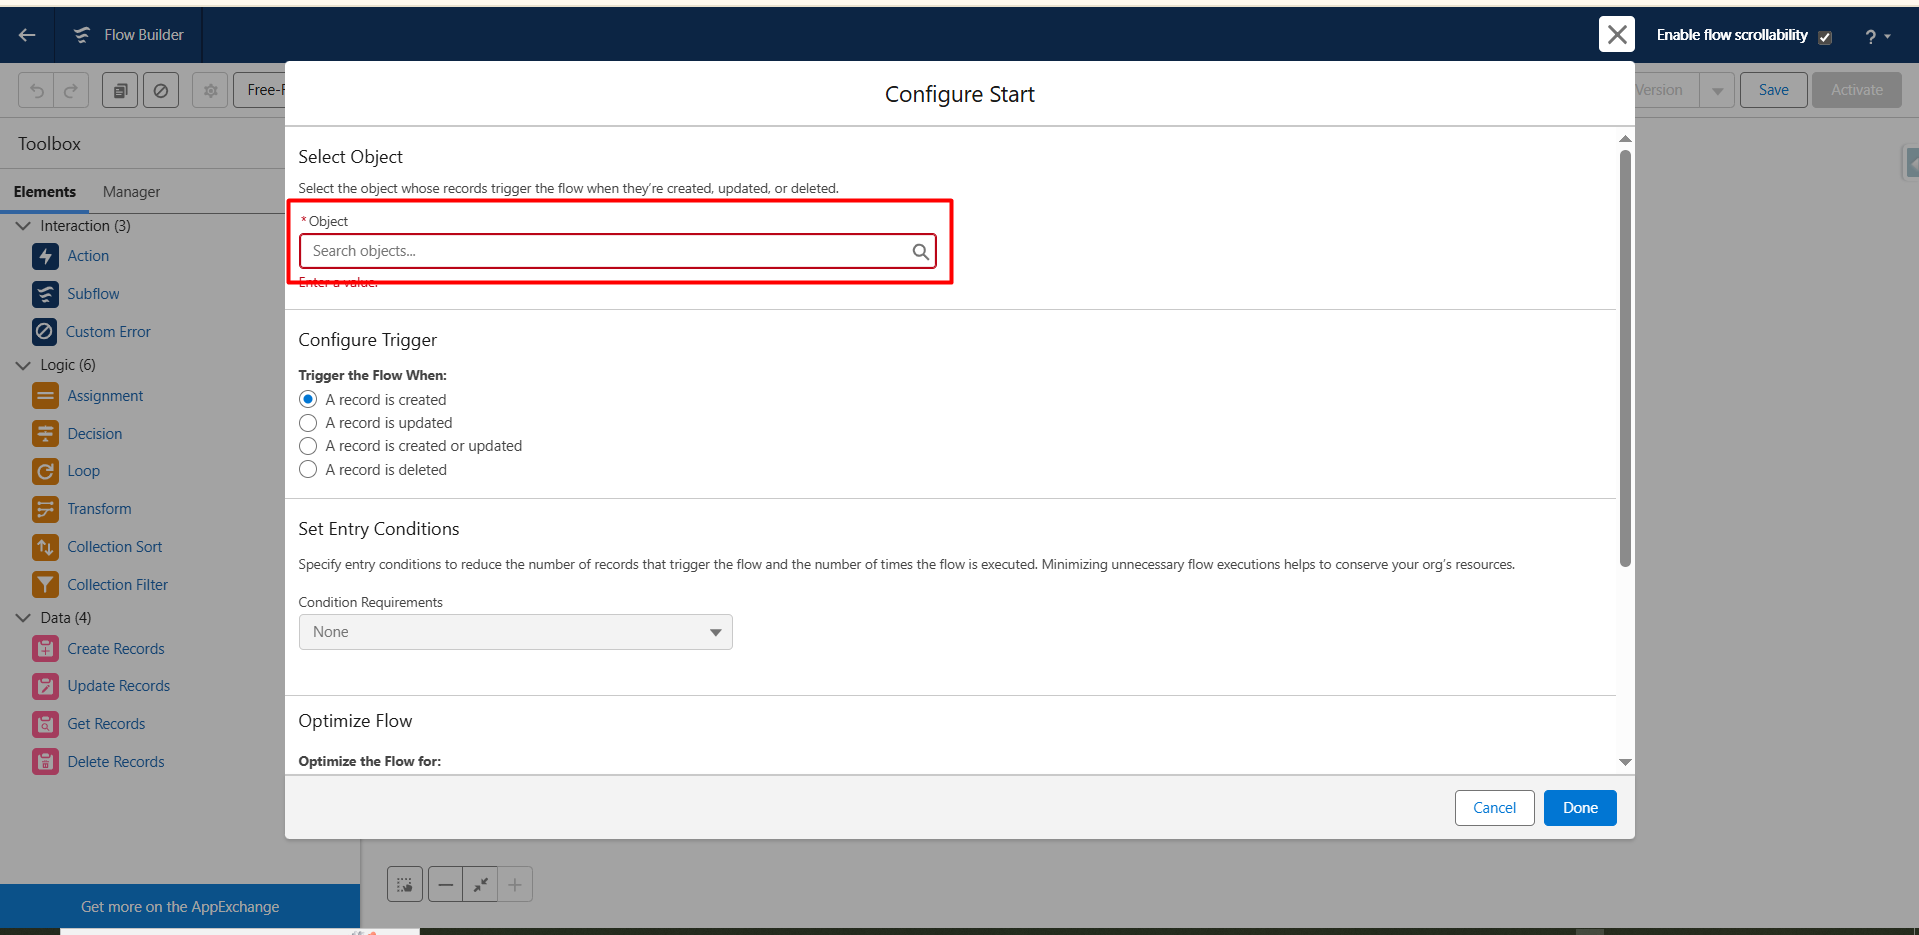
Object (Select an object)
- Defines the Salesforce object (e.g., Account, Contact, Opportunity, or your custom object) that will trigger the flow.
- You must select the object whose record changes will launch this automation.
Configure Trigger :- Specifies the condition under which the flow starts. Available options include:
- A record is created
- A record is updated
- A record is created or updated
- A record is deleted

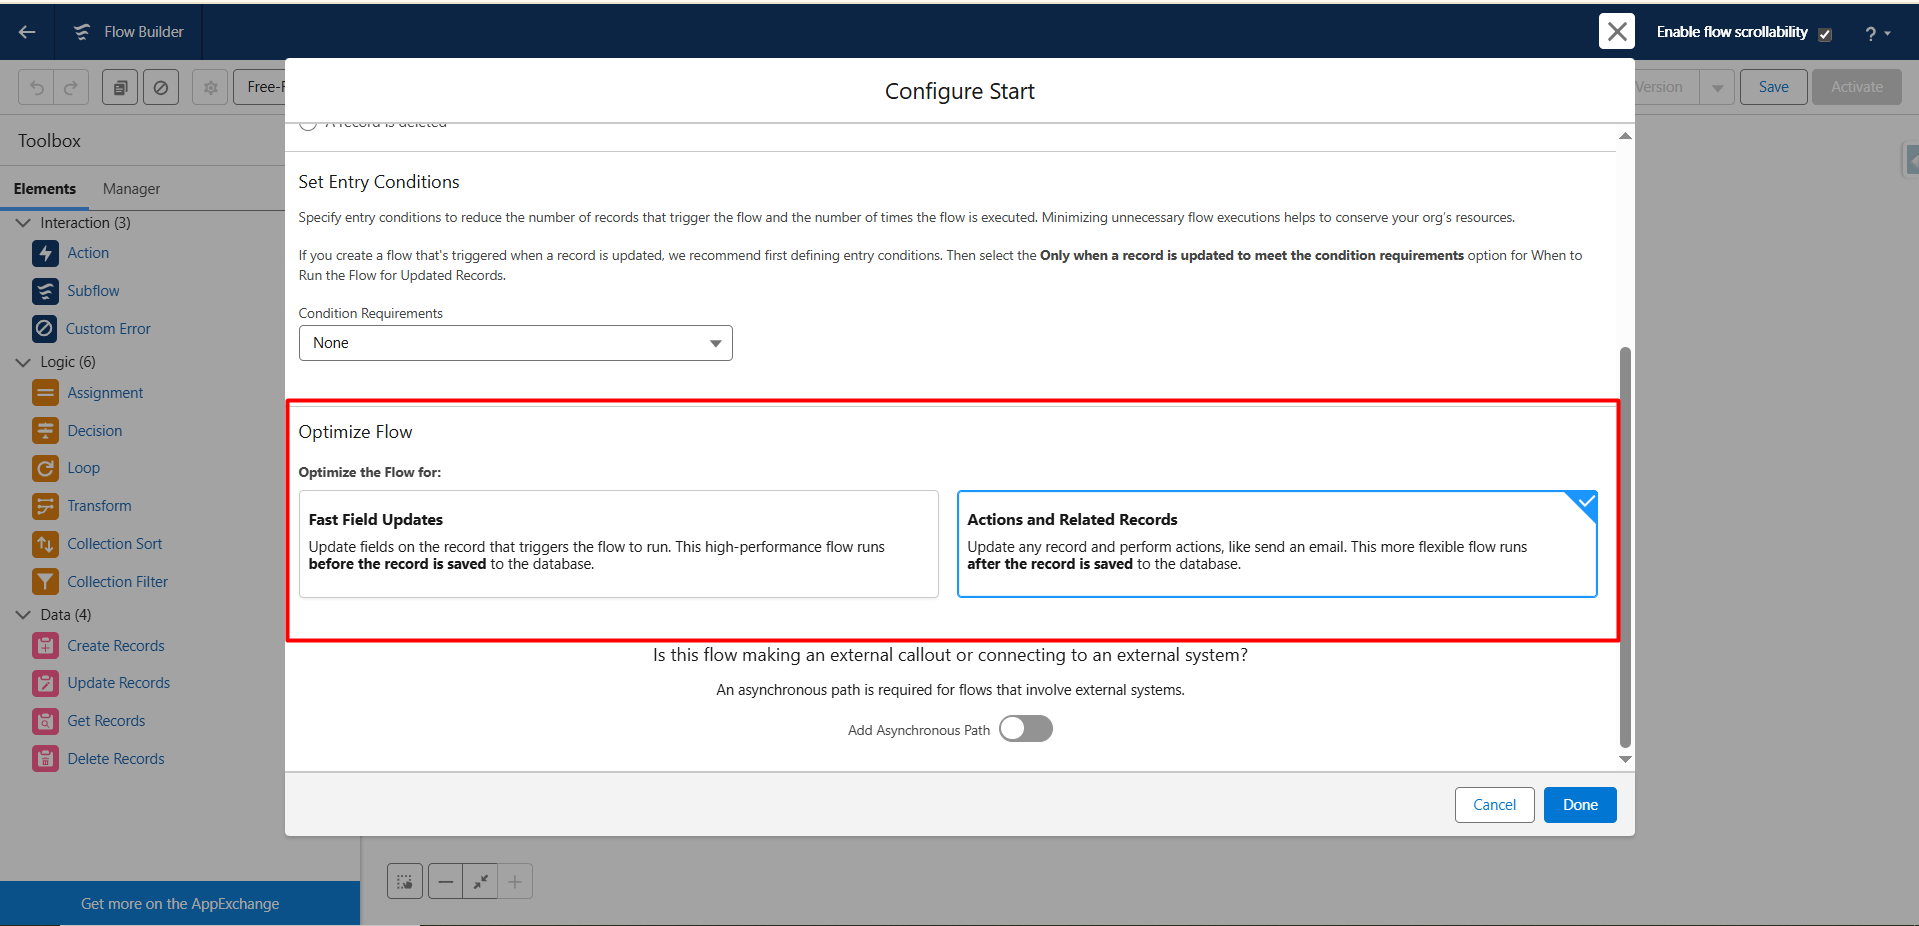
Set Entry Conditions :- This is where you define criteria that must be true for the flow to execute.
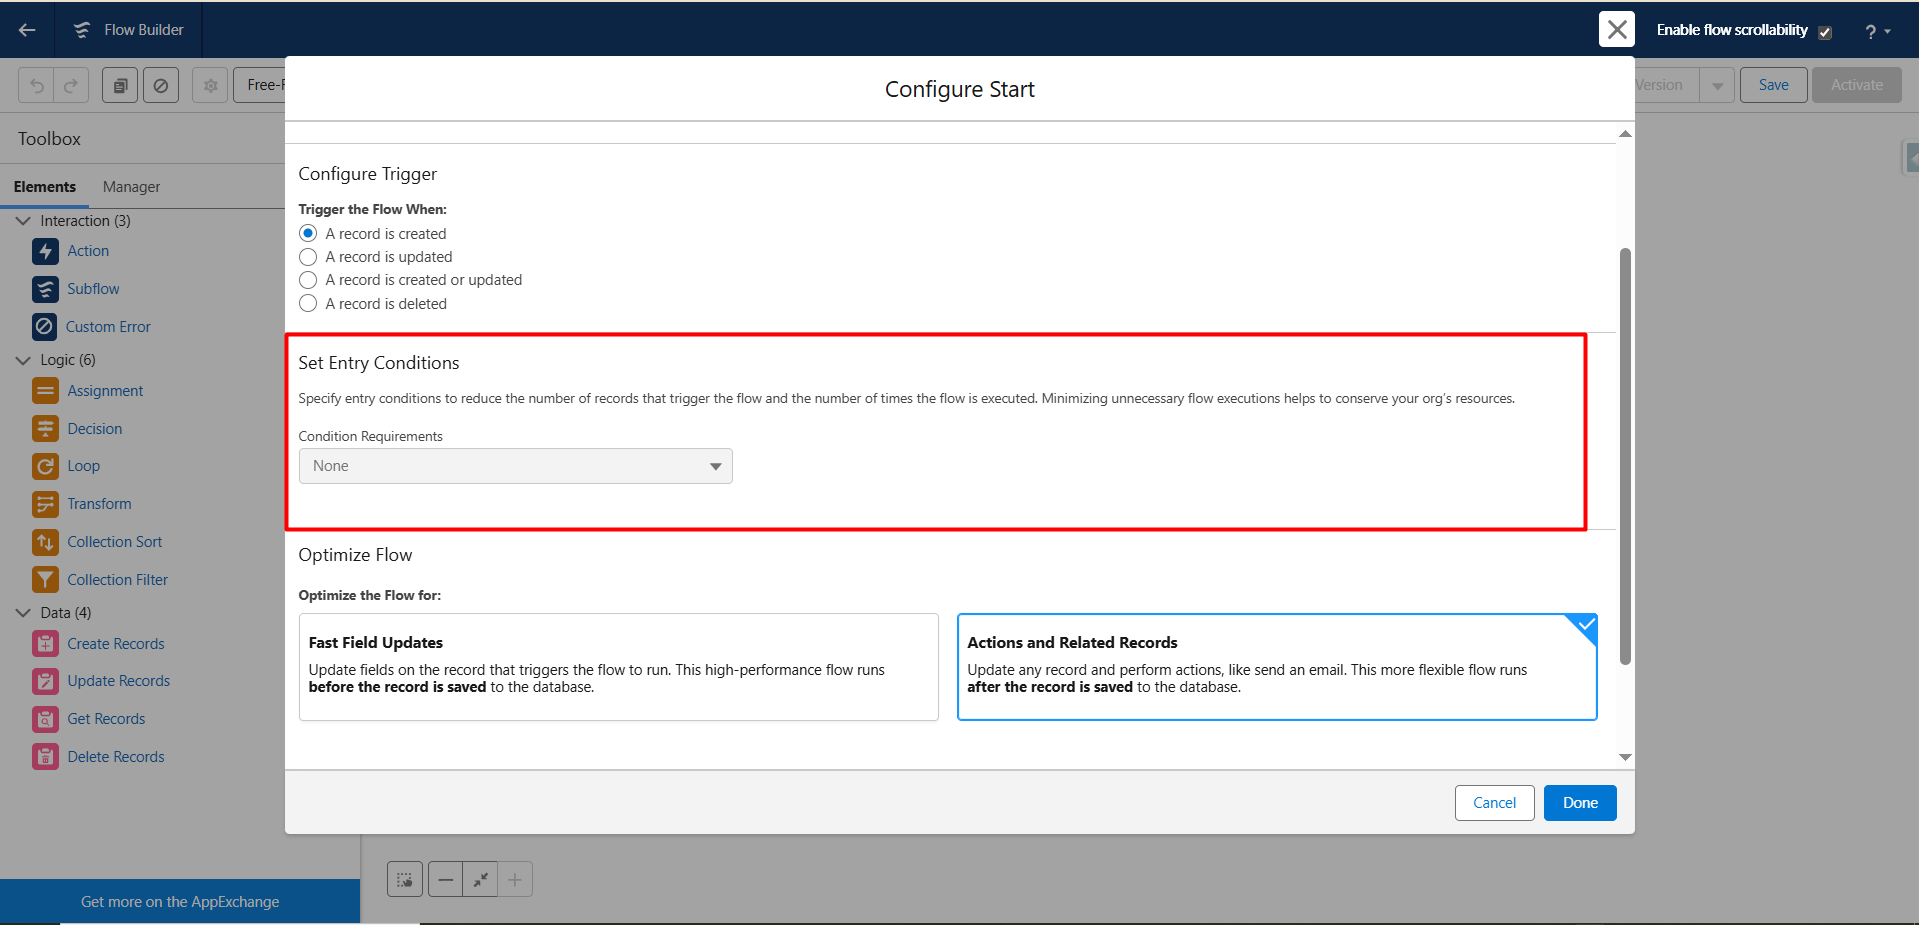
Optimize for (Actions and Related Records) :- Determines how the flow behaves during execution:
- Fast Field Updates:- Updates fields immediately, before saving the record to the database.
- Actions and Related Records:- Allows for more complex actions like sending emails, updating related records, or creating tasks. Runs after the record is saved.

Step 8 :- Choose the object that will act as the entry point for this automation. Define the criteria that must be satisfied for the flow to execute, ensuring the automation triggers only for records that meet your specified conditions.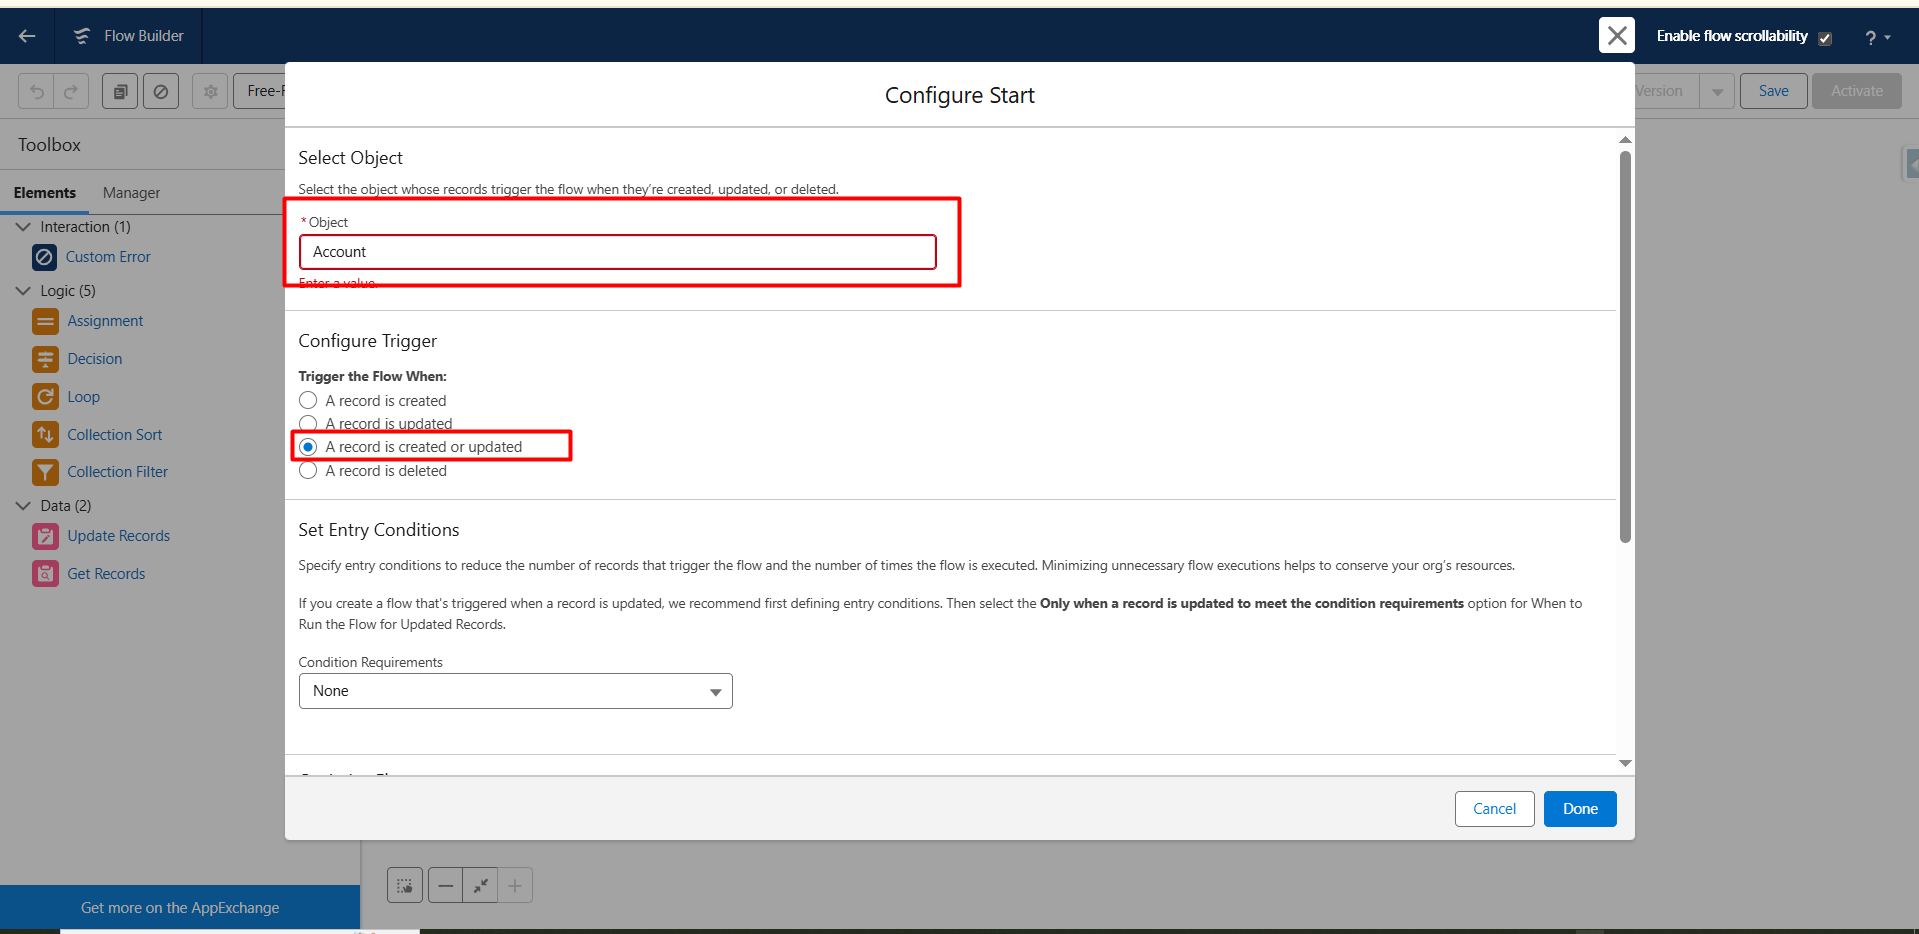
Step 9 :- Click the Done button to save your configuration and proceed to the next step in the flow setup.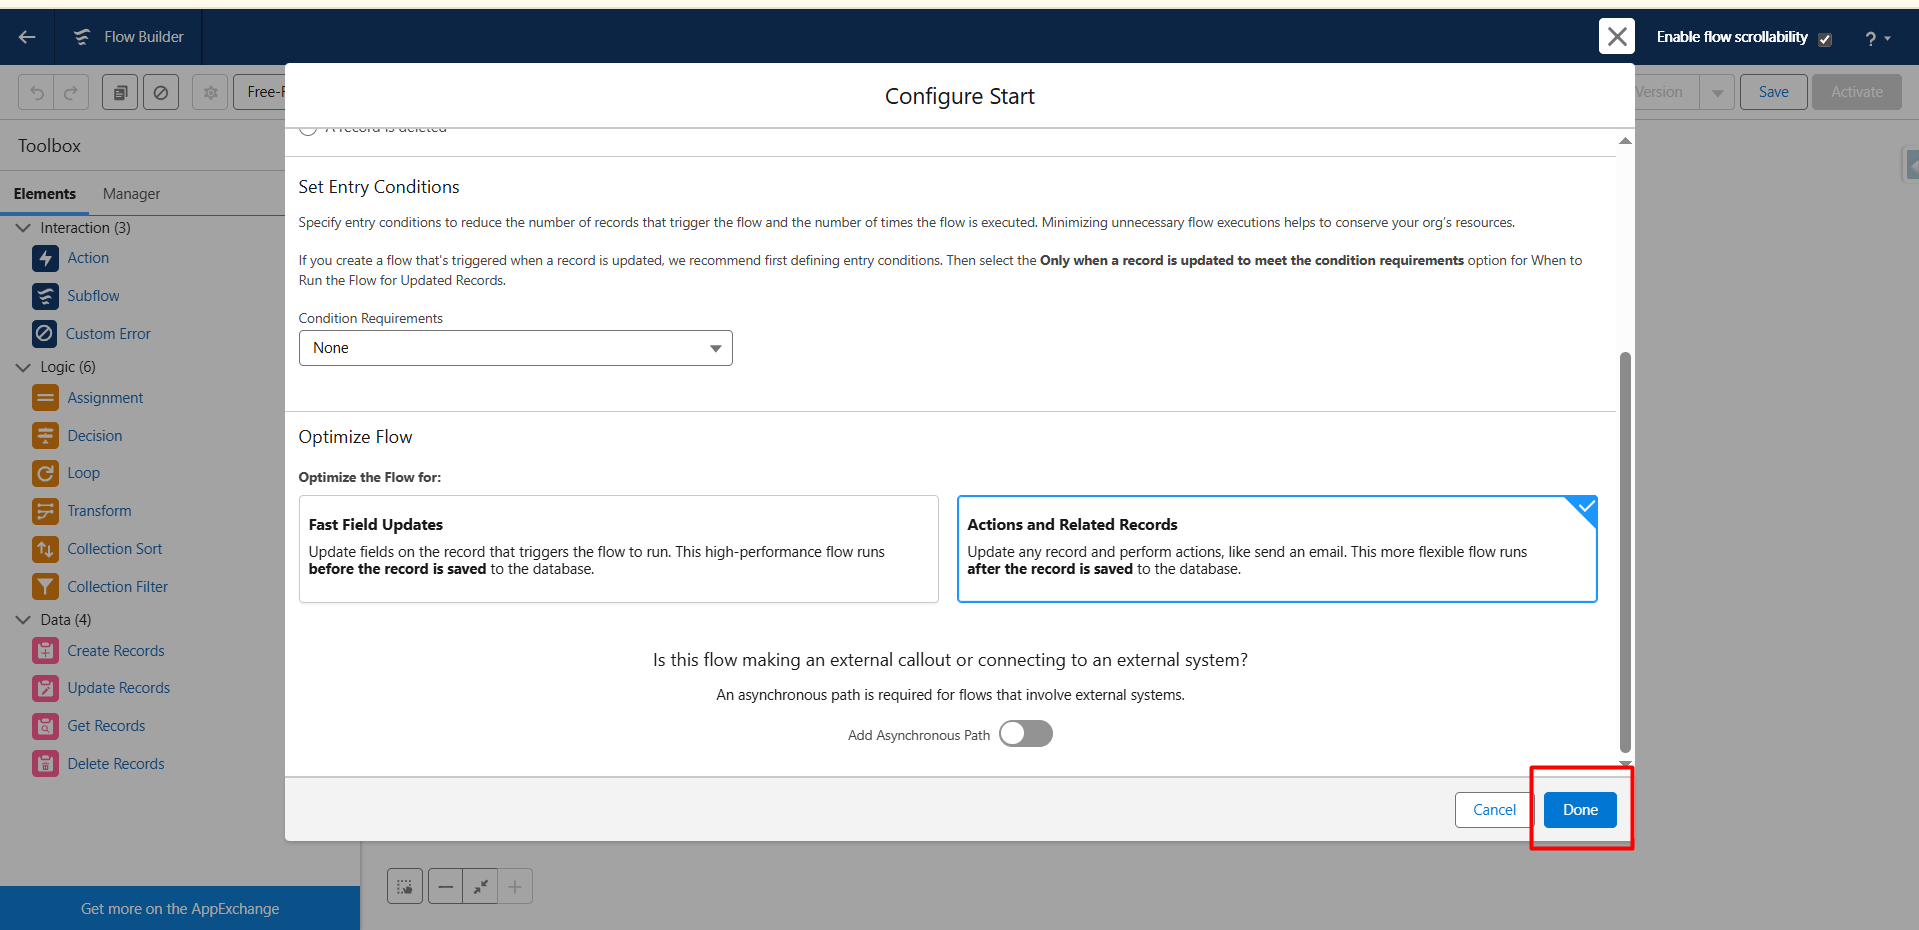
Step 10:- Next, add an Action Element in the flow to automate sending the template to selected recipients for e-signature.
- Action Element lets you perform tasks that go beyond simply creating or updating records. It allows the flow to use Salesforce features, run custom logic, or connect with external systems to automate more complex processes.

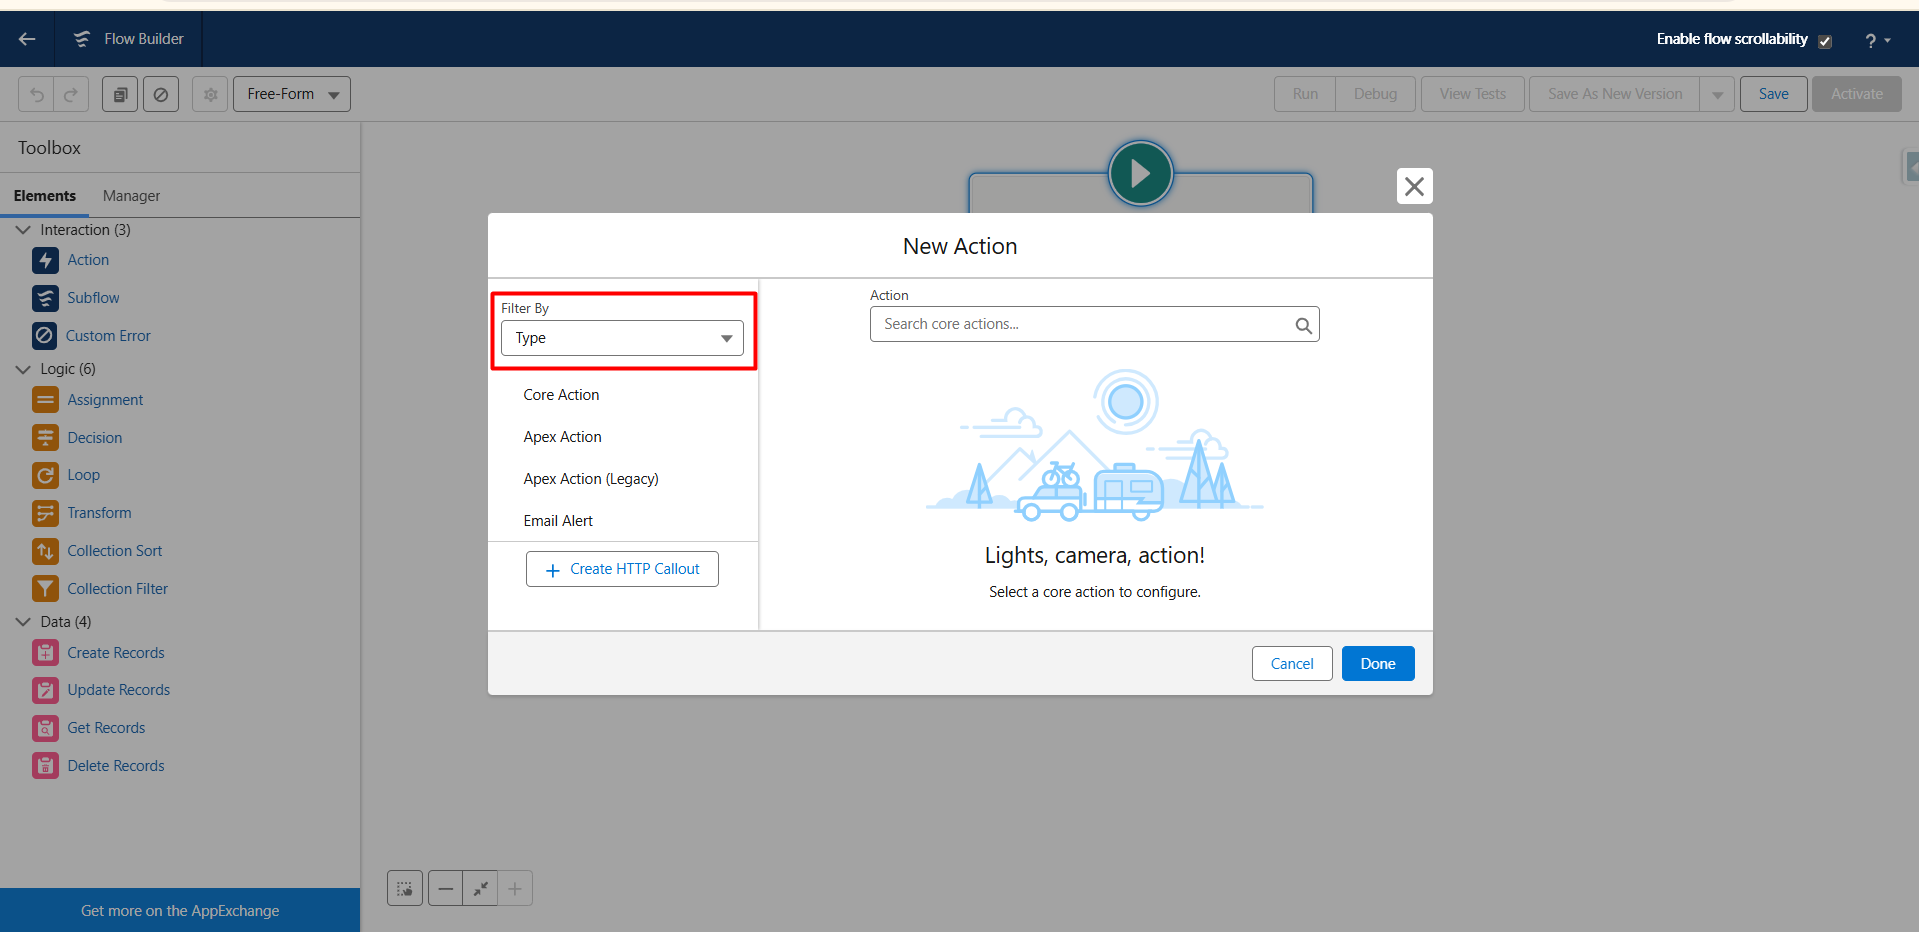
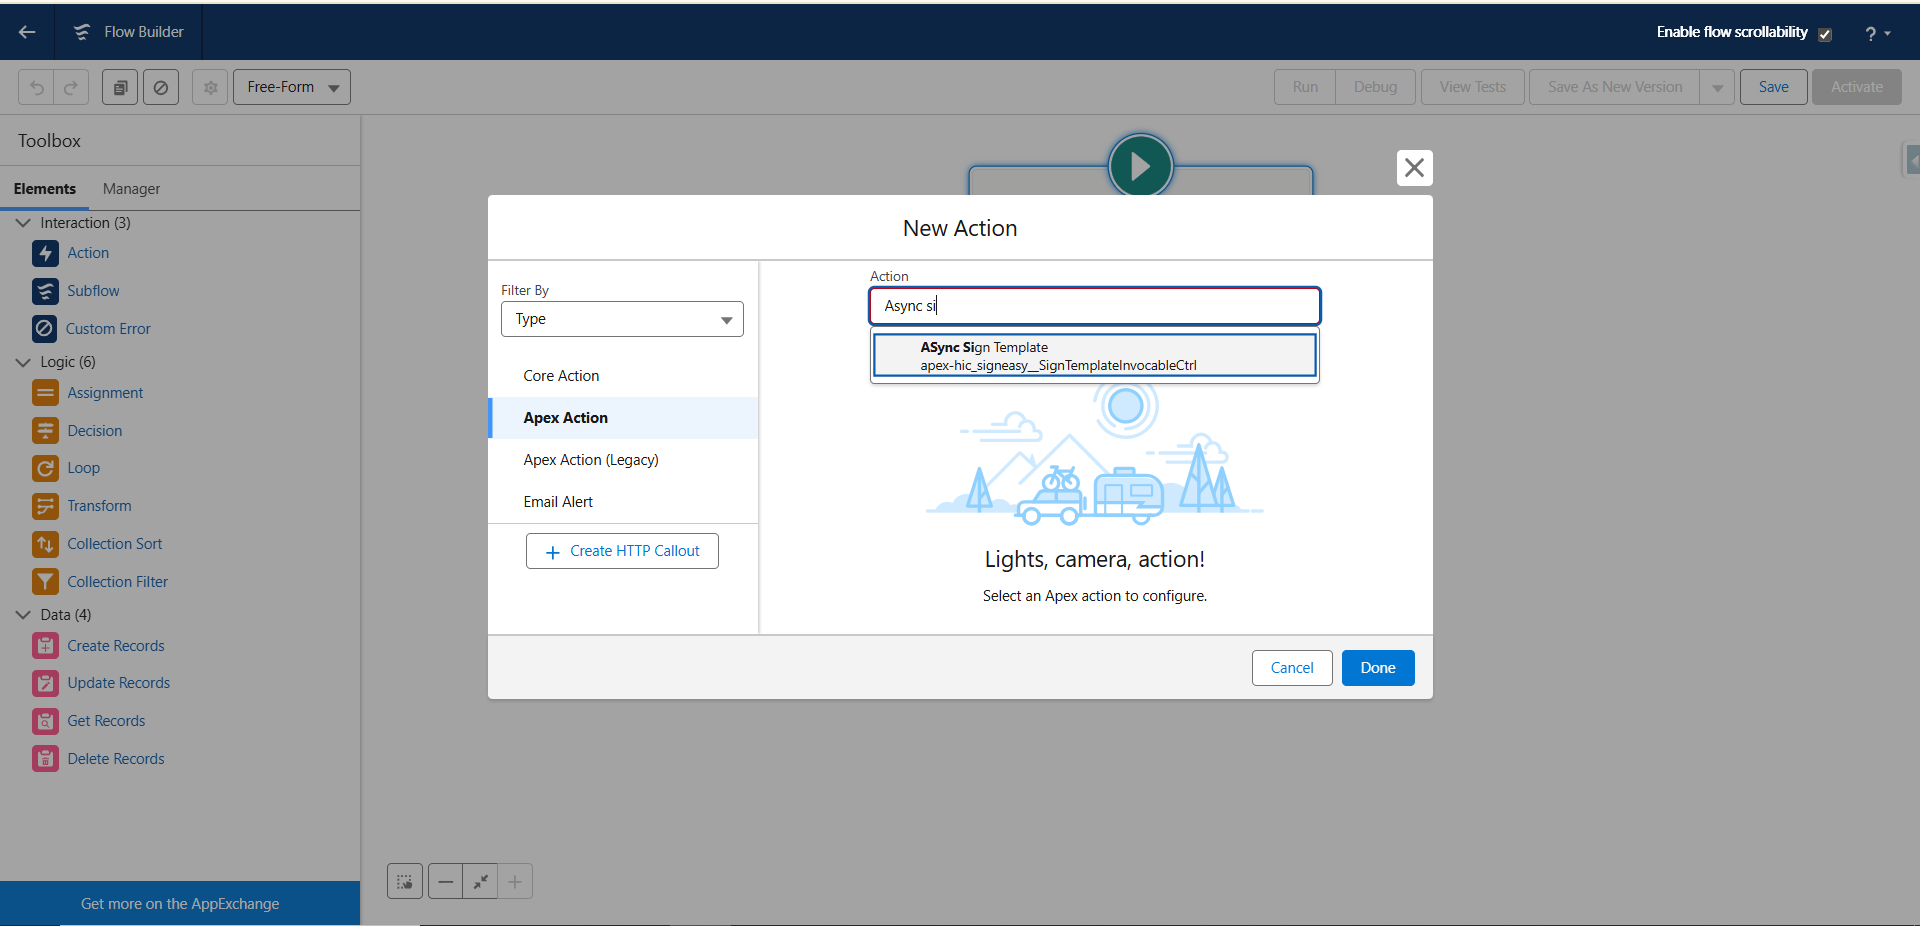
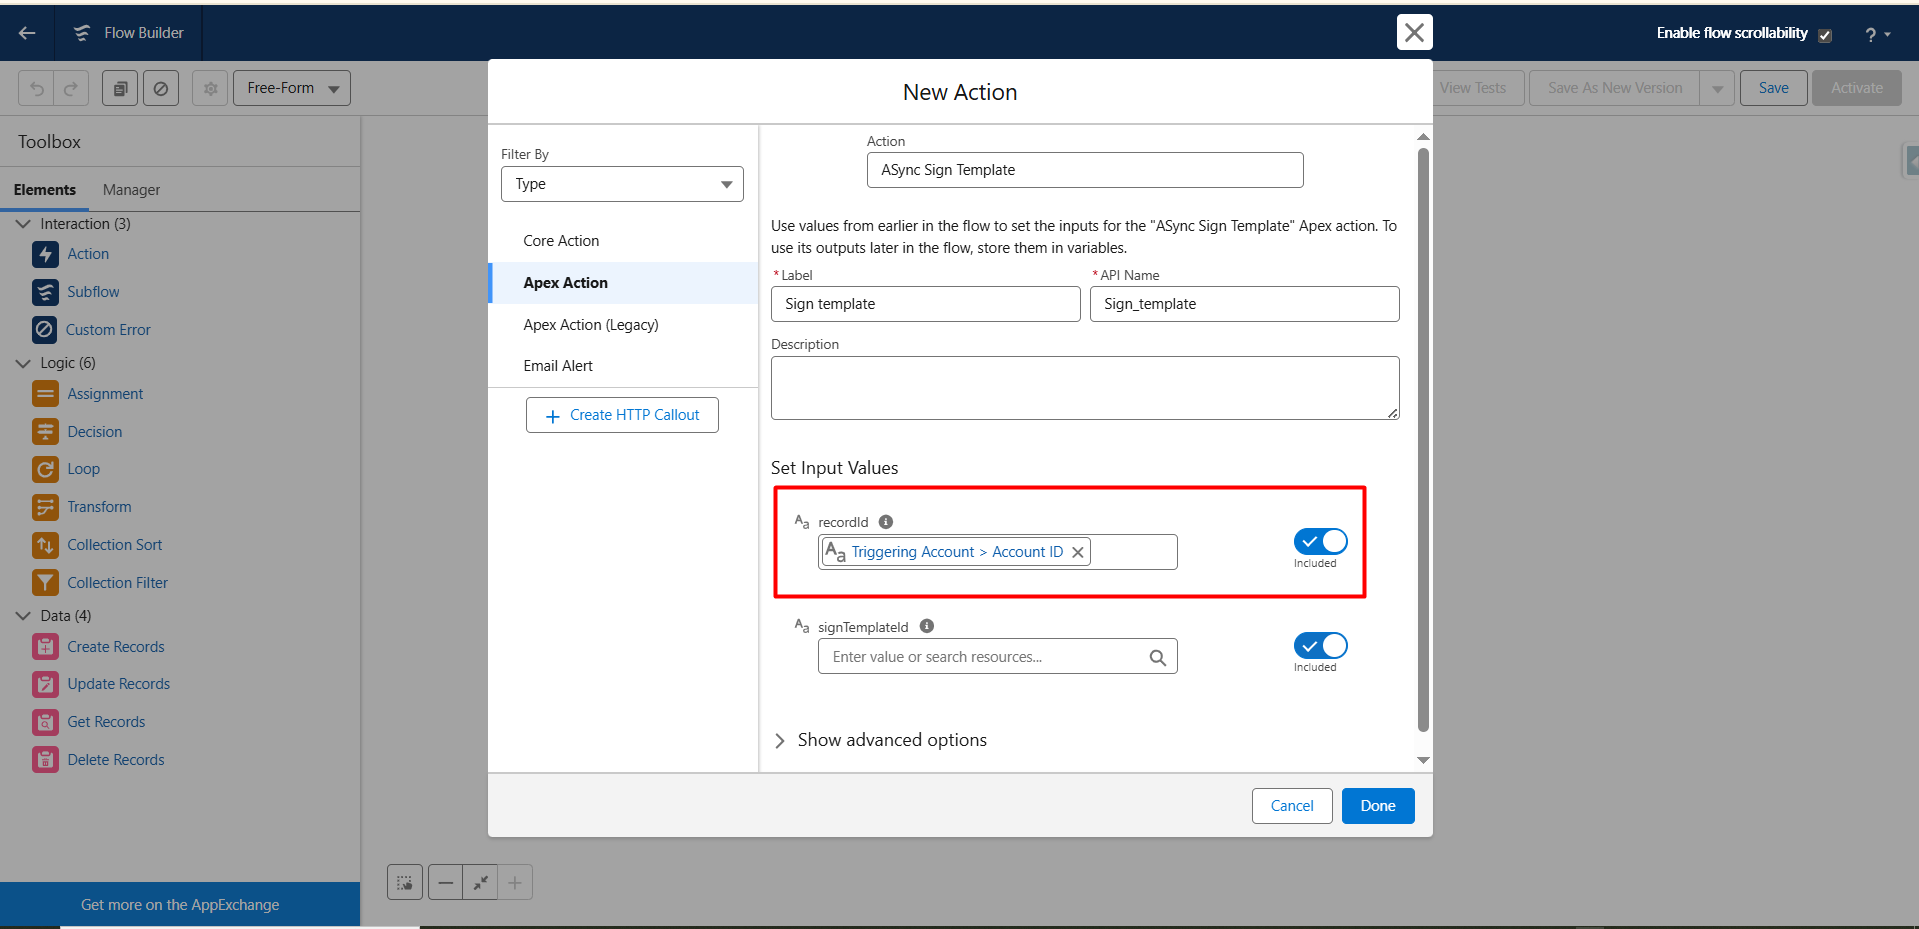
Step 11 :- Next, the New Action page will appear. Filter the actions by Type, select Apex Action, and search for Async Sign Template. Complete all mandatory fields, including Label and API Name, to configure the action. You may customize the Label and API Name according to your preference.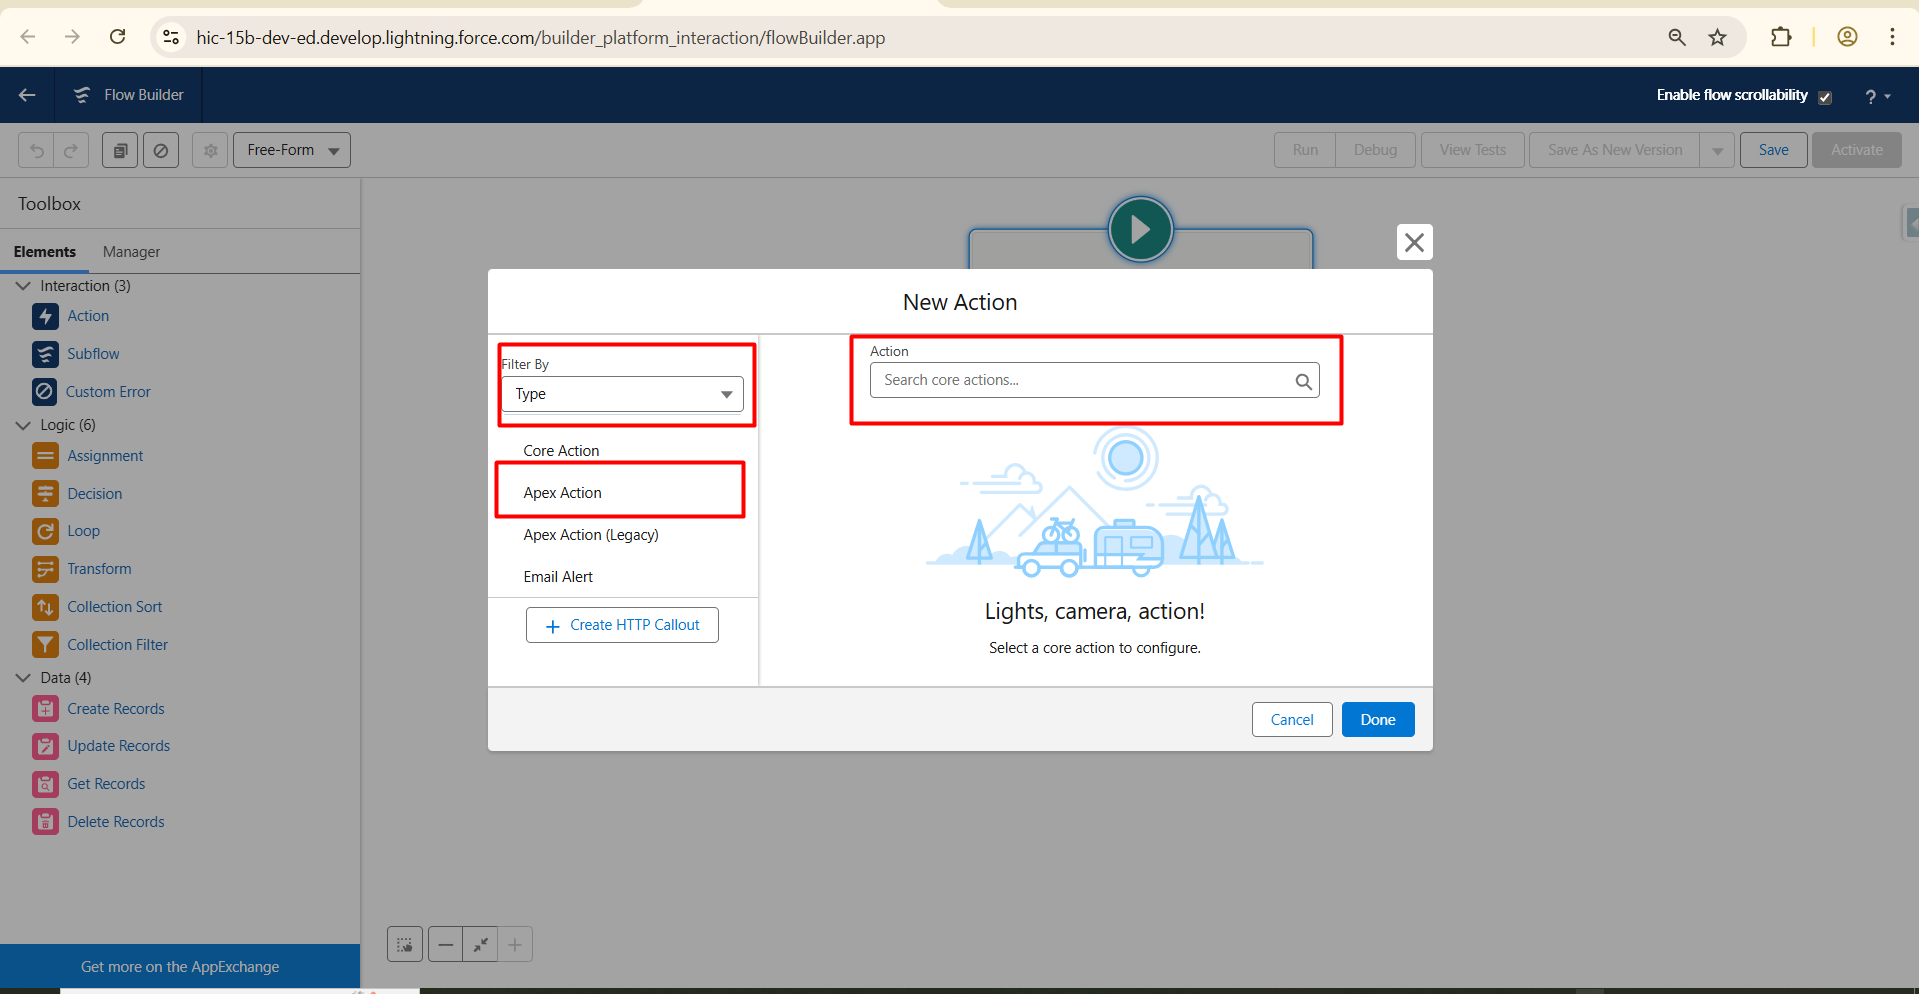

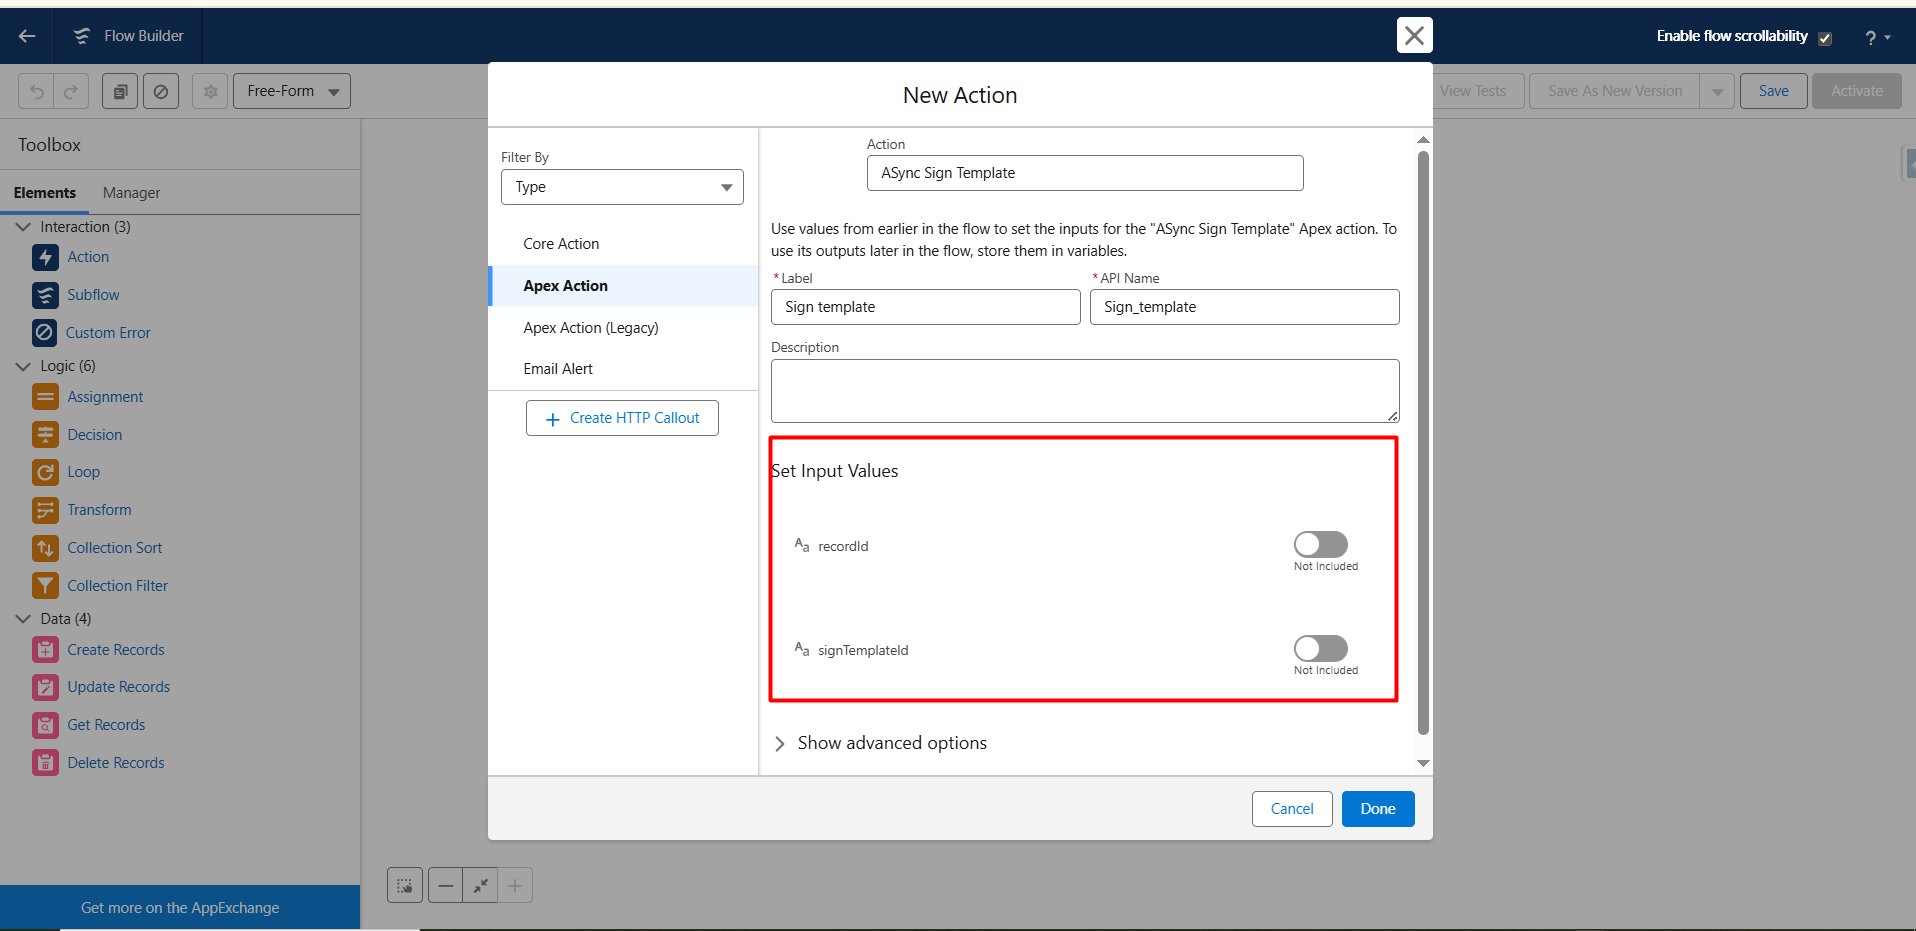
Set Input Values
- This section is used to provide values for the input parameters required by the Apex action. These inputs enable the flow to pass dynamic data to the Apex action, ensuring it executes correctly.
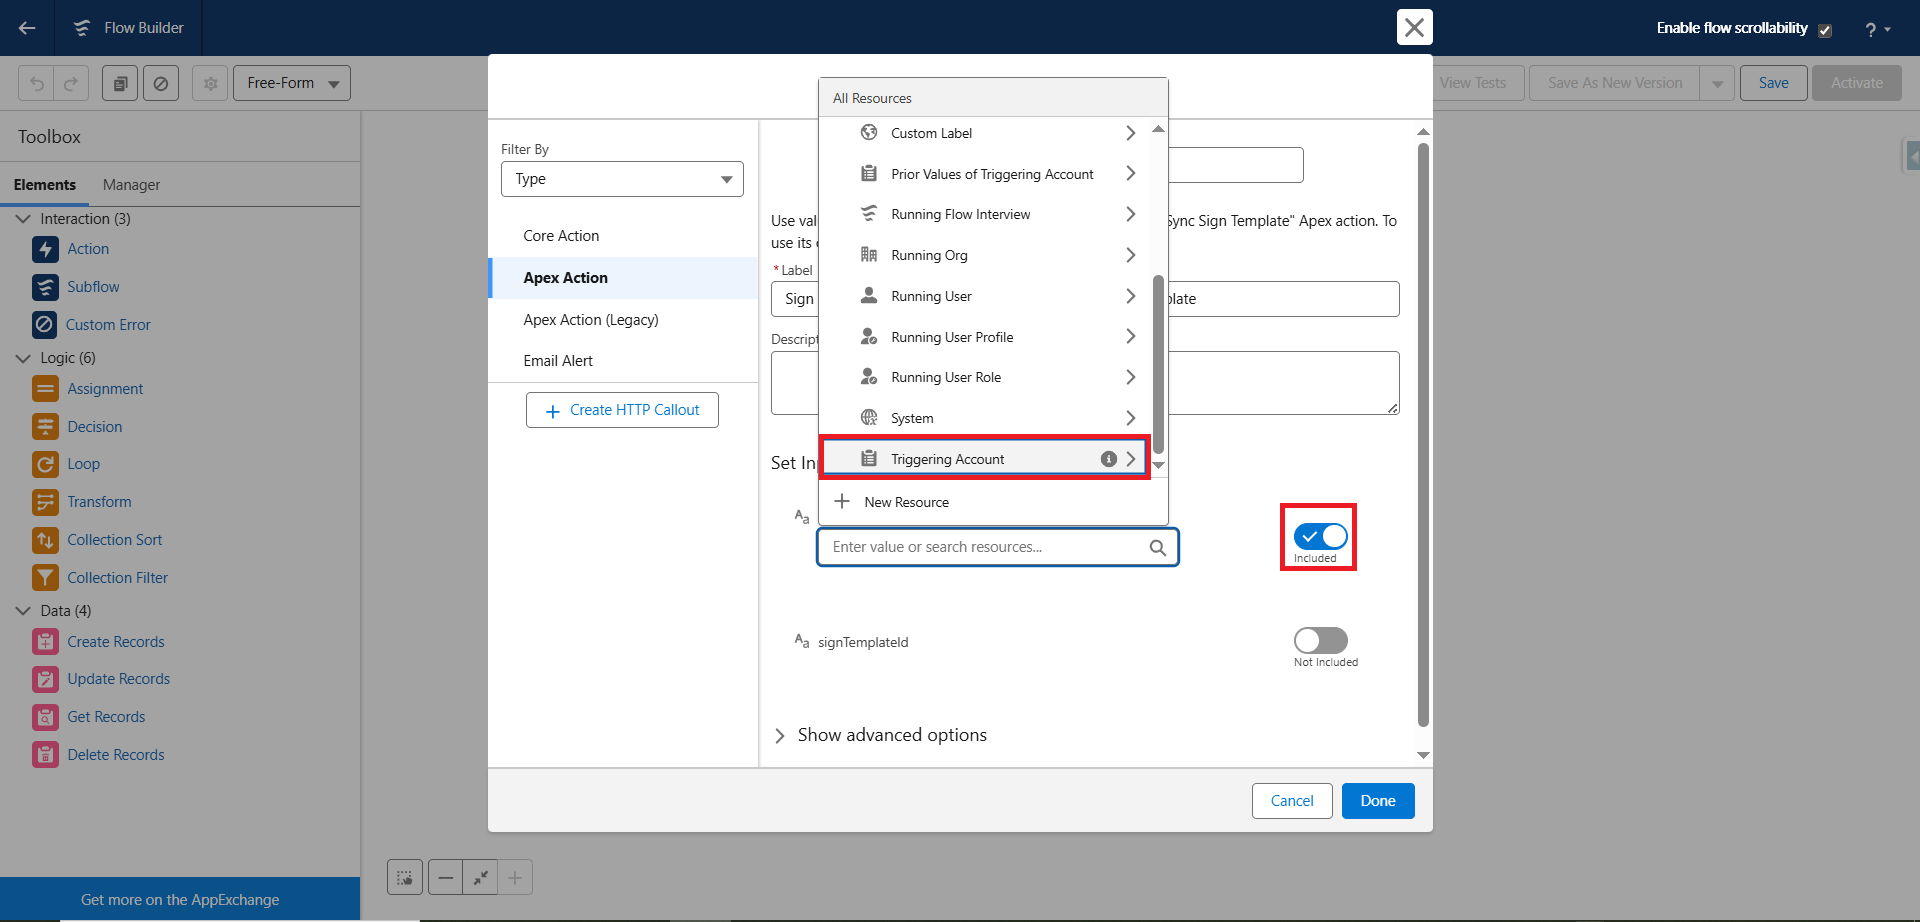
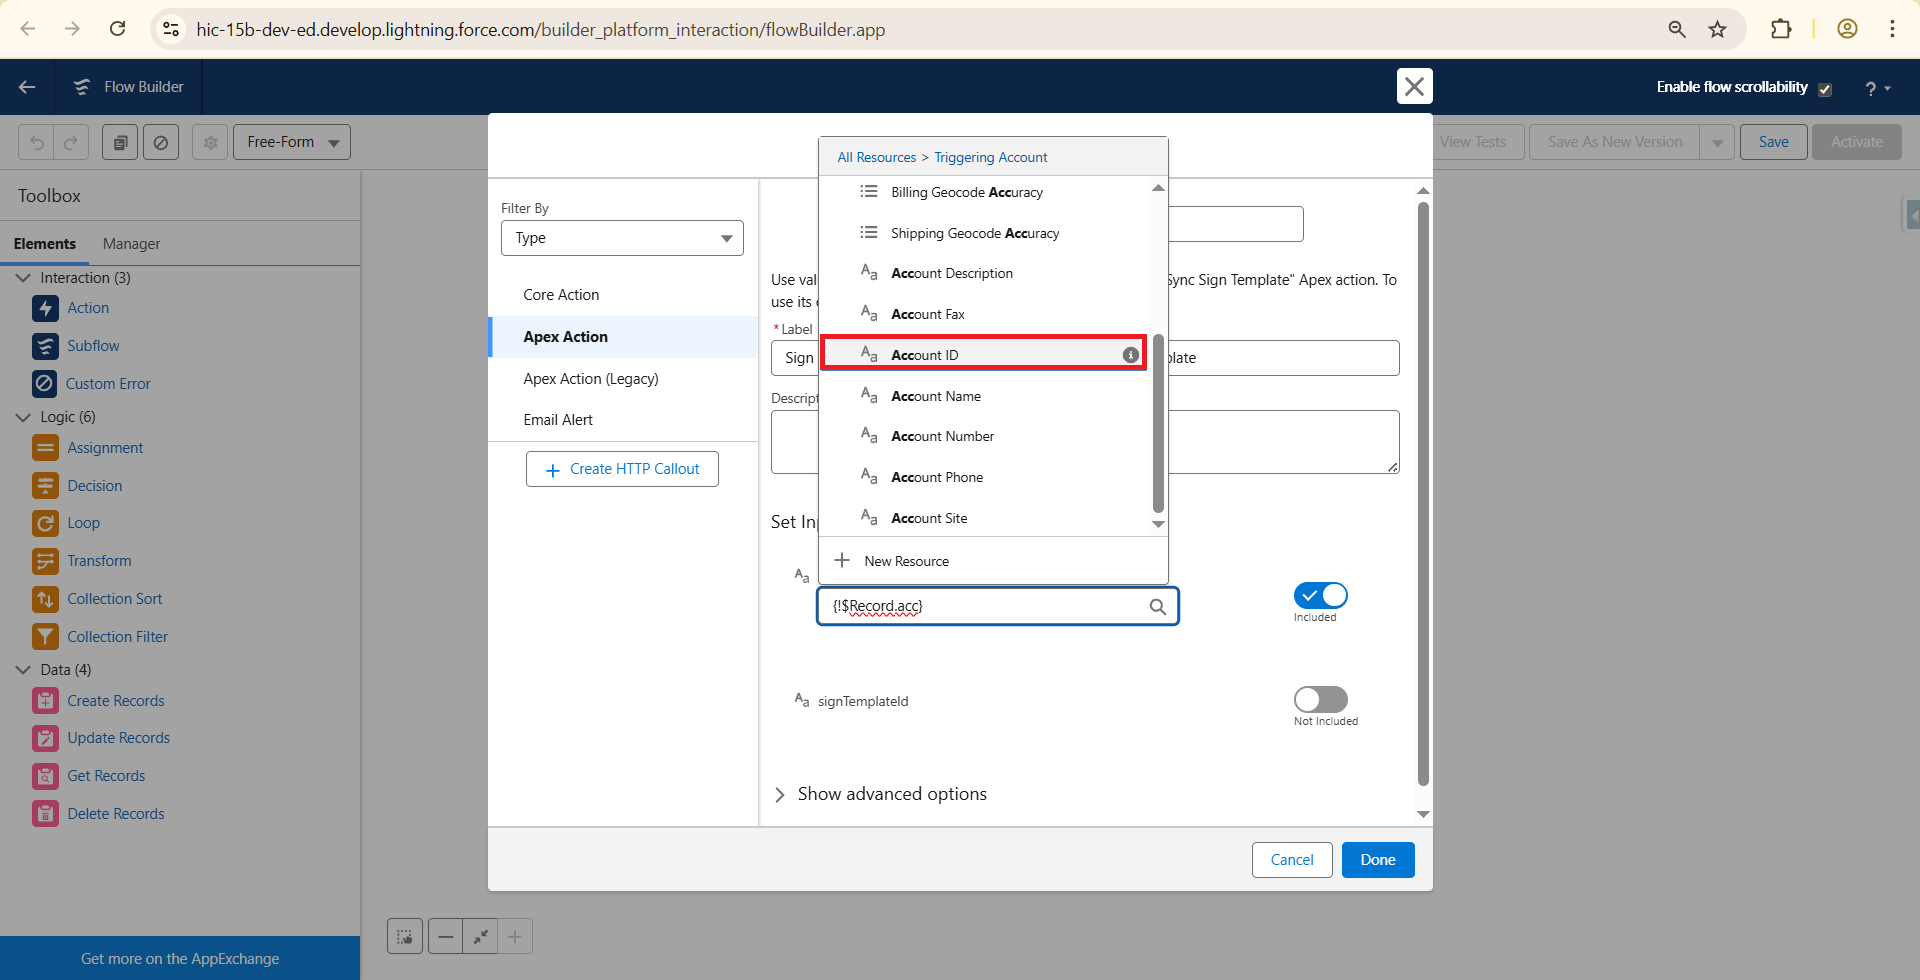
- recordId :- This input is typically the ID of the record that triggered the flow (e.g., a record on which you want to send the template for e-signature).
- By including this, the Apex action knows which Salesforce record it should process.
- signTemplateId :- This input is the ID of the Sign Template that you want to send.
- It tells the Apex action exactly which template to use for the e-signature process.
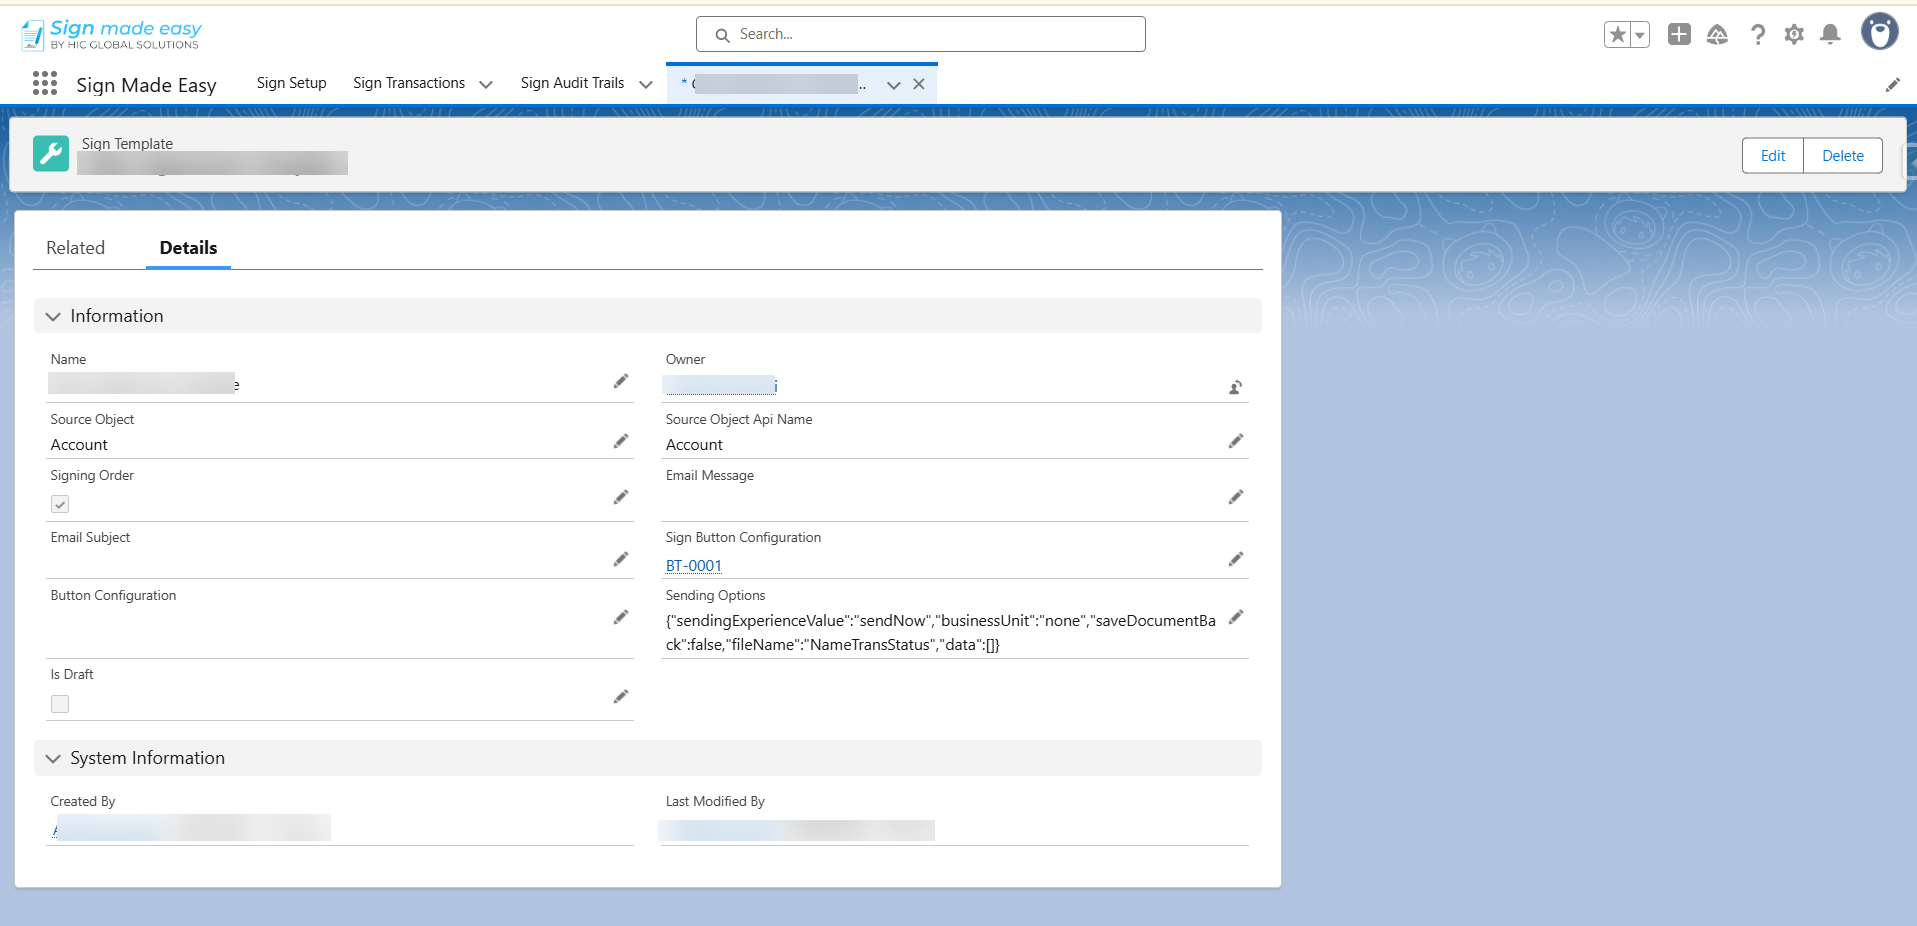
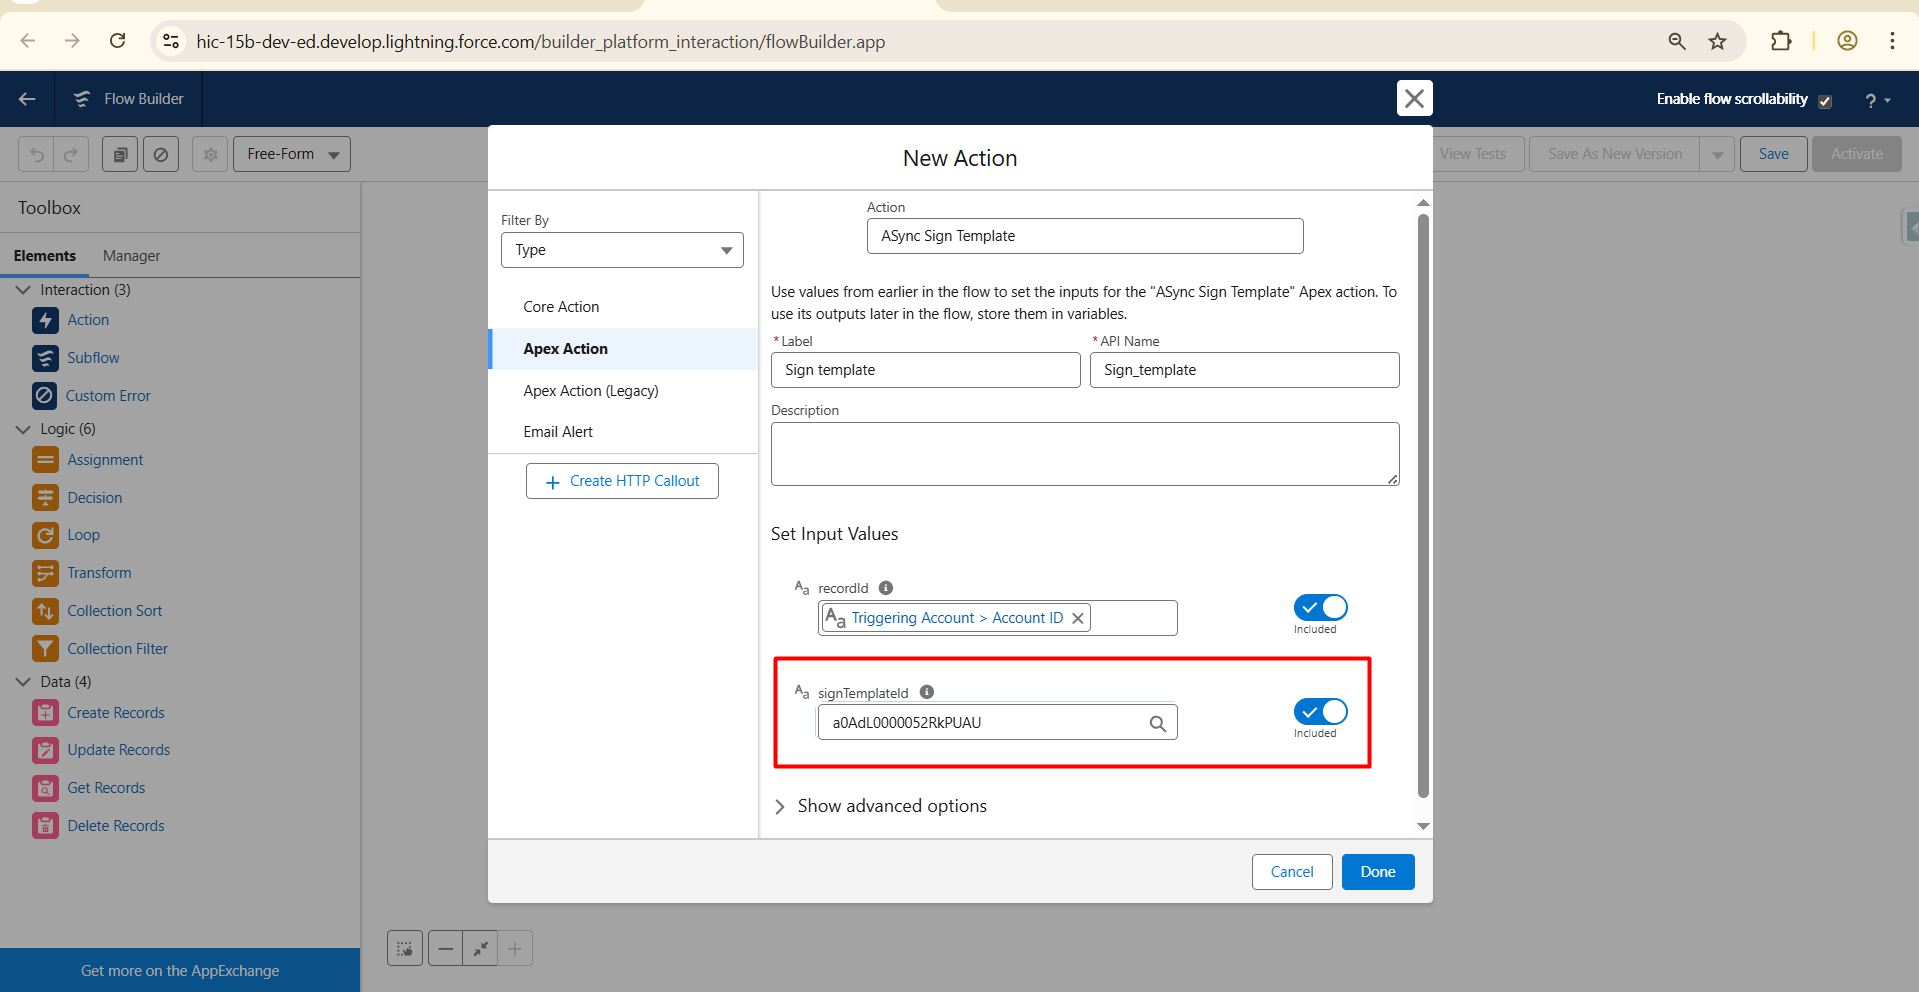
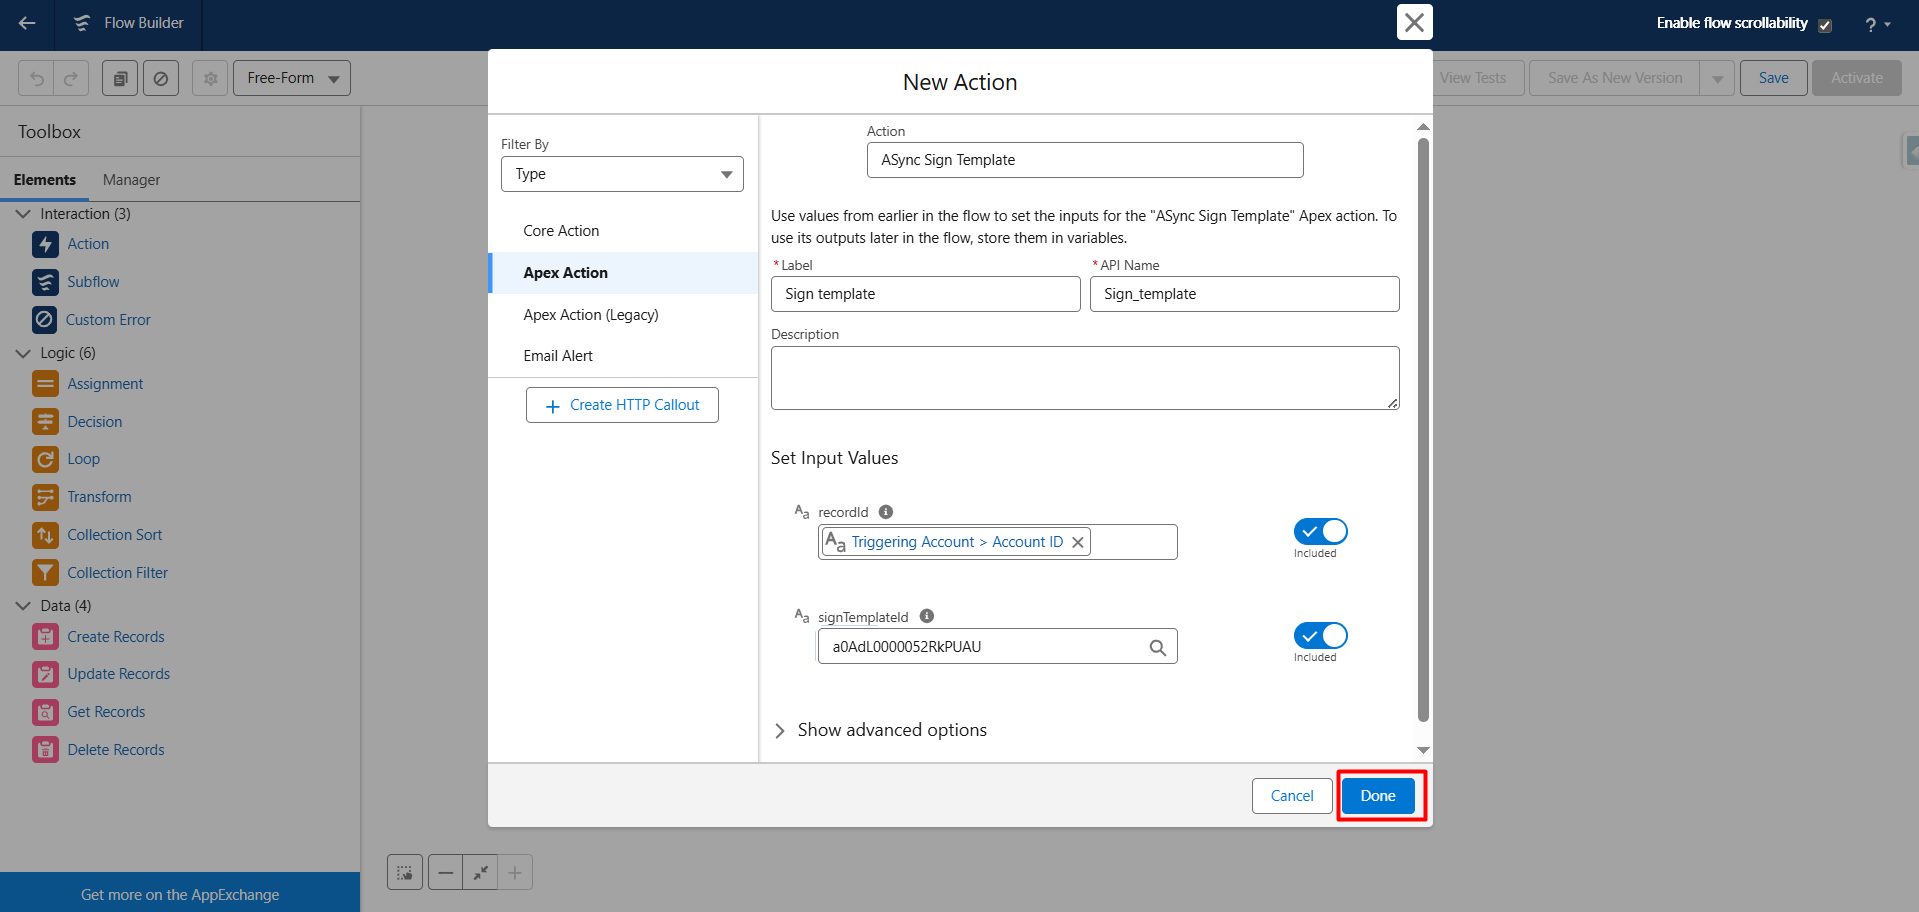
Step 12:- Now, enter the Record ID of the Sign Template you created, and click Done to proceed.
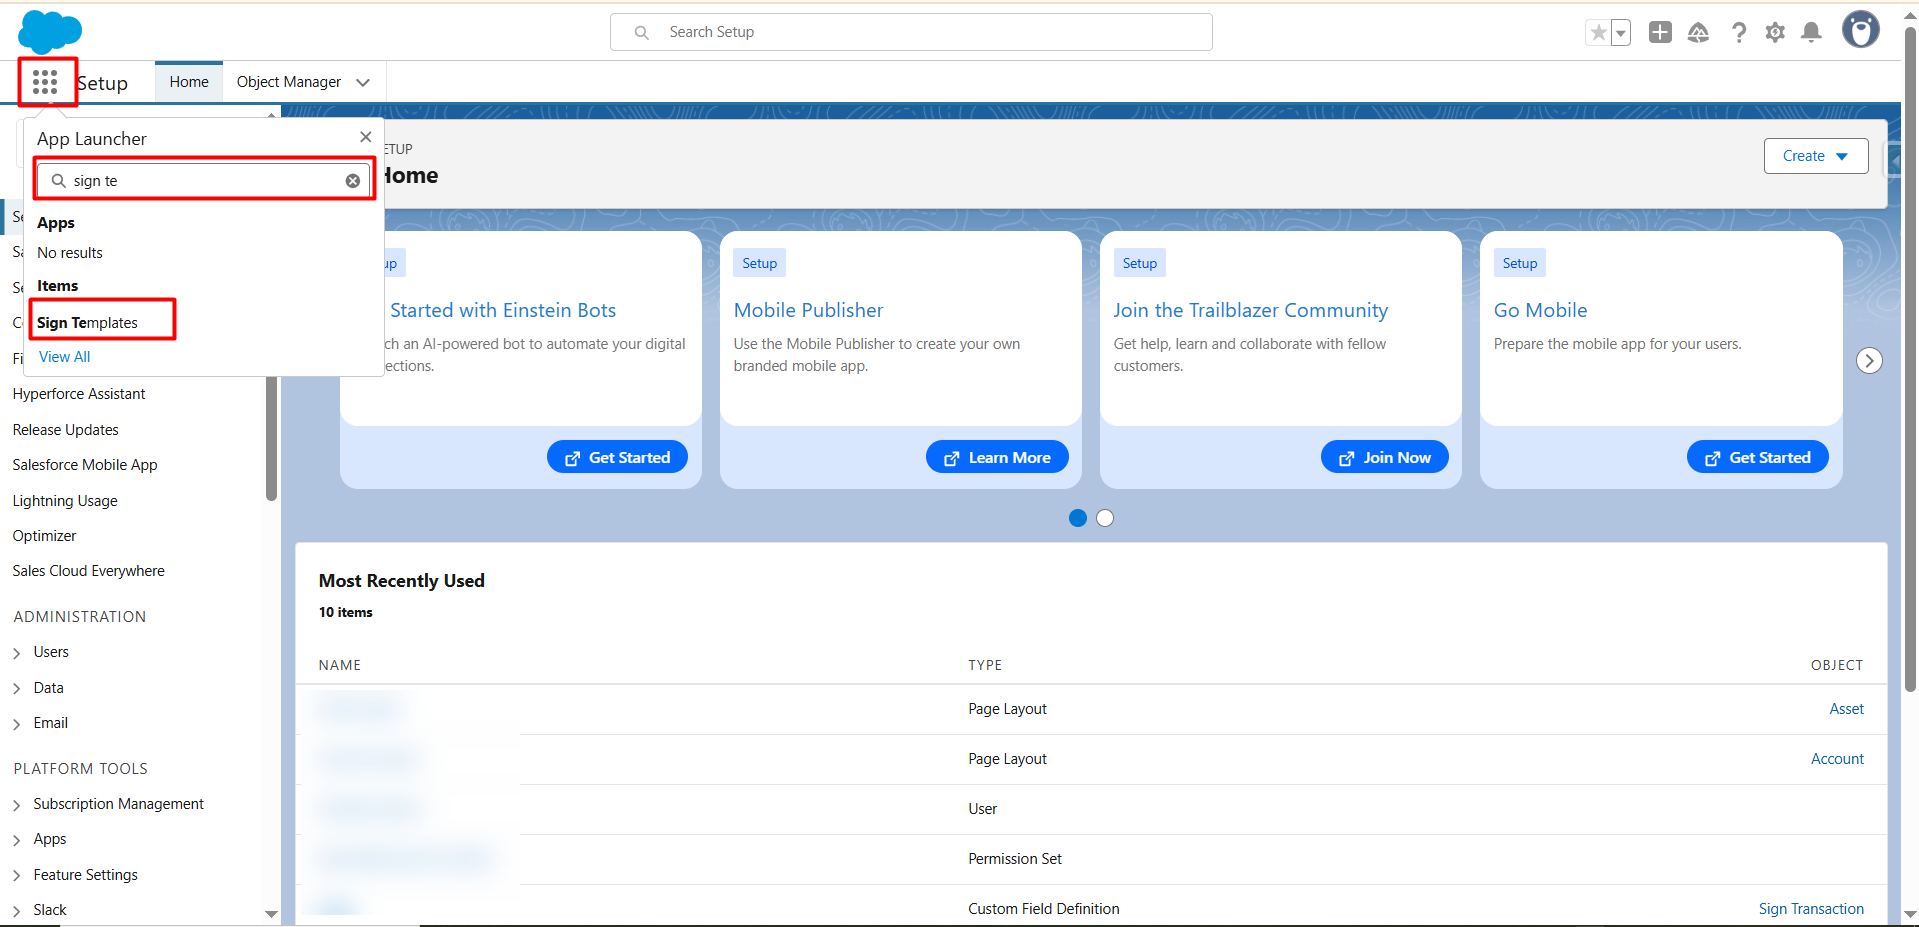
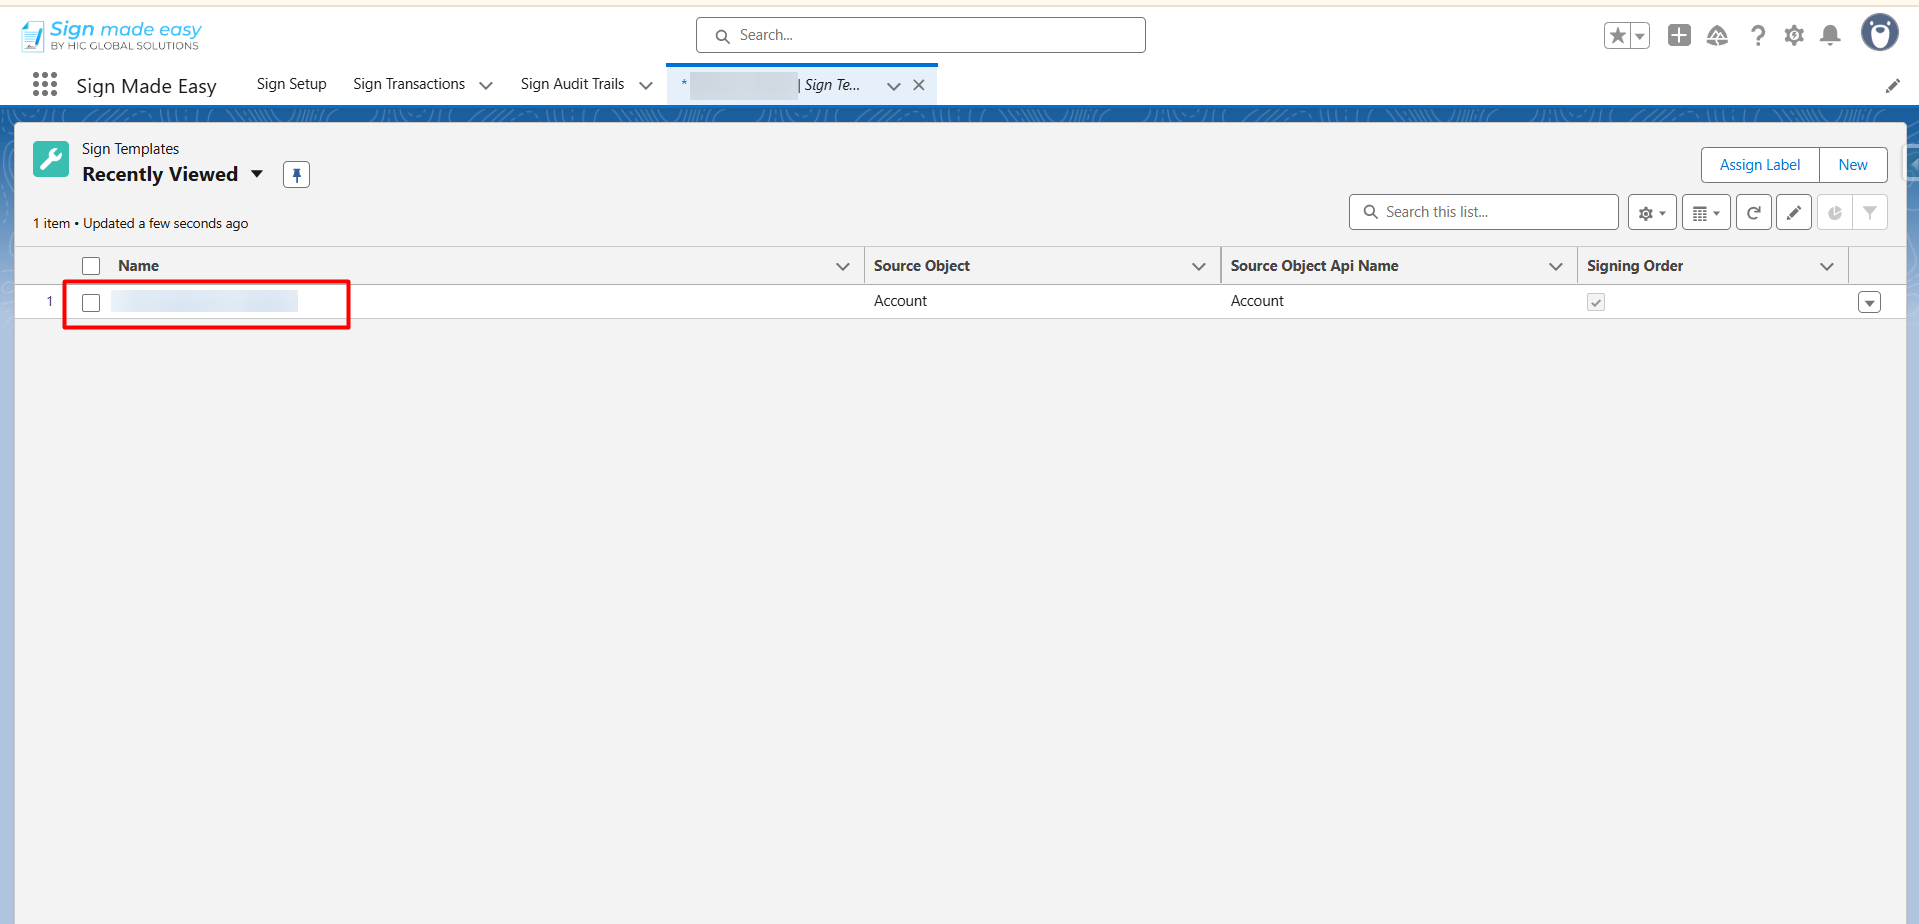
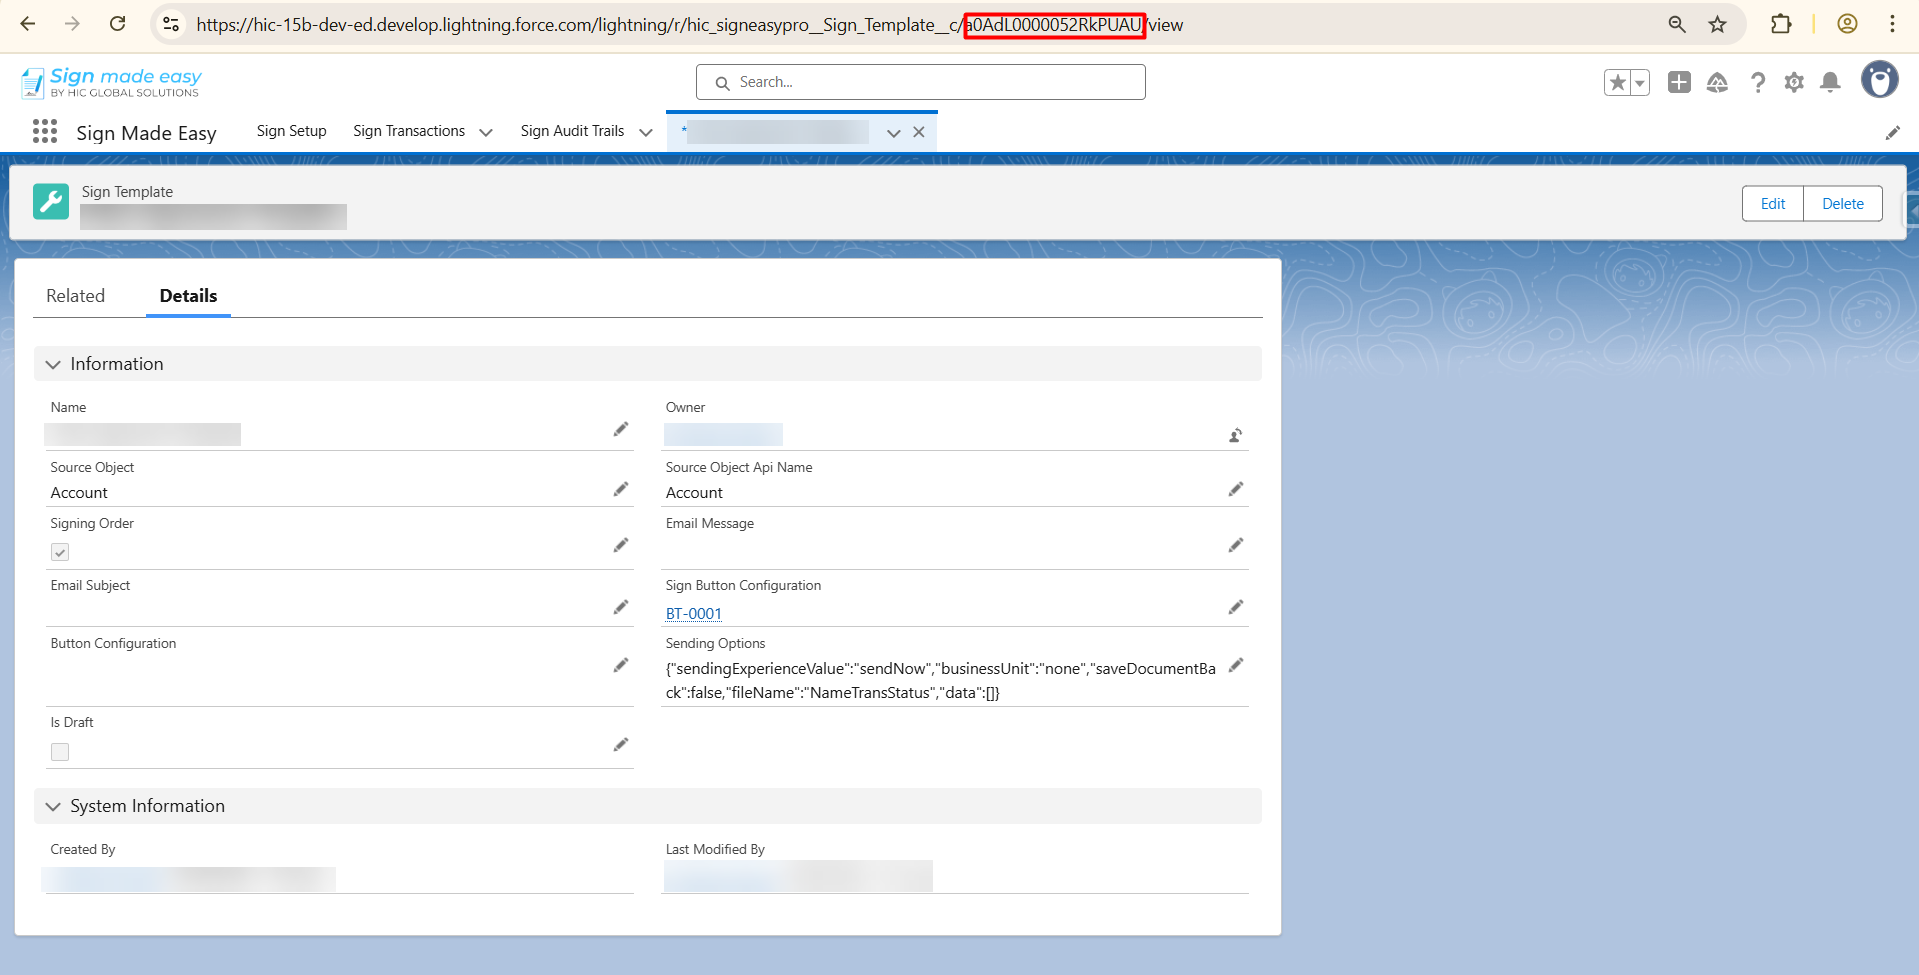
Note:- To obtain the Sign Template Record ID, open the Sign Template object by clicking on the App Launcher and searching for 'Sign Template' in the search bar. Open the object, select the template record you want to send to the recipient, and copy the Record ID from the URL, as shown in the image below.
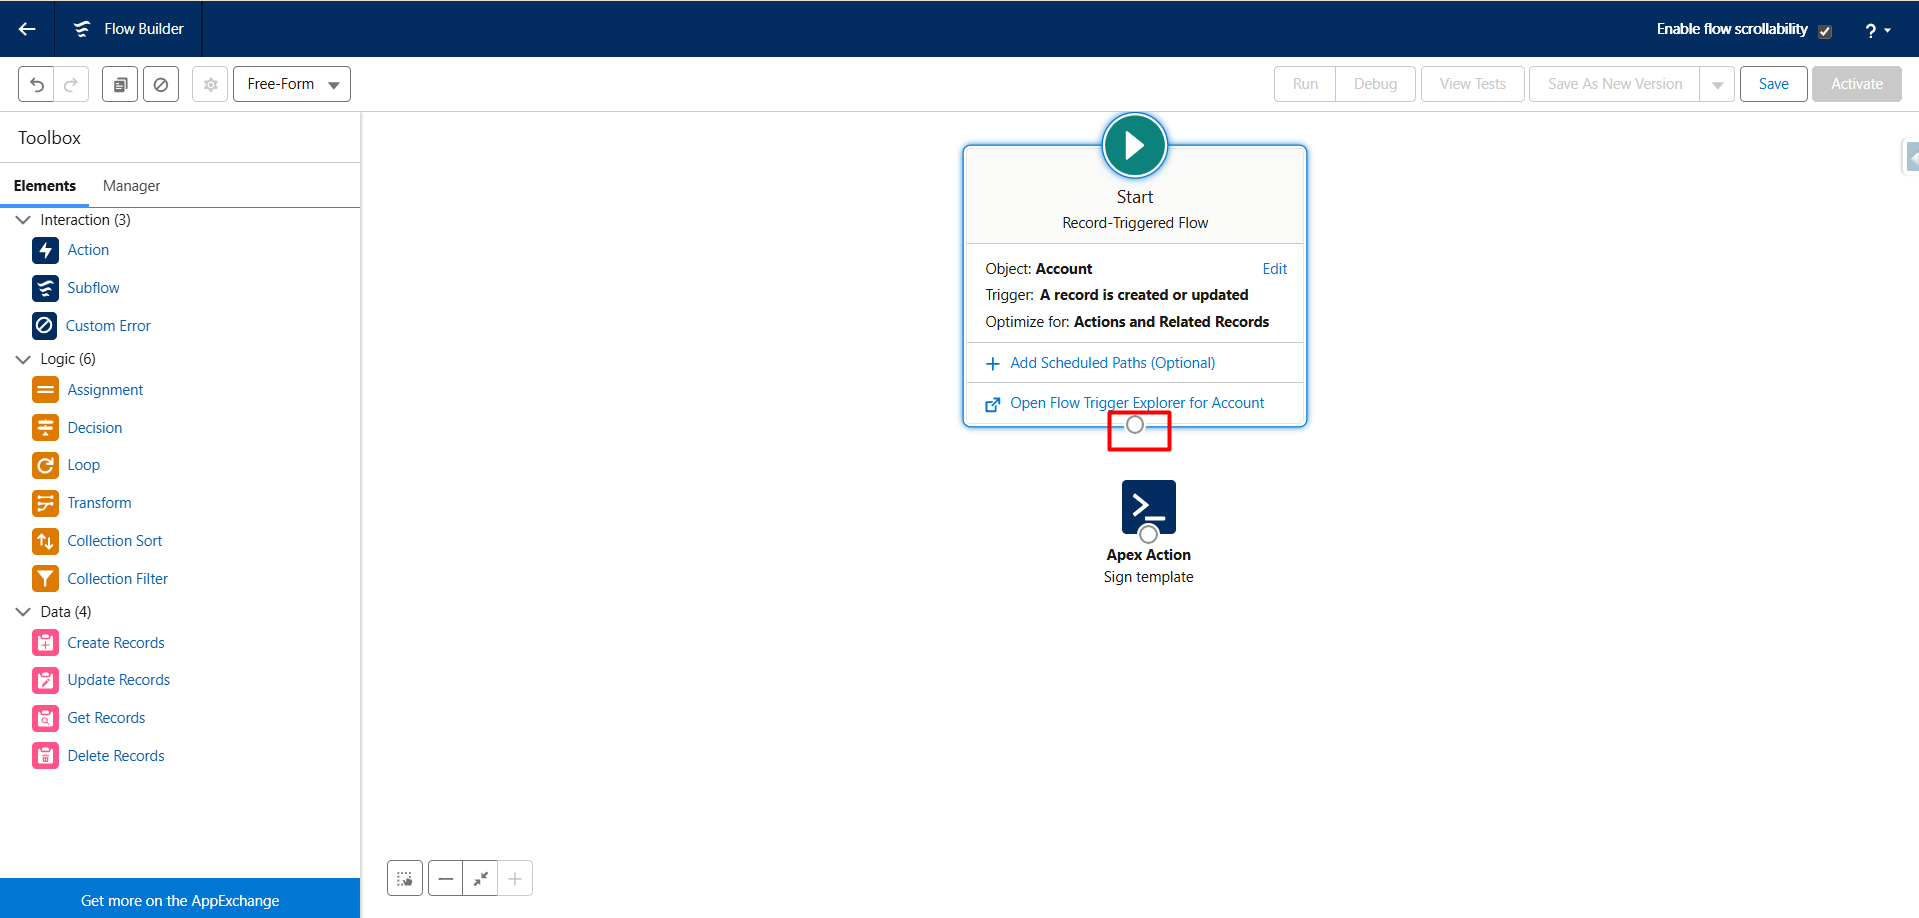
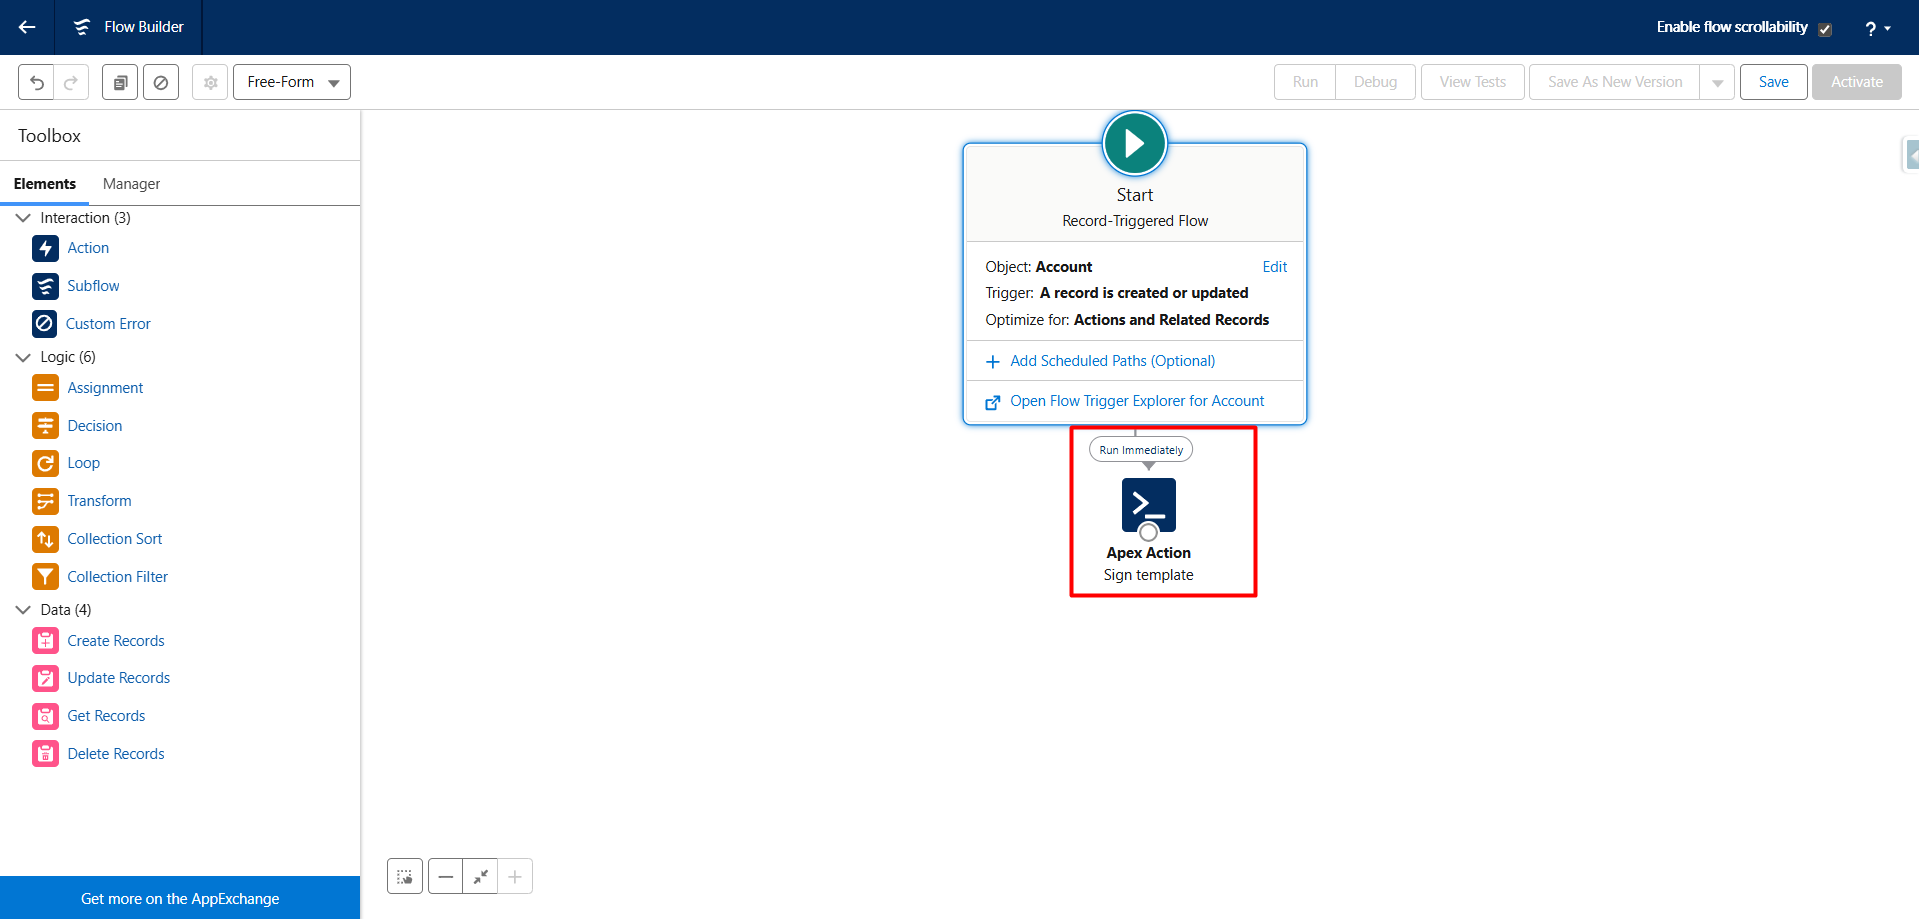
Step 13:- Connecting the Elements
- Click the small circle at the bottom of the Start element.
- Drag the arrow to the Apex Action element.
- This establishes the flow path, telling Salesforce to execute the Apex action immediately after the flow is triggered.
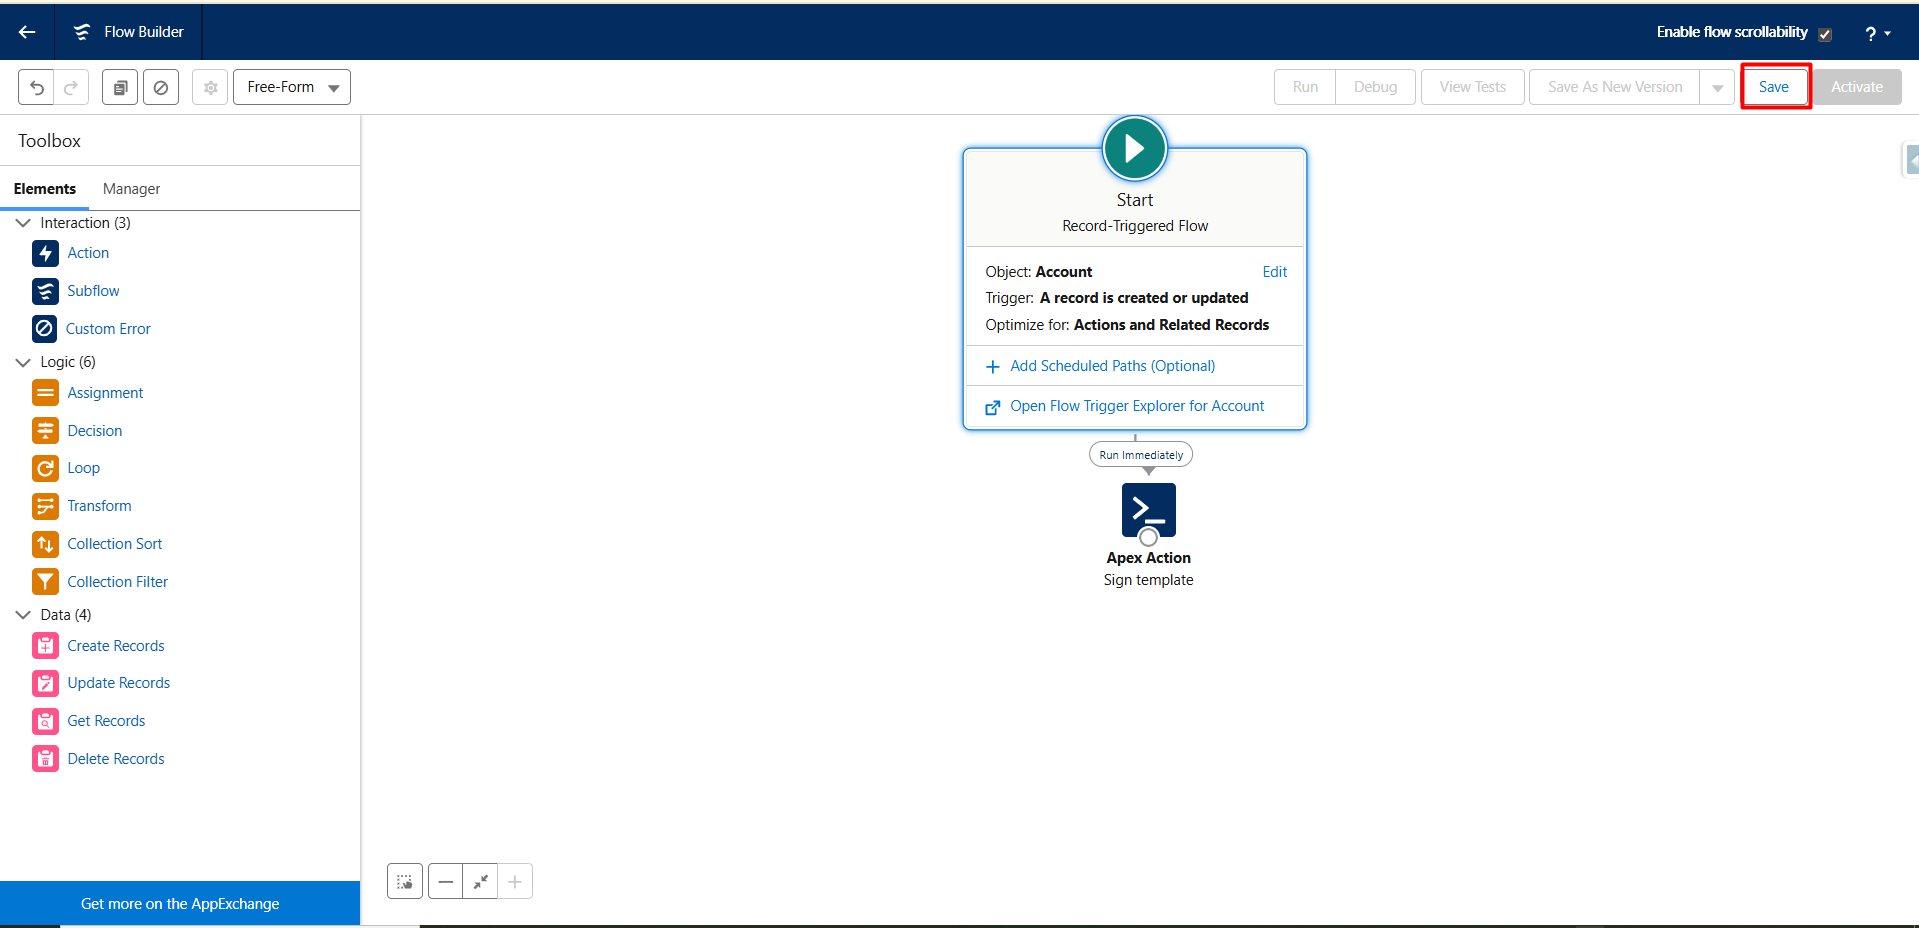
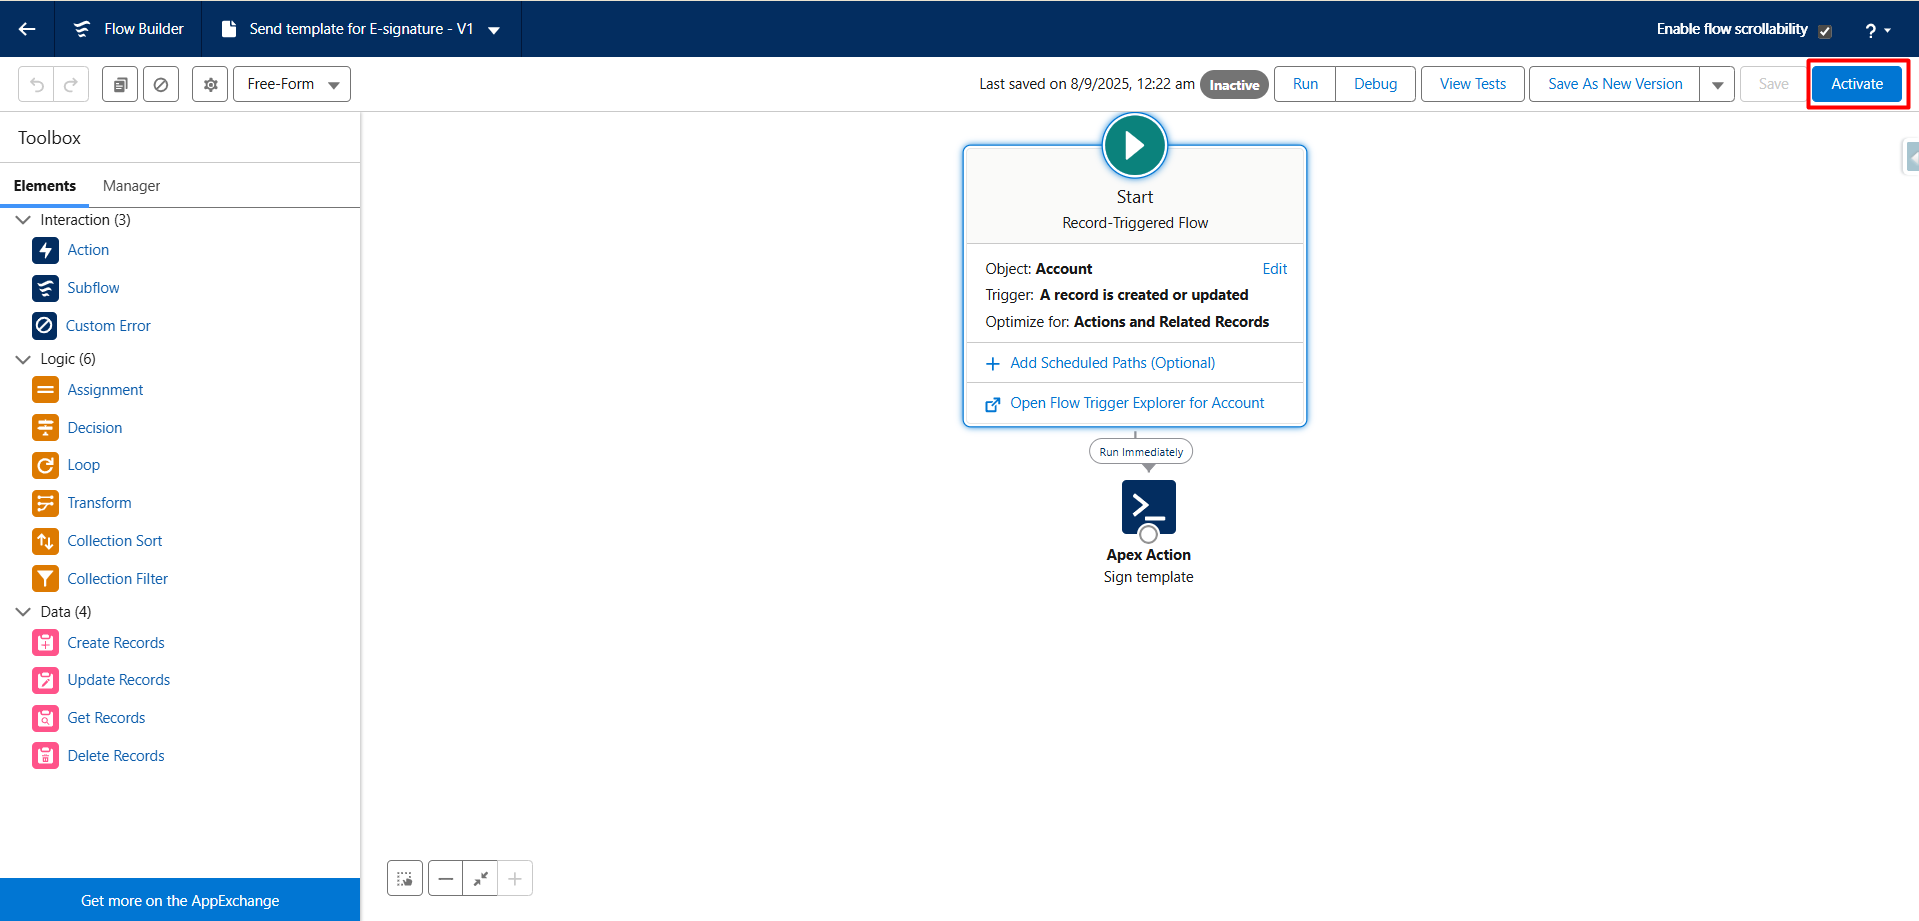
Step 14:- Save and Activate
- After defining the connection and input values, click Save.
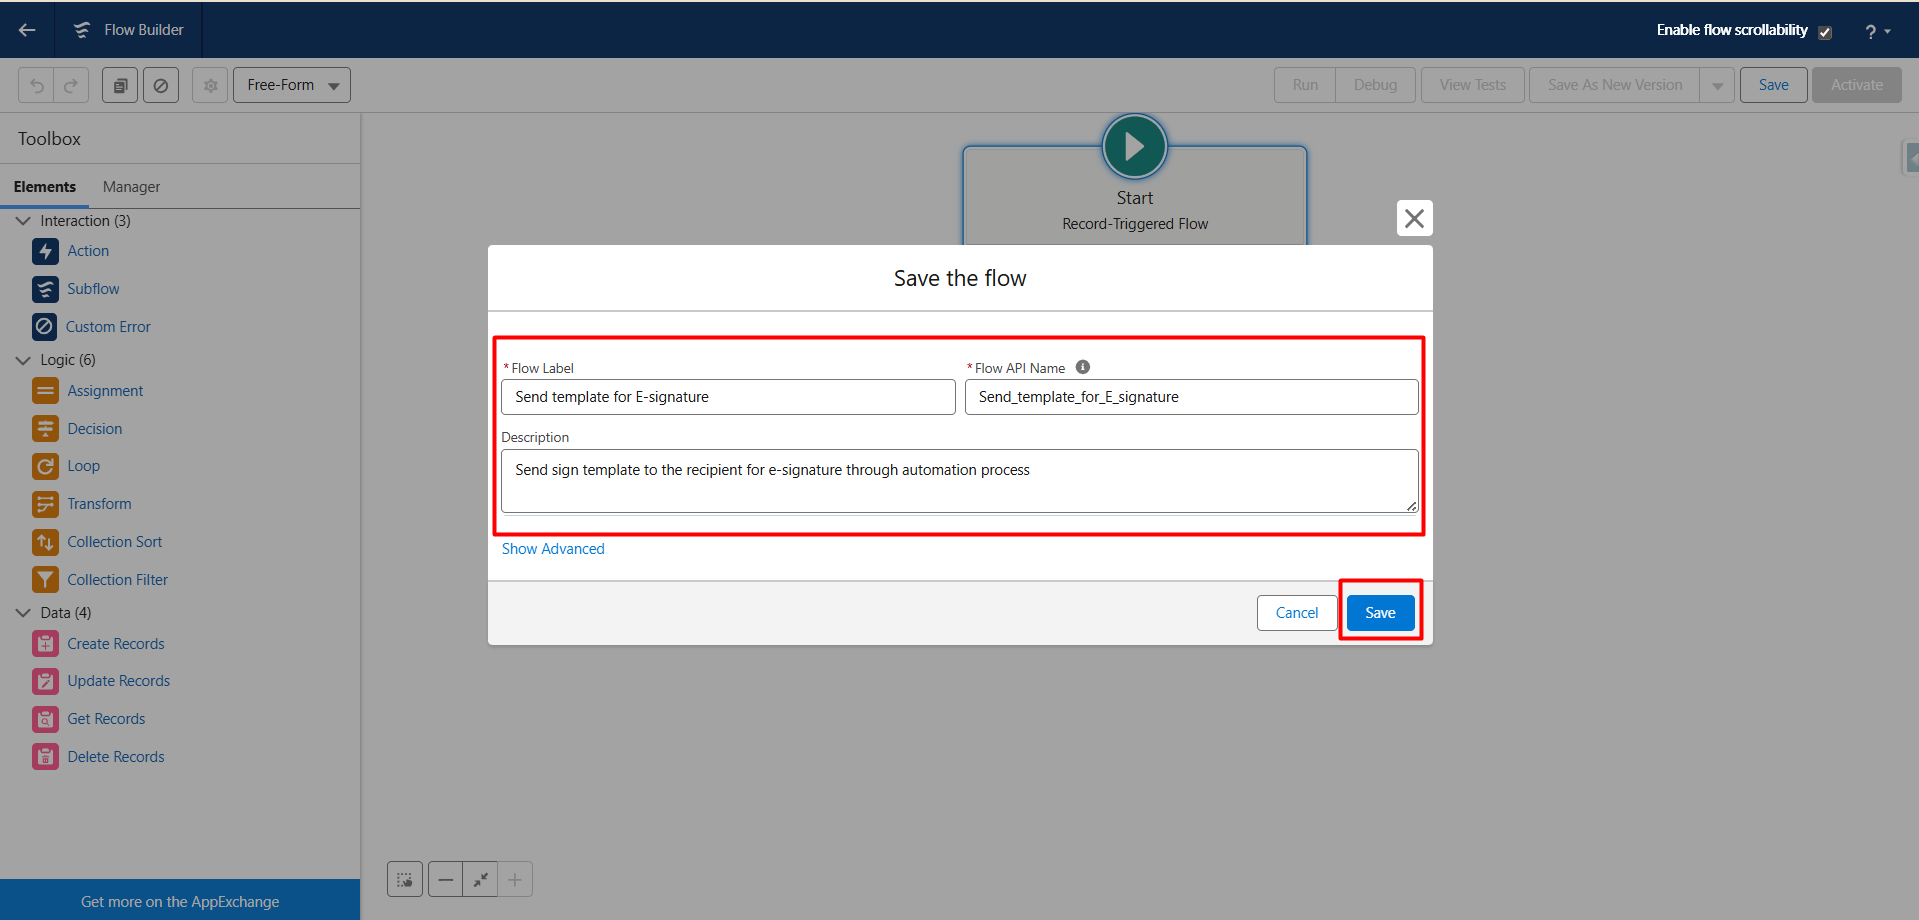
To save the flow, you must enter both a Name and an API Name. You can select these according to your preference, but make sure they are meaningful and descriptive, clearly reflecting the purpose of the flow. This ensures easy identification and maintains consistency across your Salesforce org - Then click Activate to make the flow live.

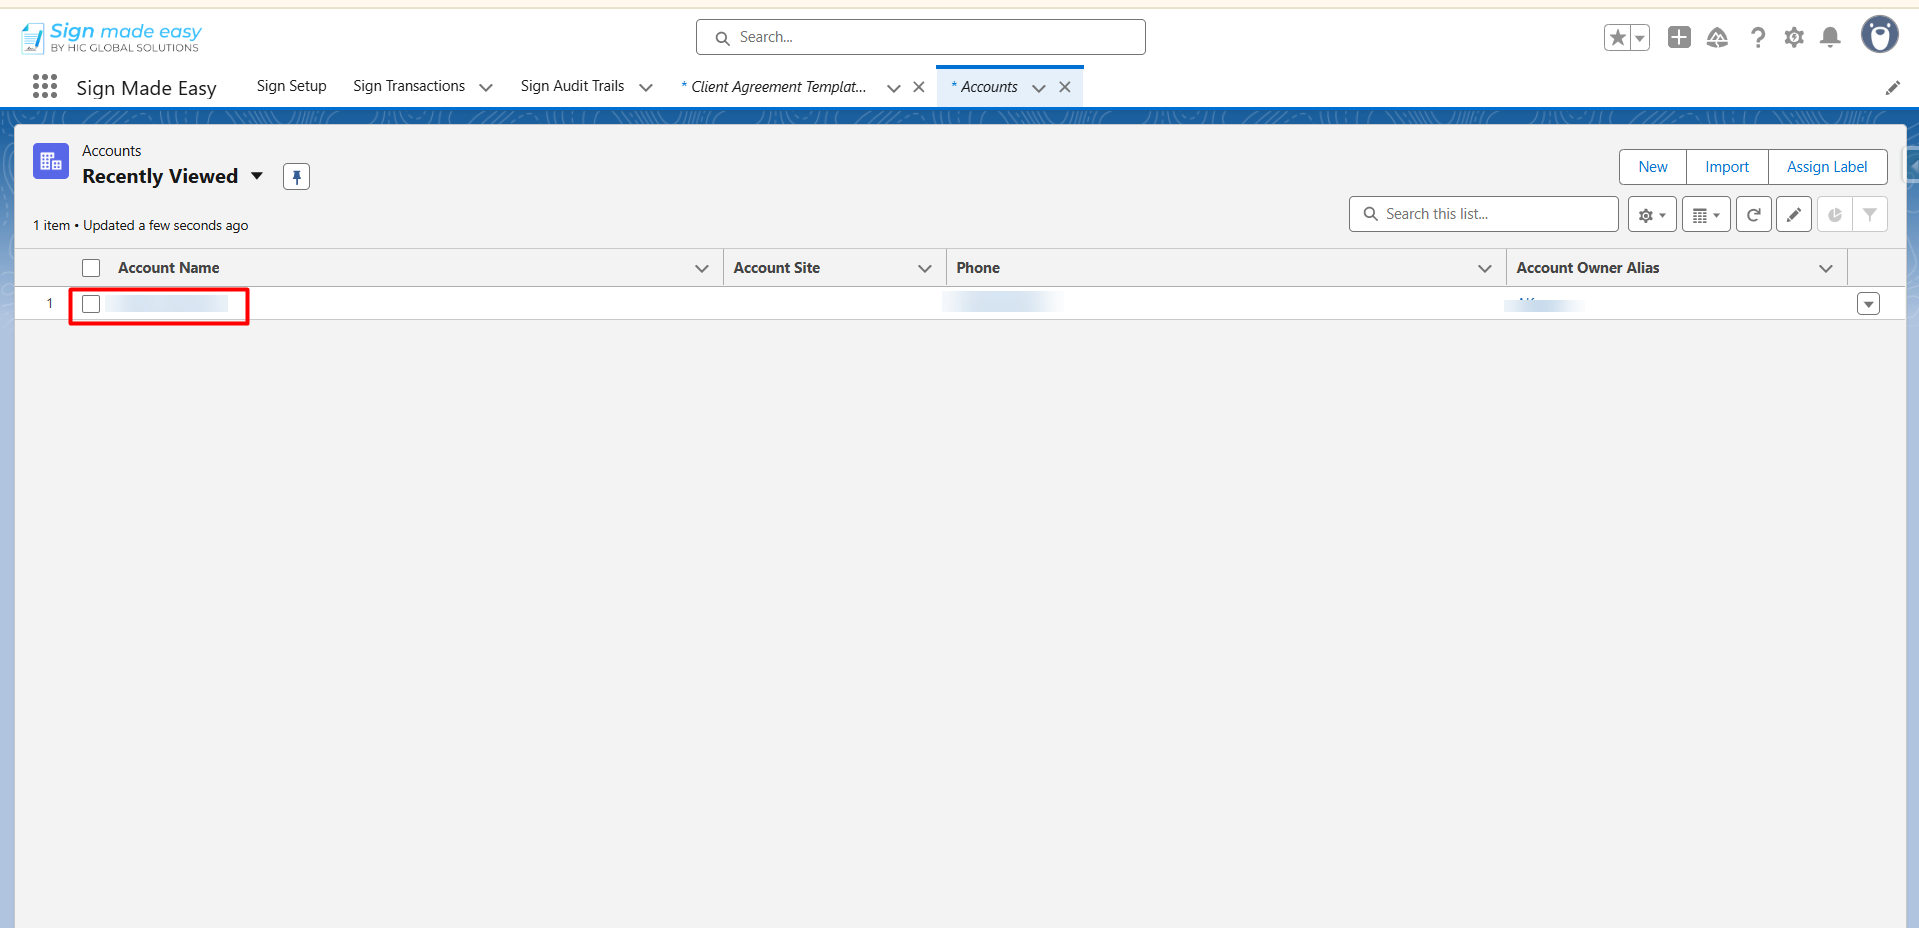
Step 15:- Now, either update an existing record or create a new record for the object on which you configured the trigger conditions in the flow. This action will initiate the flow and send the email as defined in your automation.
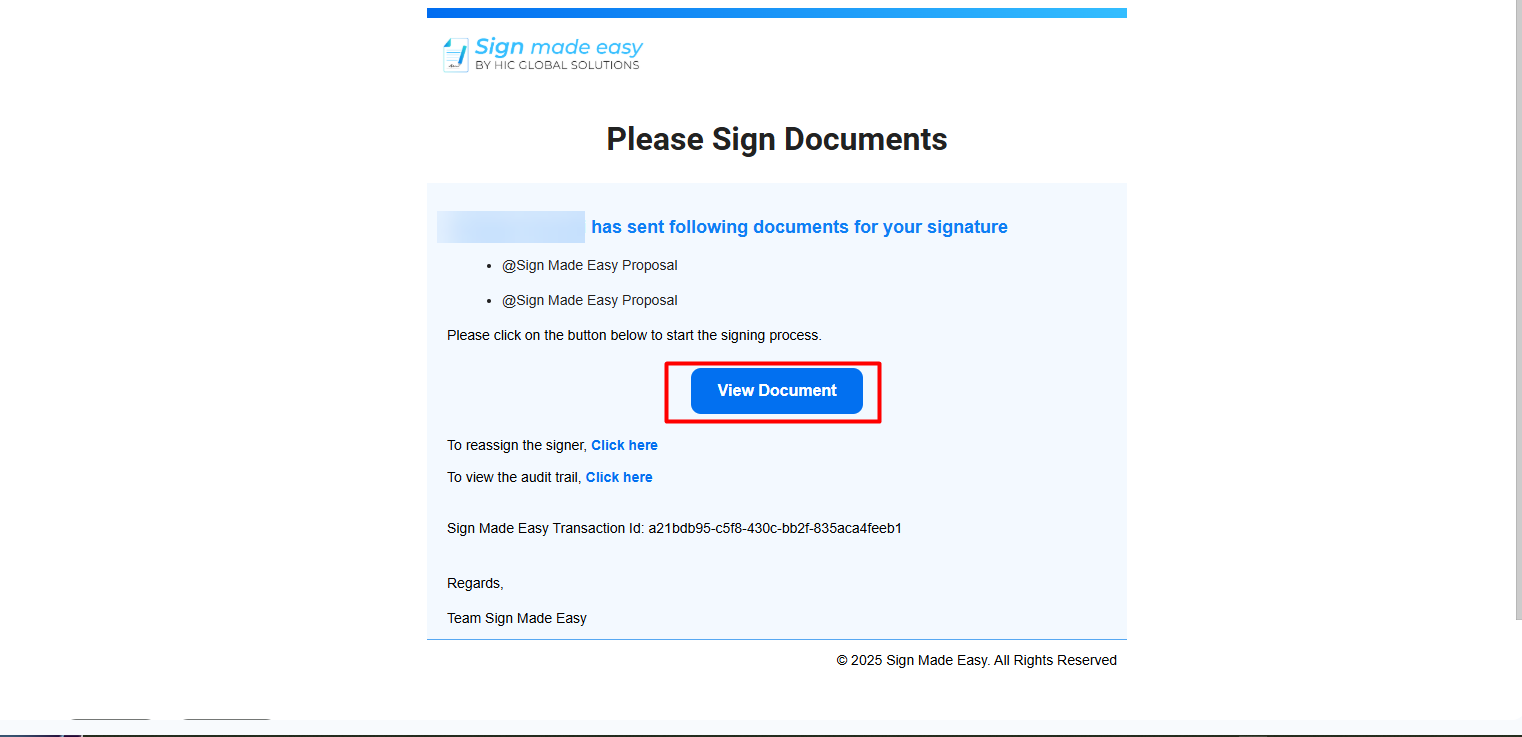
 Step 16:- After updating or creating a record for the object where the automation flow is configured, the recipients will receive an email notification. To complete the e-signature process, open the email and click the “View Document” button.
Was this article helpful?
That’s Great!
Thank you for your feedback
Sorry! We couldn't be helpful
Thank you for your feedback
Feedback sent
We appreciate your effort and will try to fix the article