Note: To save the signed document to the parent record without storing the original document, please ensure the following settings are configured correctly:
- Enable Document Cloning = False
- Save Document Back to Salesforce Record = True
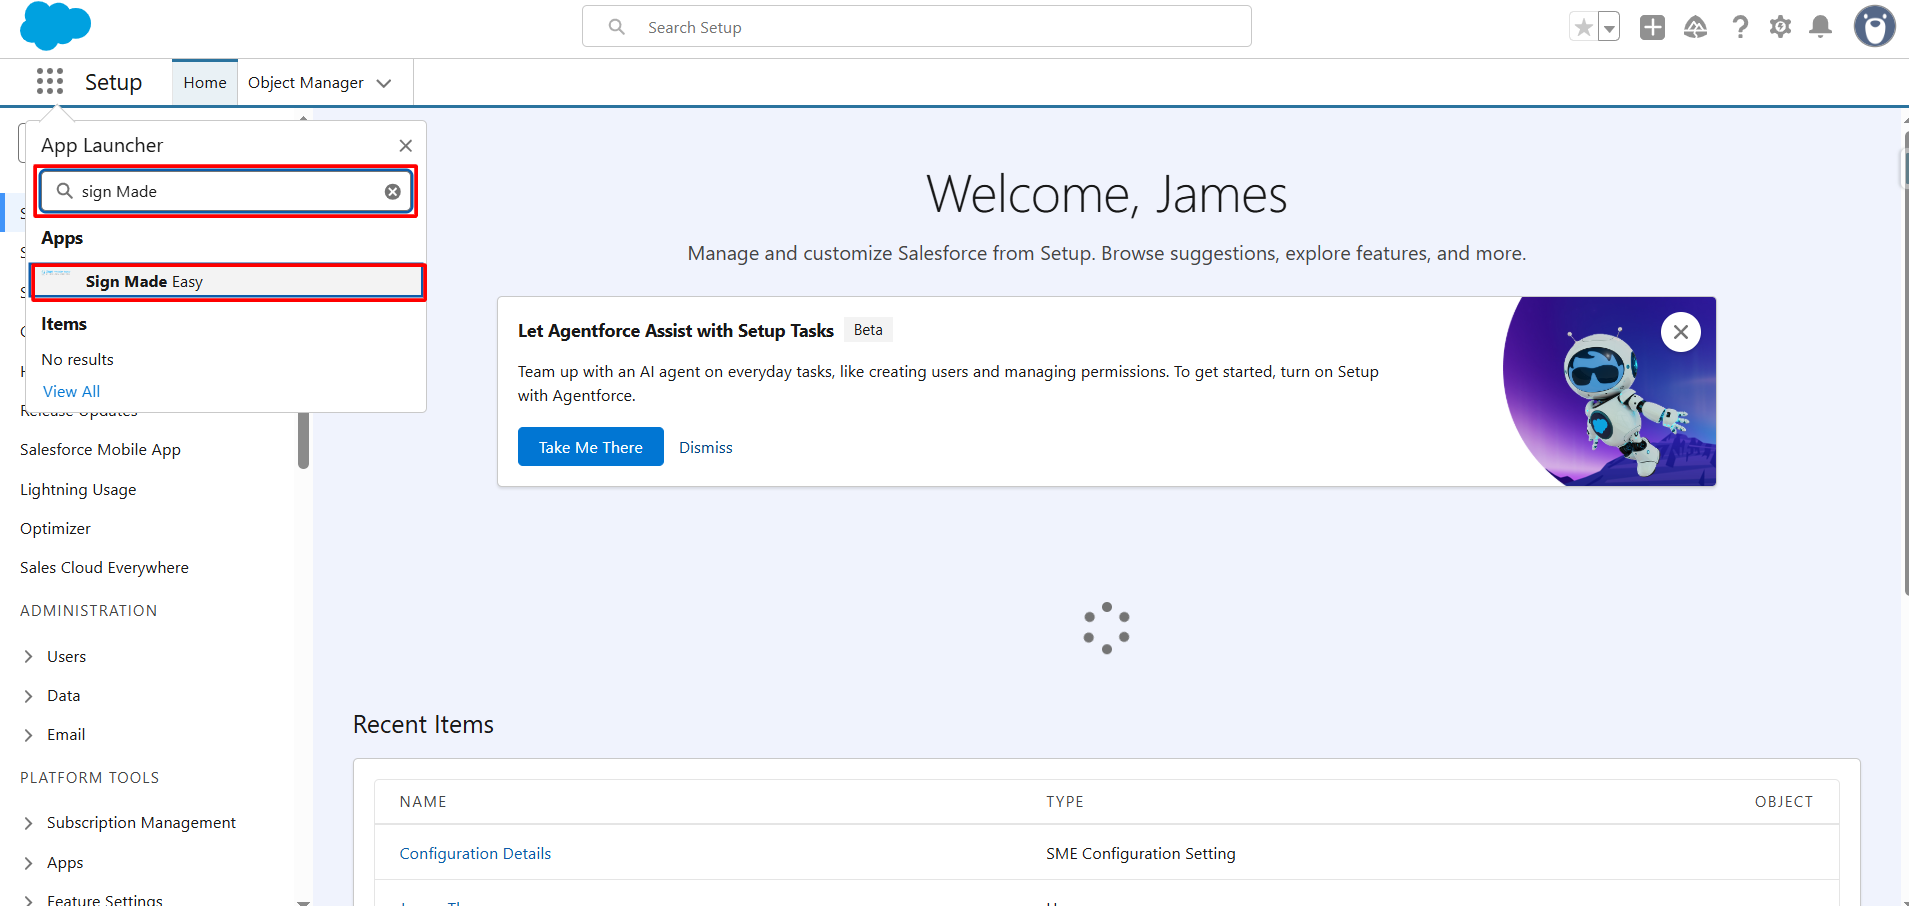
Step 1: Navigate to the App Launcher, Enter Sign Made Easy in the search bar, and click to access the application.

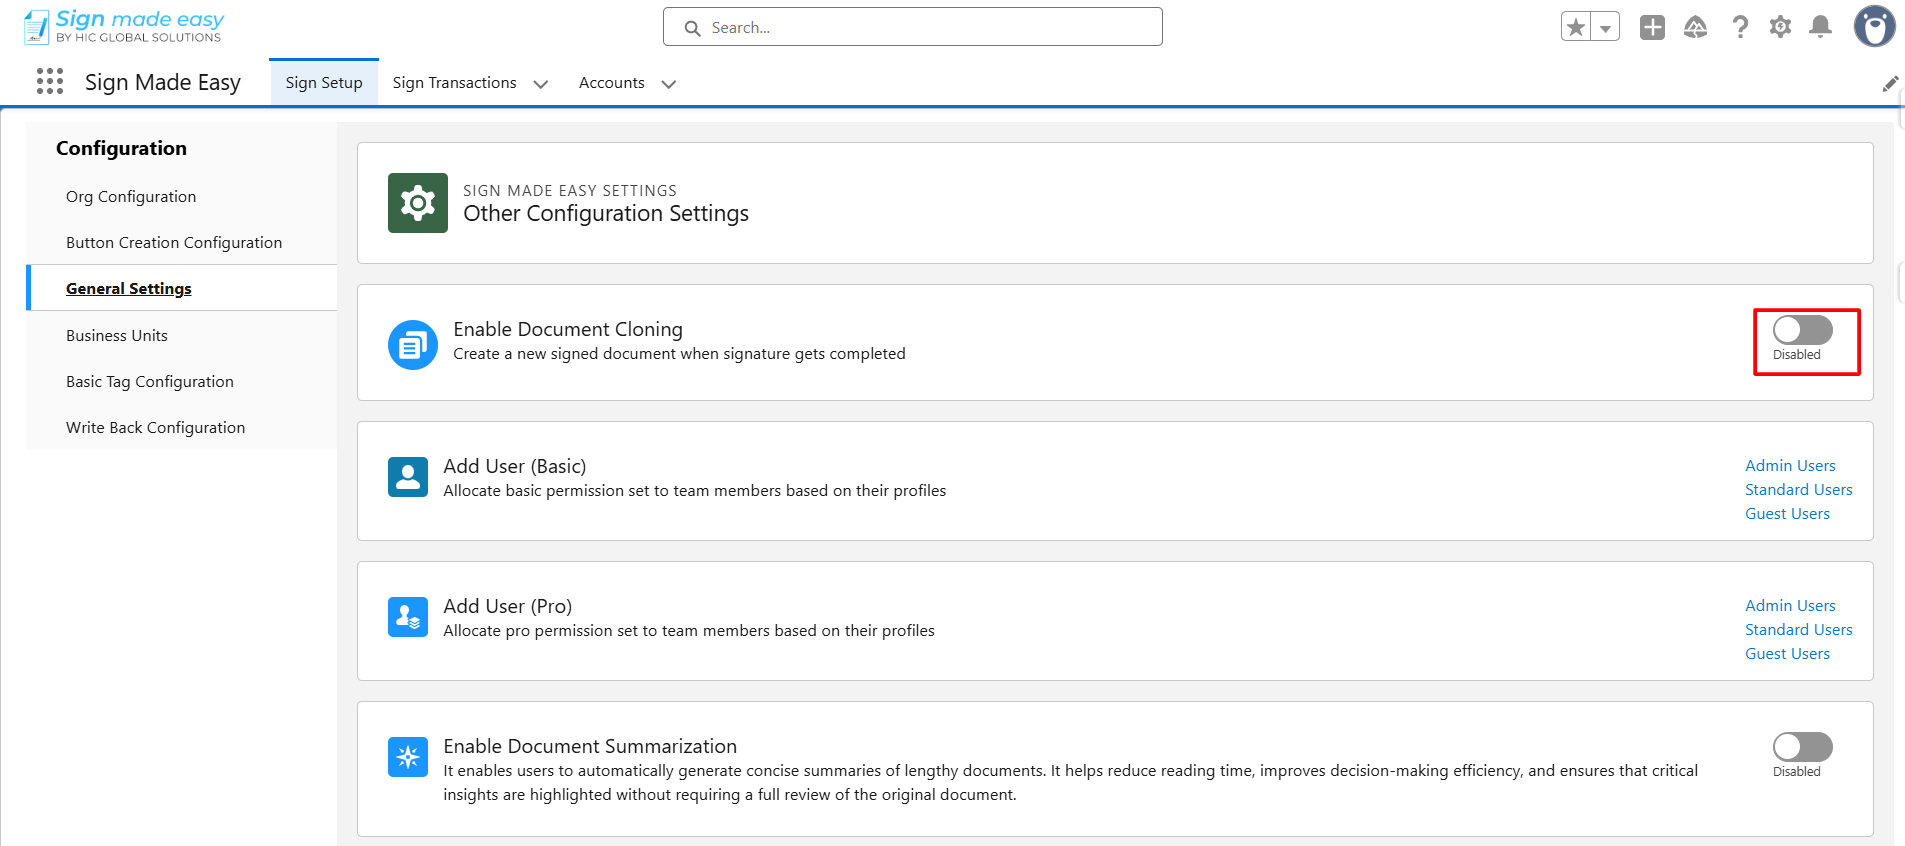
Step 2: Navigate to the General Setting and Disable the “ Enable Document Cloning " .
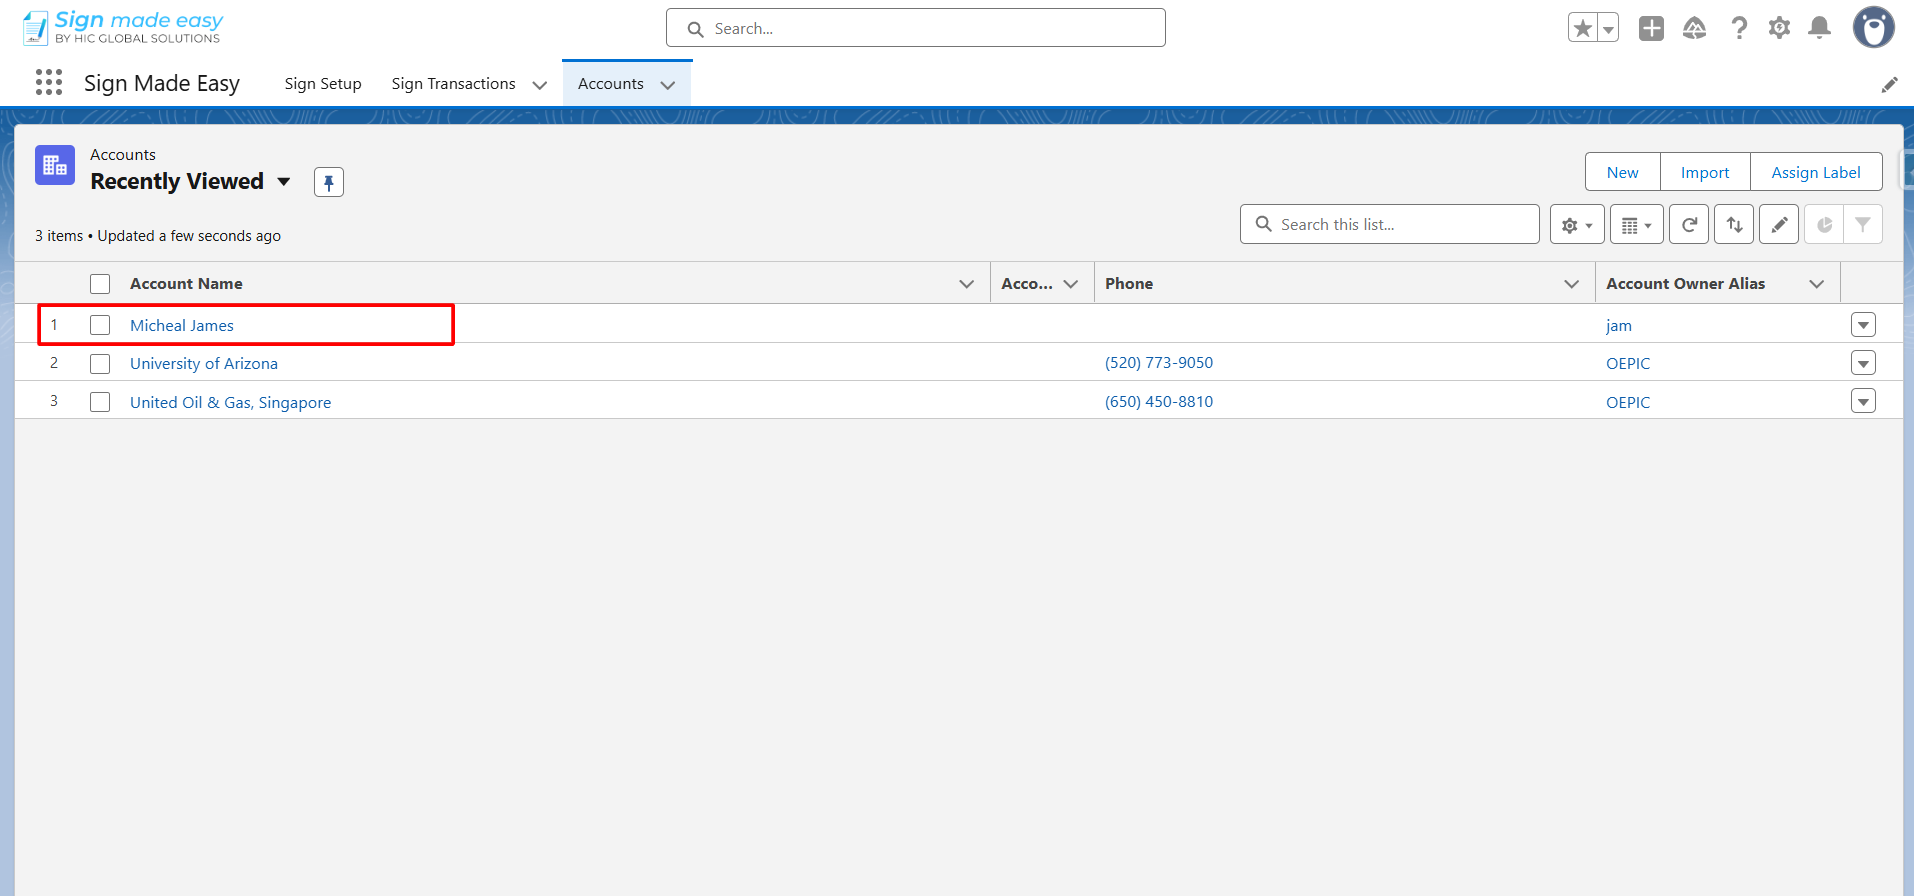
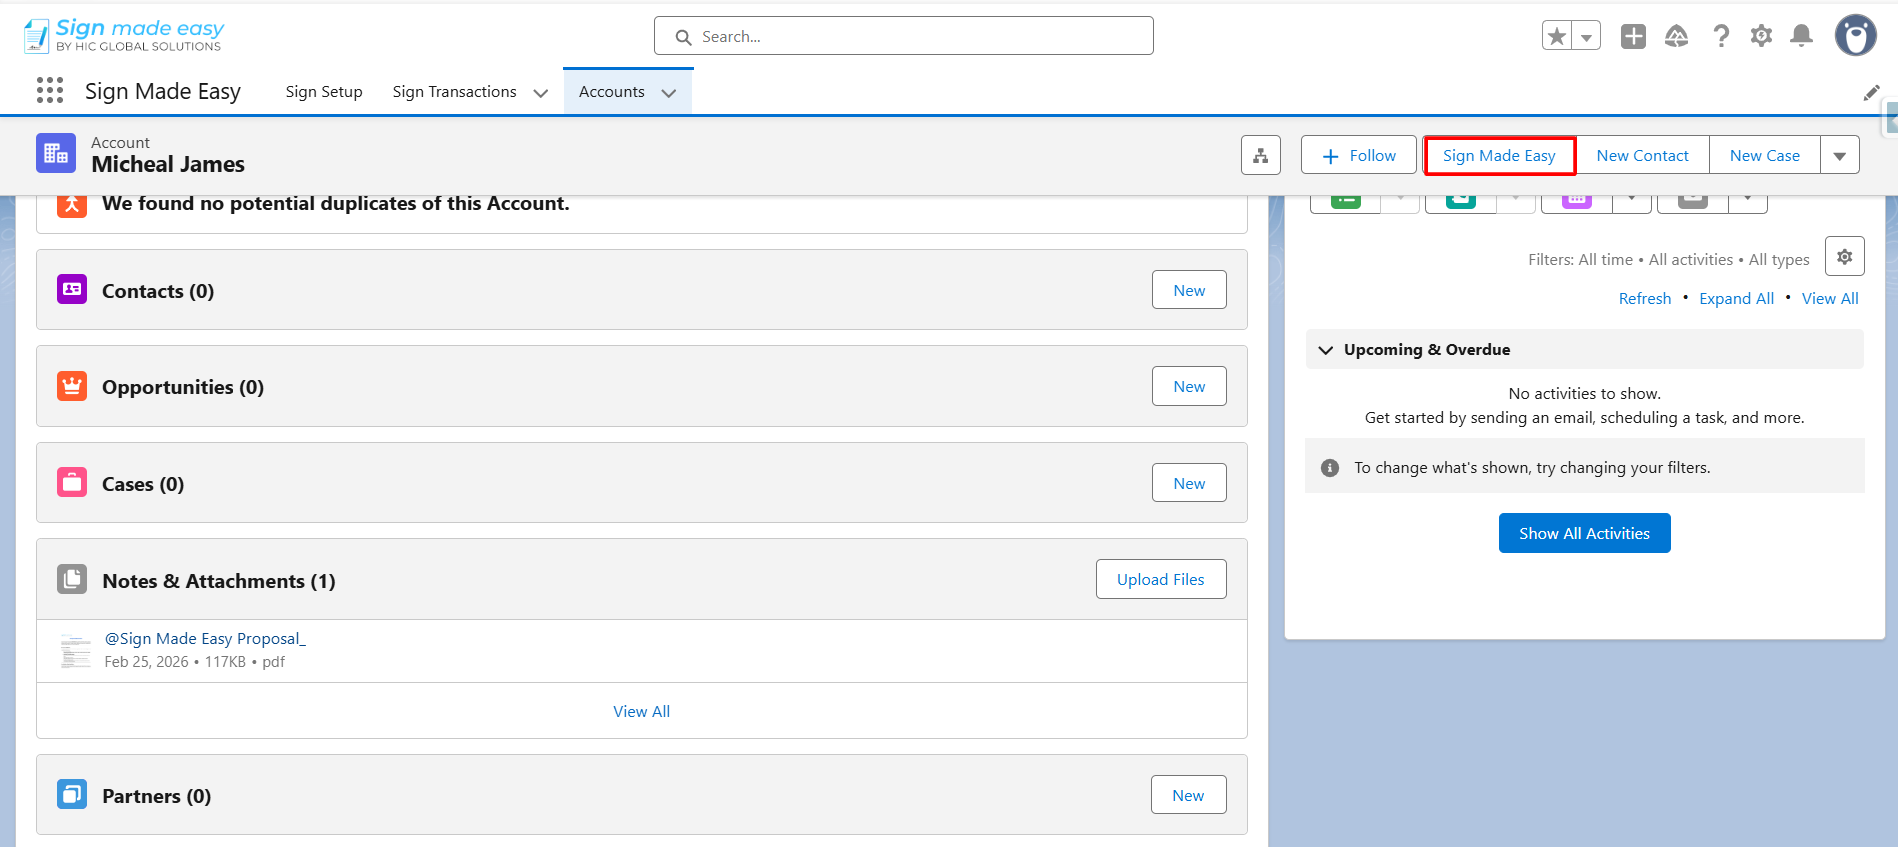
Step 3: Open the Record from which you want to create a transaction.
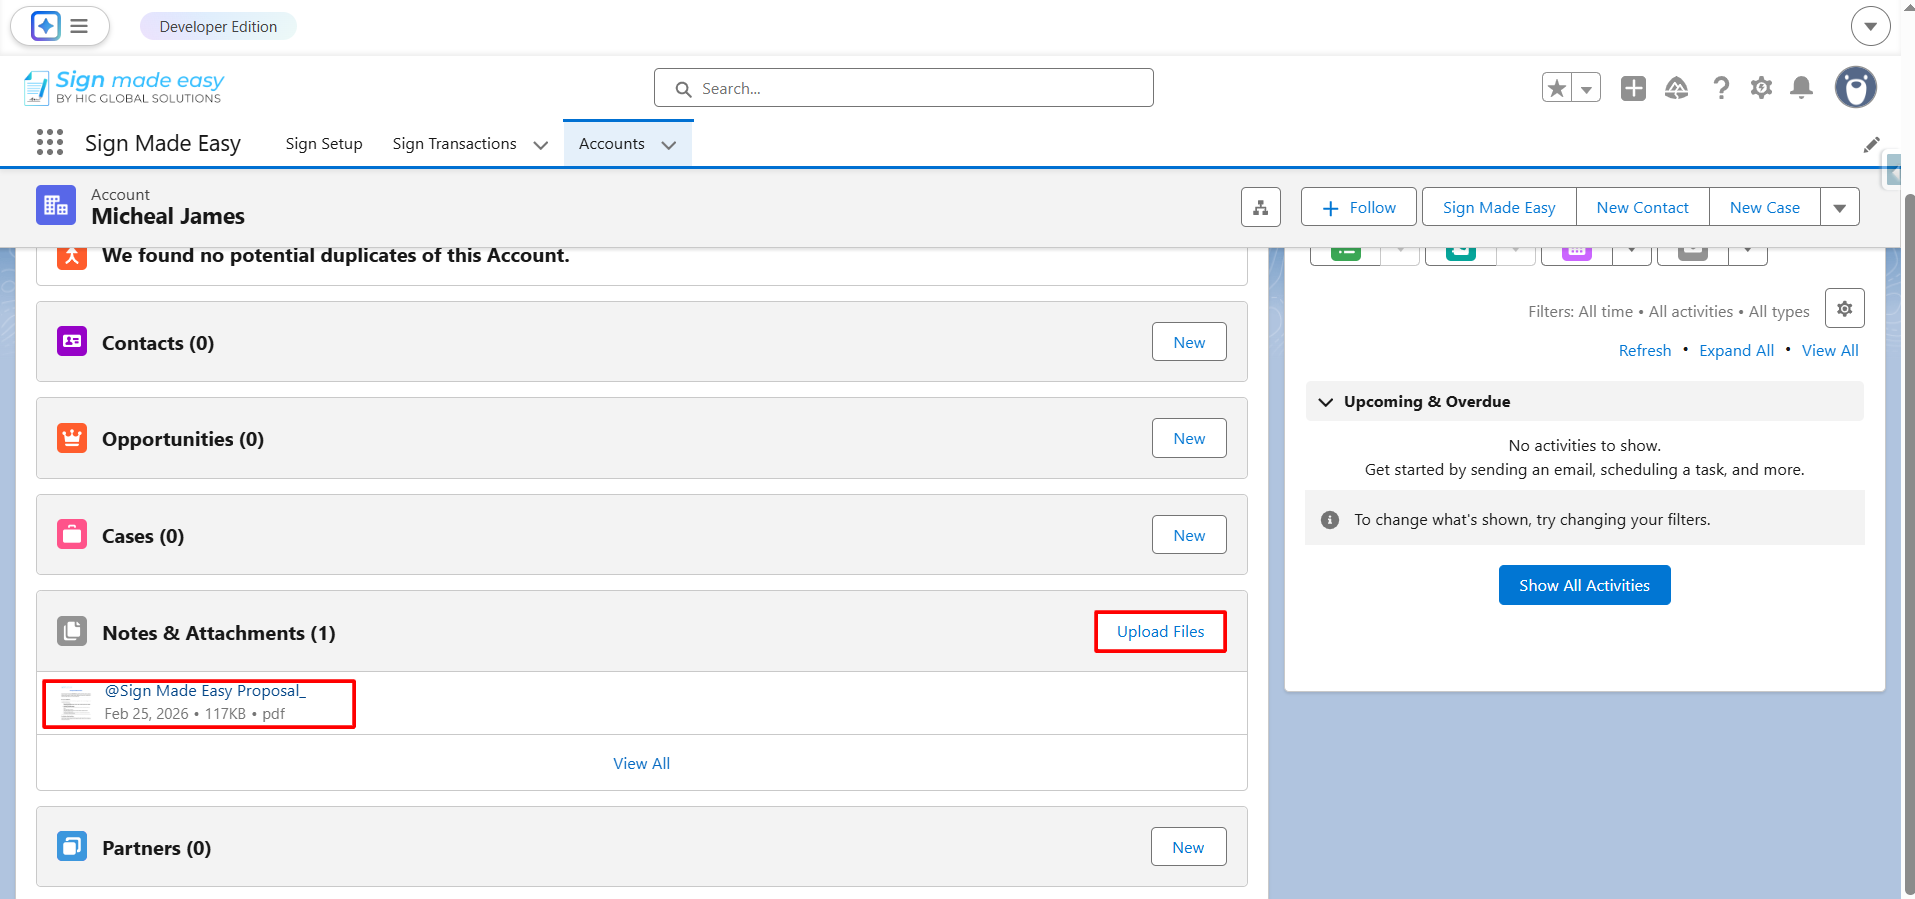
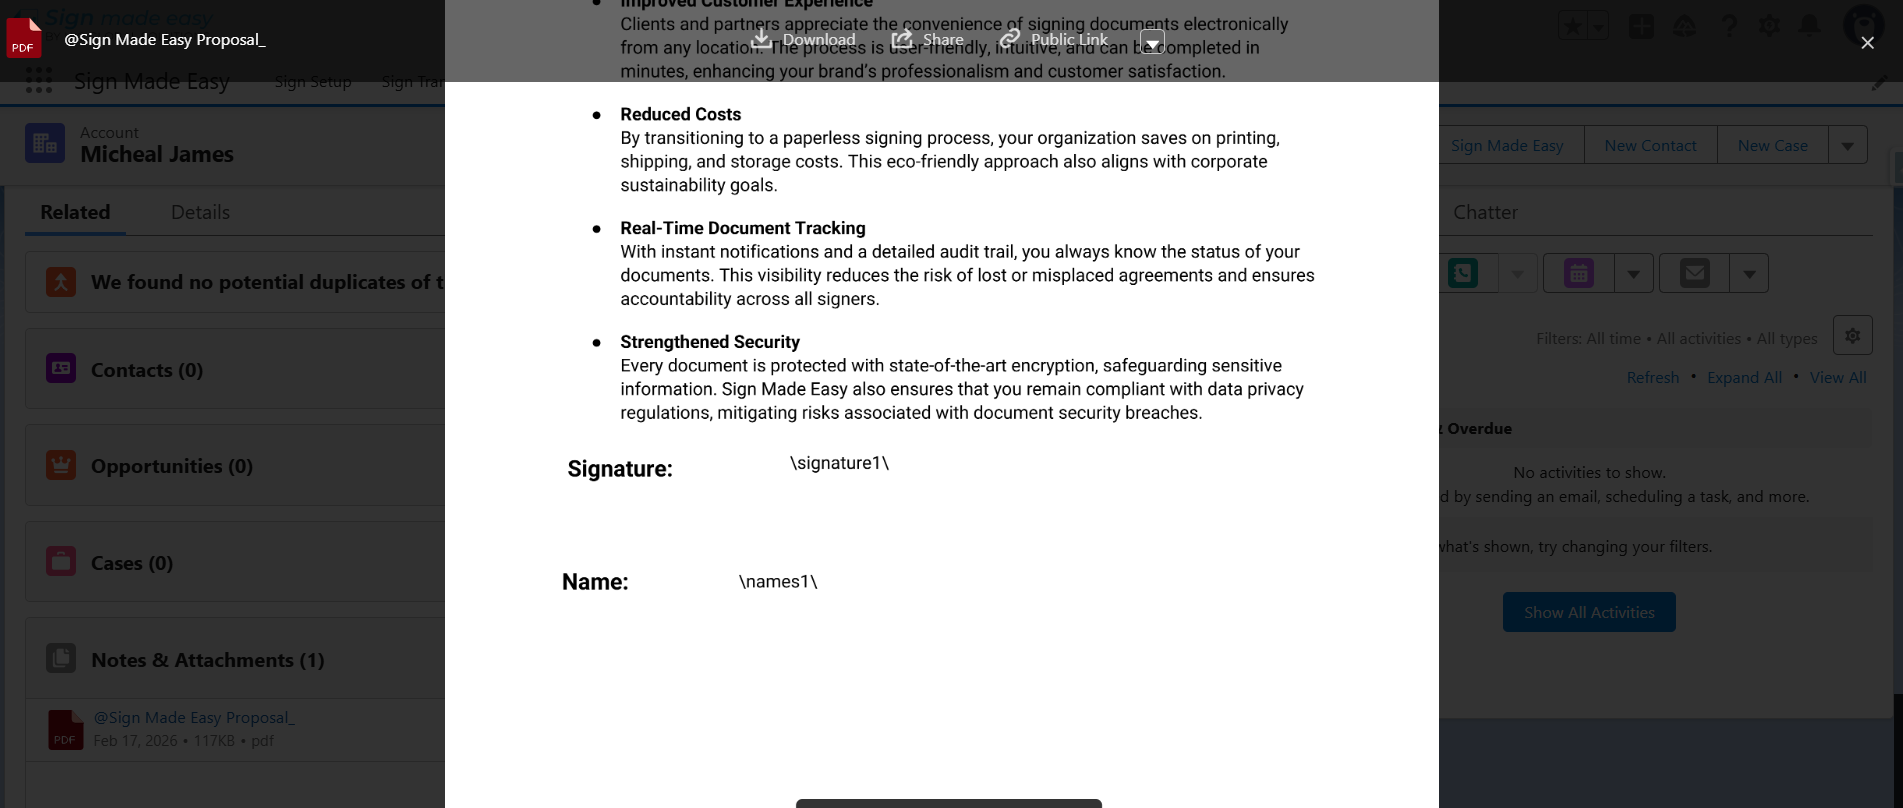
Step 4: Upload the file in Notes & Attachments and click on the file to view the uploaded file.
Step 5: Click on the Sign Made Easy Button that you have created earlier , If not created , please Click Here.
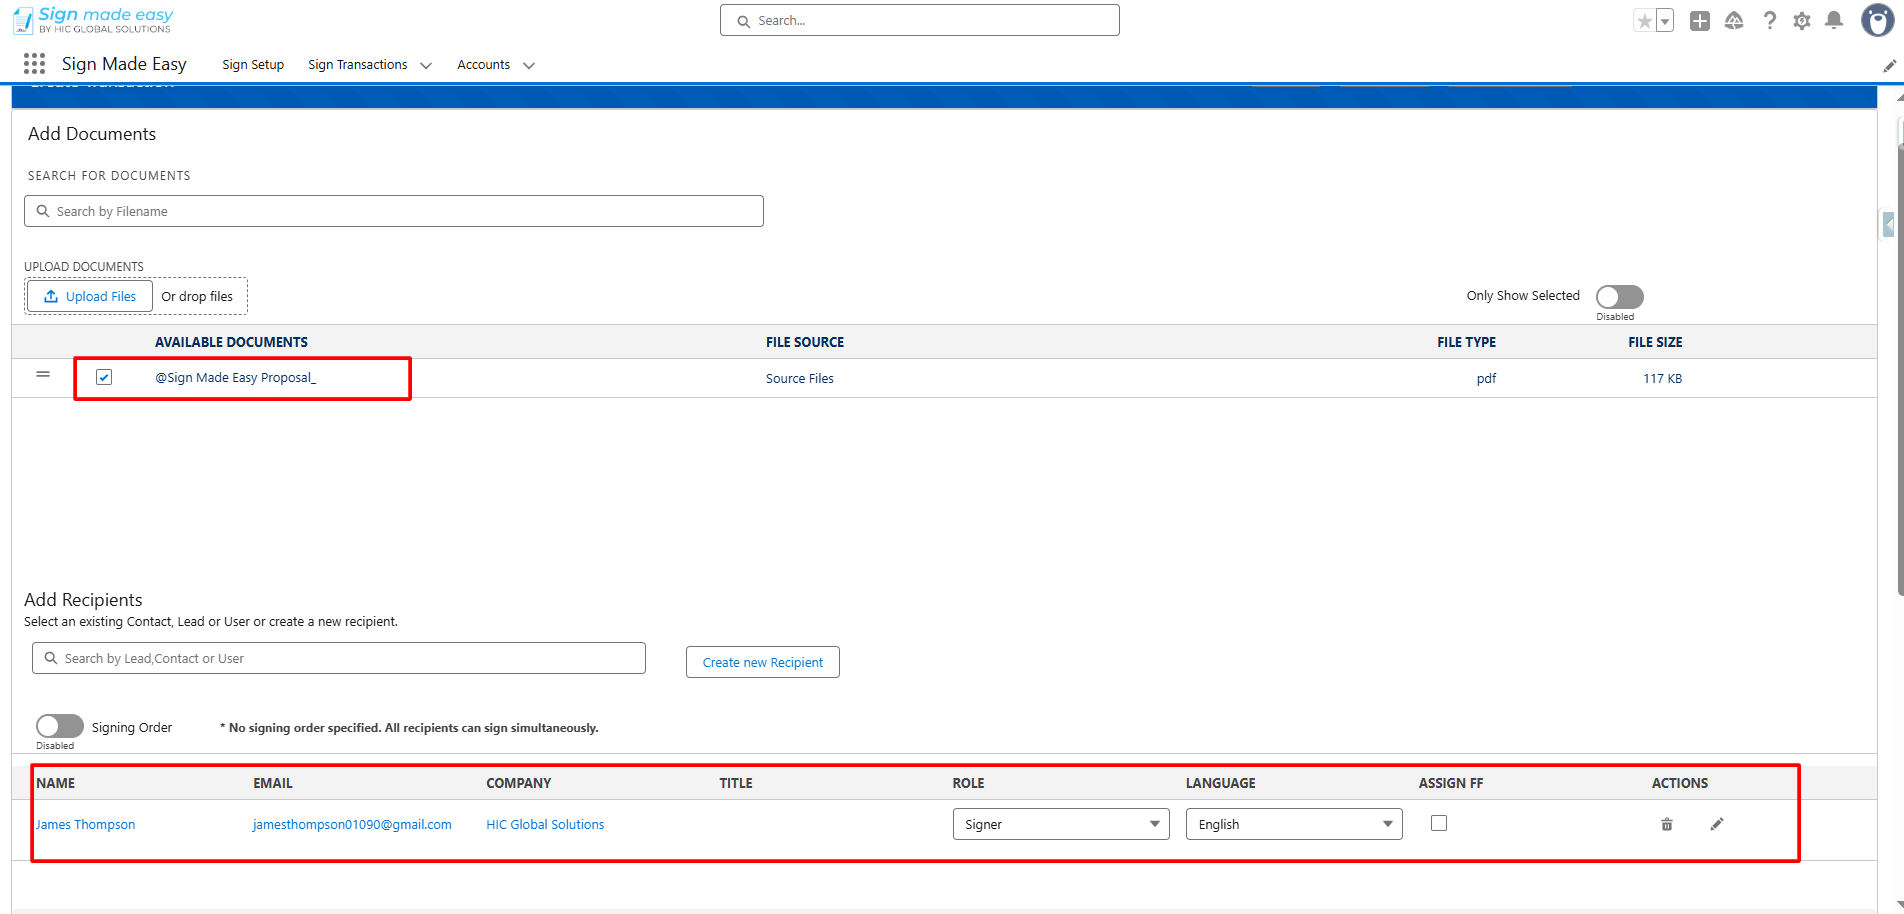
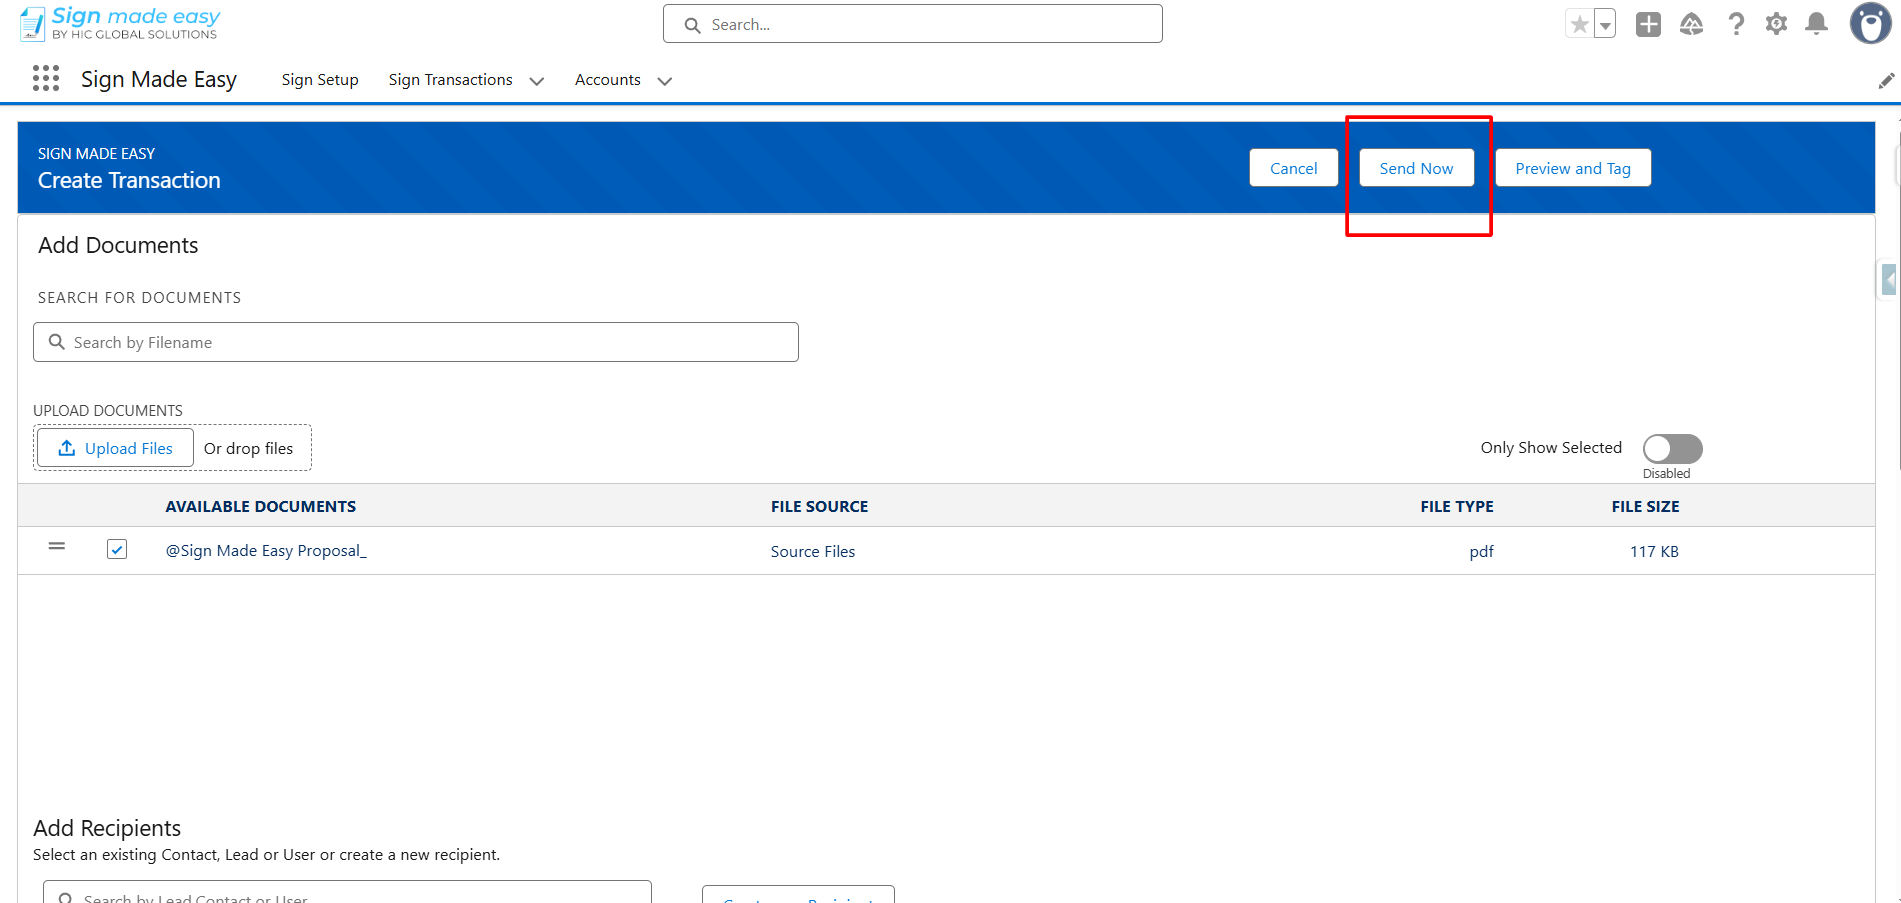
Step 6: Select or upload File and Recipient.
NOTE: All documents related to the object (available in Notes & Attachments) will be displayed here. You can also upload a new document by clicking the Upload Document button. You may select up to three (3) documents and assign a maximum of five (5) recipients per transaction.
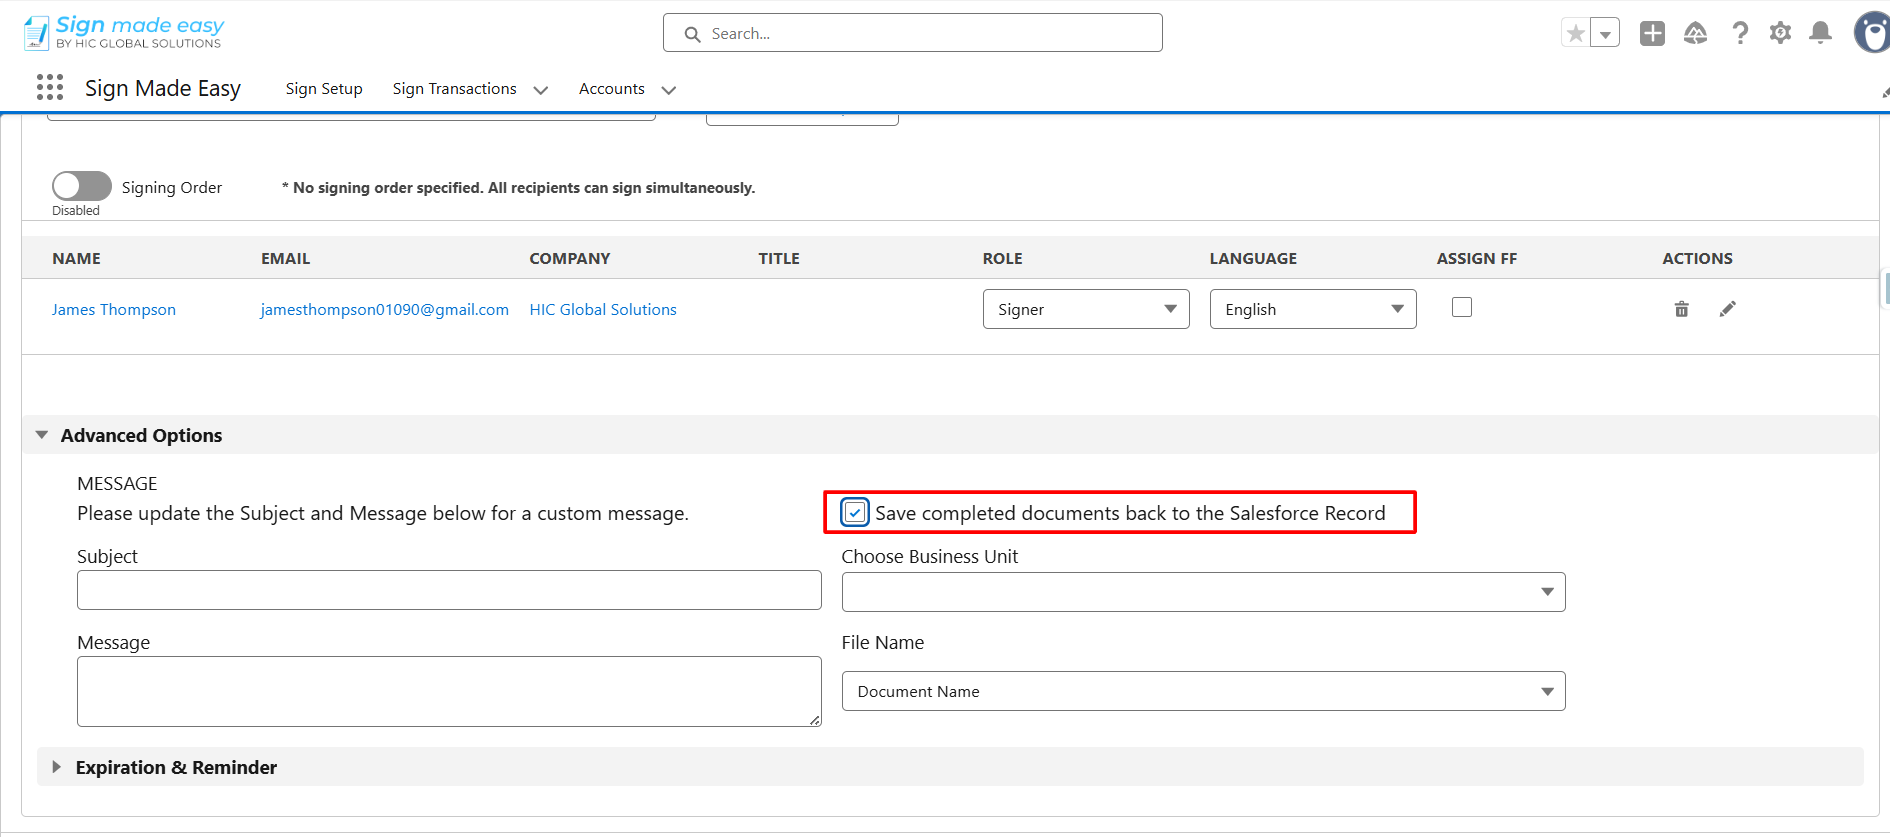
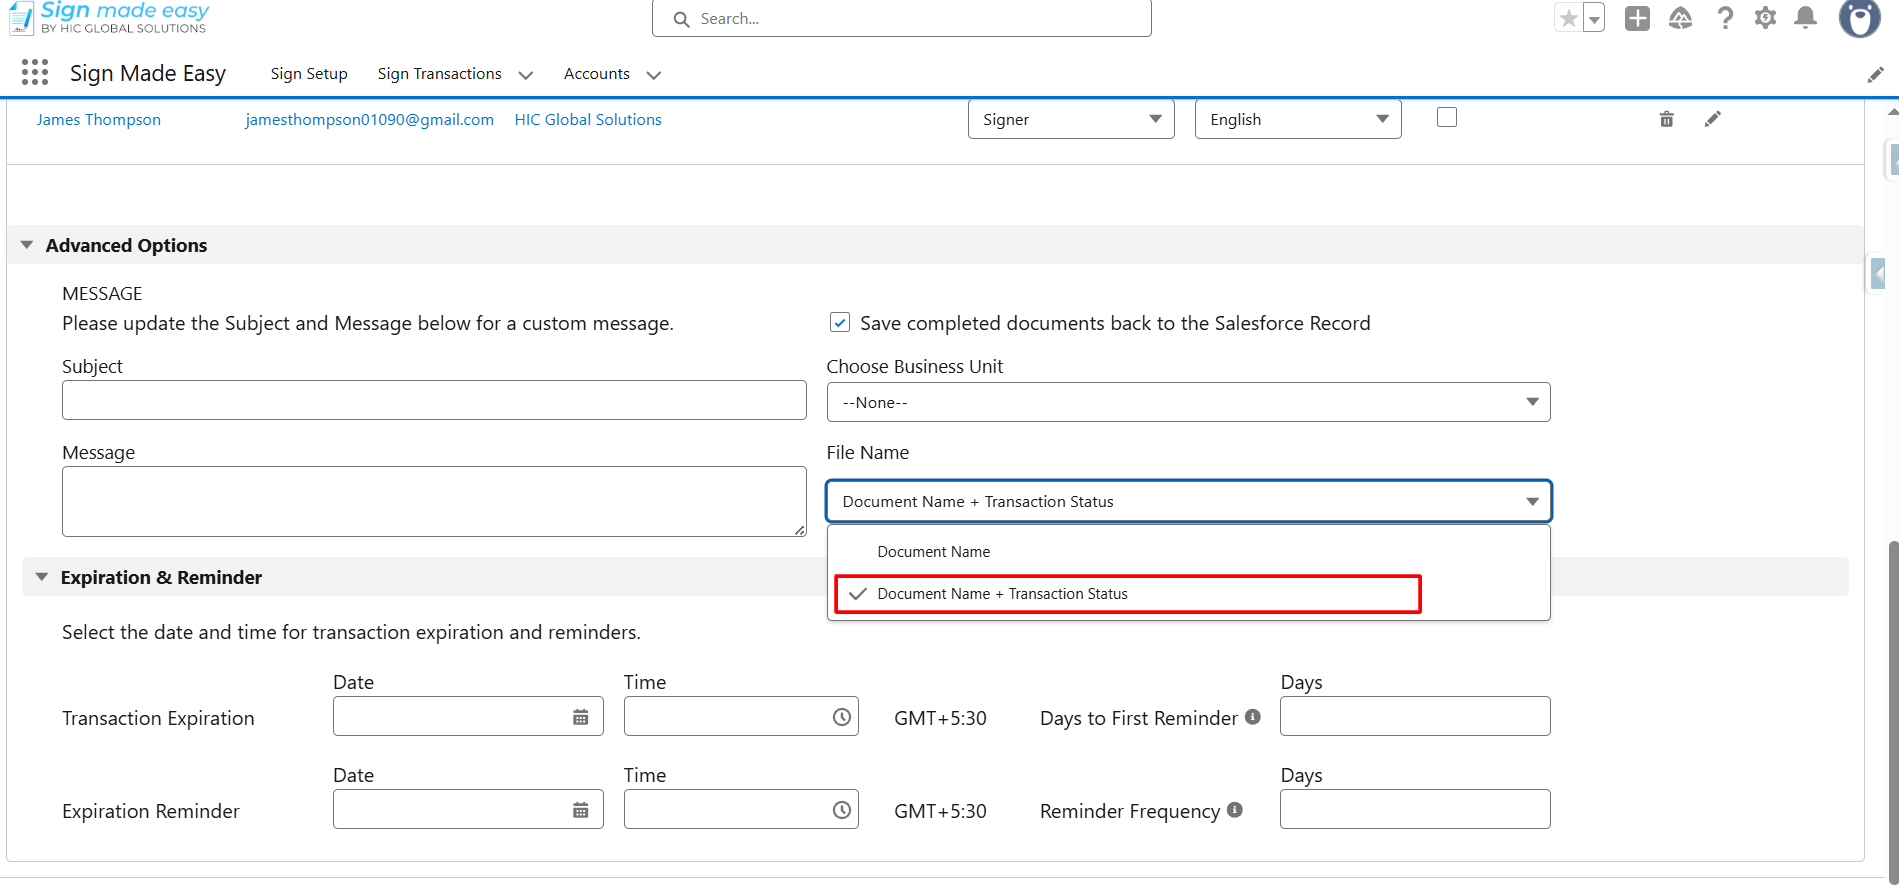
Step 7: Checked the “Save completed back to the Salesforce Record” checkbox.
Step 8: Click on the “Send Now” Button.
Note : If you want to add Tags using Drag & Drop, first click on the Preview and Tag button. After that, drag and drop the tags to the desired location on the File then click the Send button.
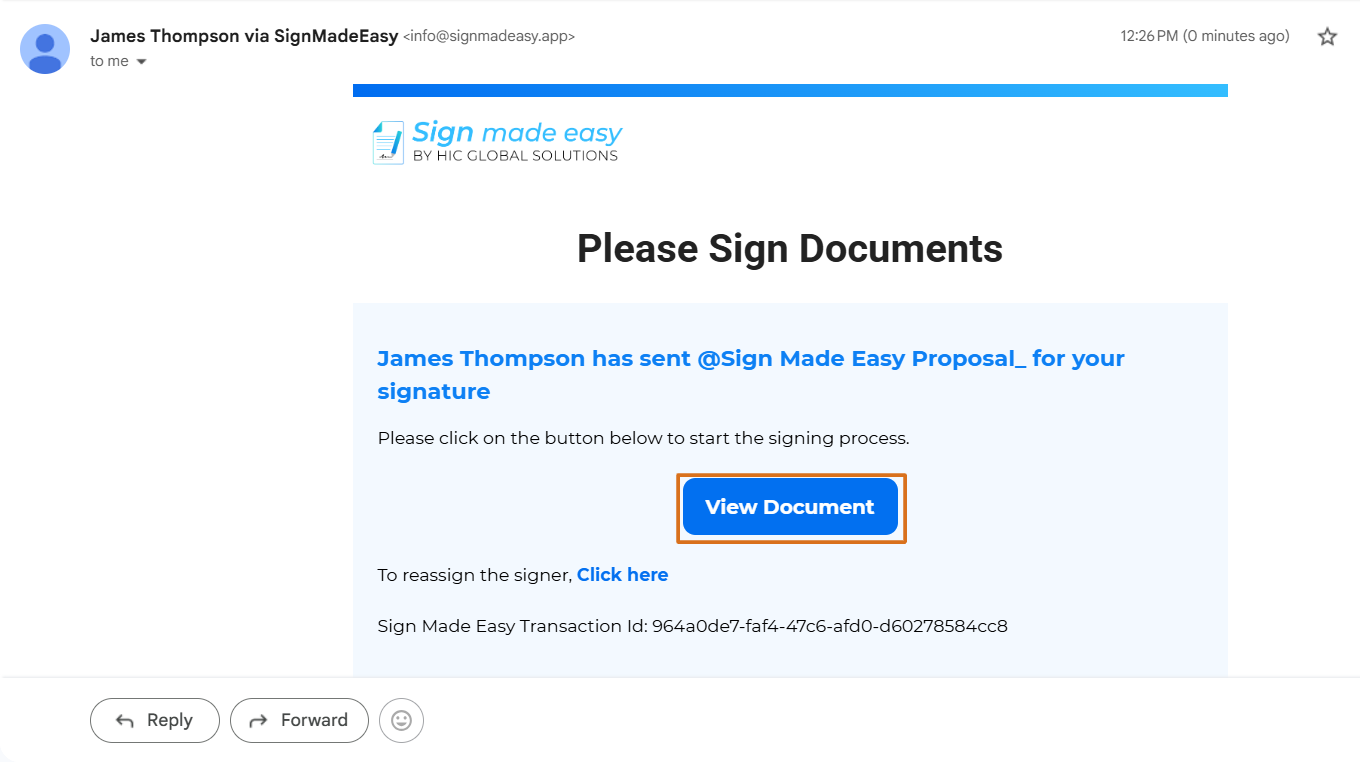
Step 9: Open the Sign Transaction email and Click on “View Document” to Sign the document.
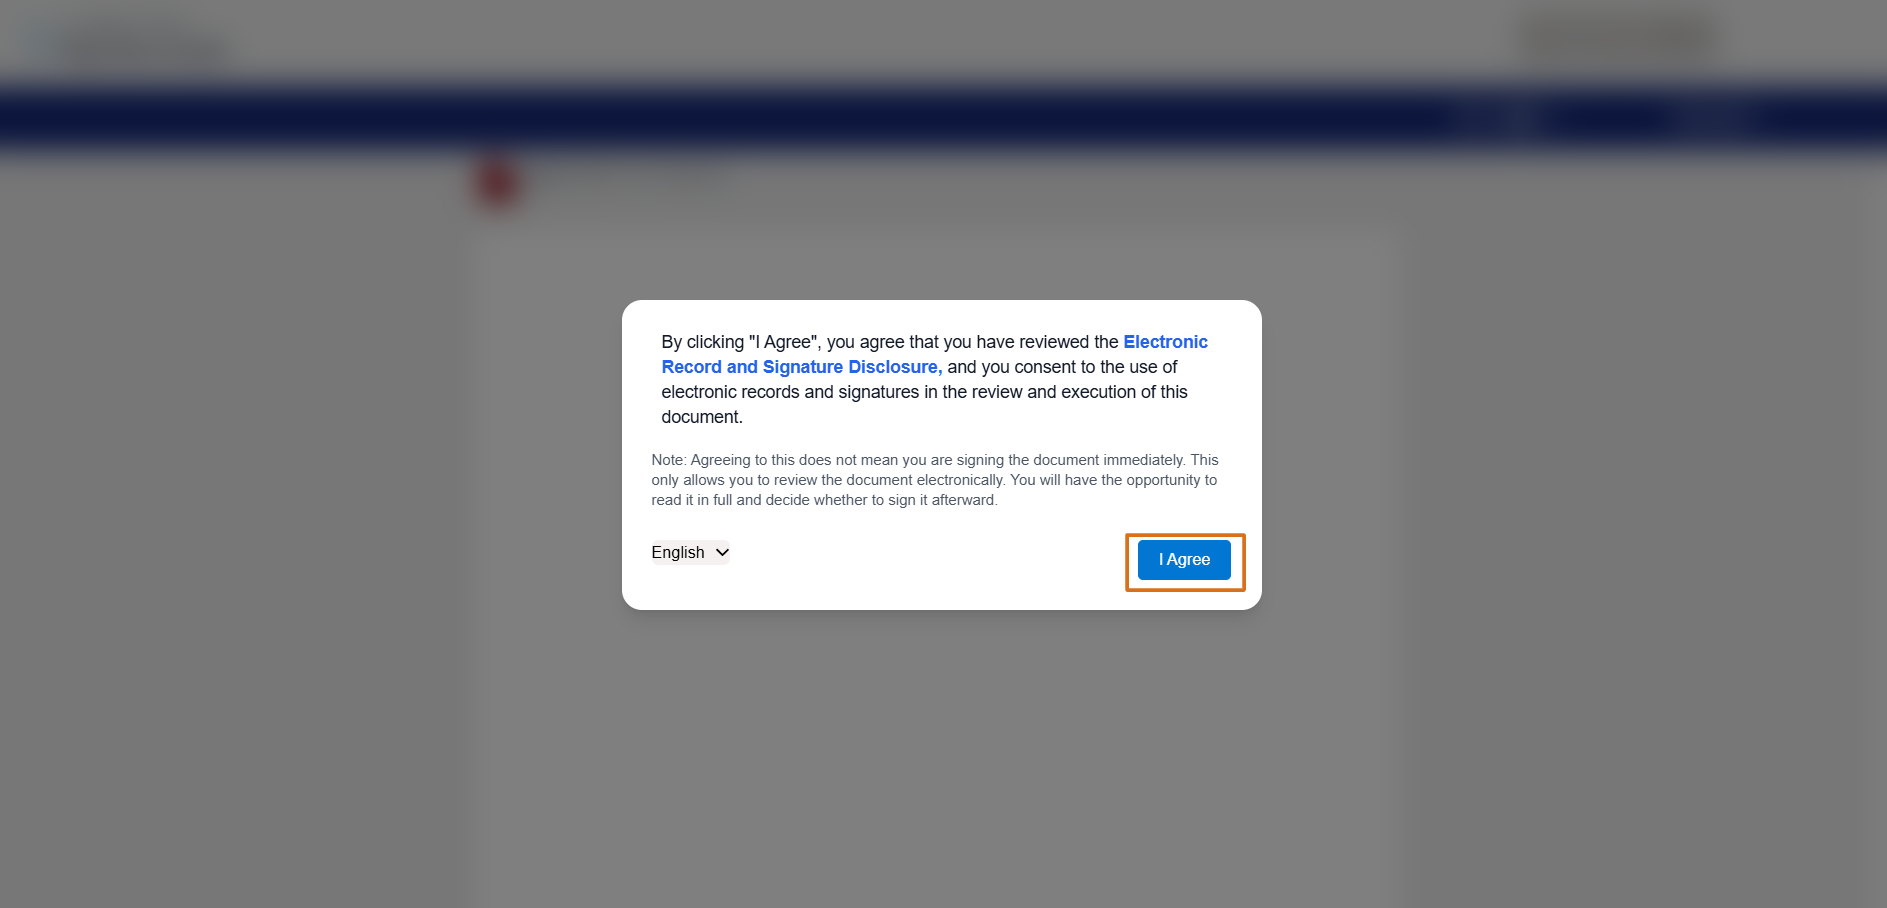
By clicking “I Agree”, you confirm that:
- You have read and understood the Electronic Record and Signature Disclosure.
- You consent to use electronic records and electronic signatures.
- You agree that your electronic signature is legally valid and binding.
- You understand that you may review the document before signing.
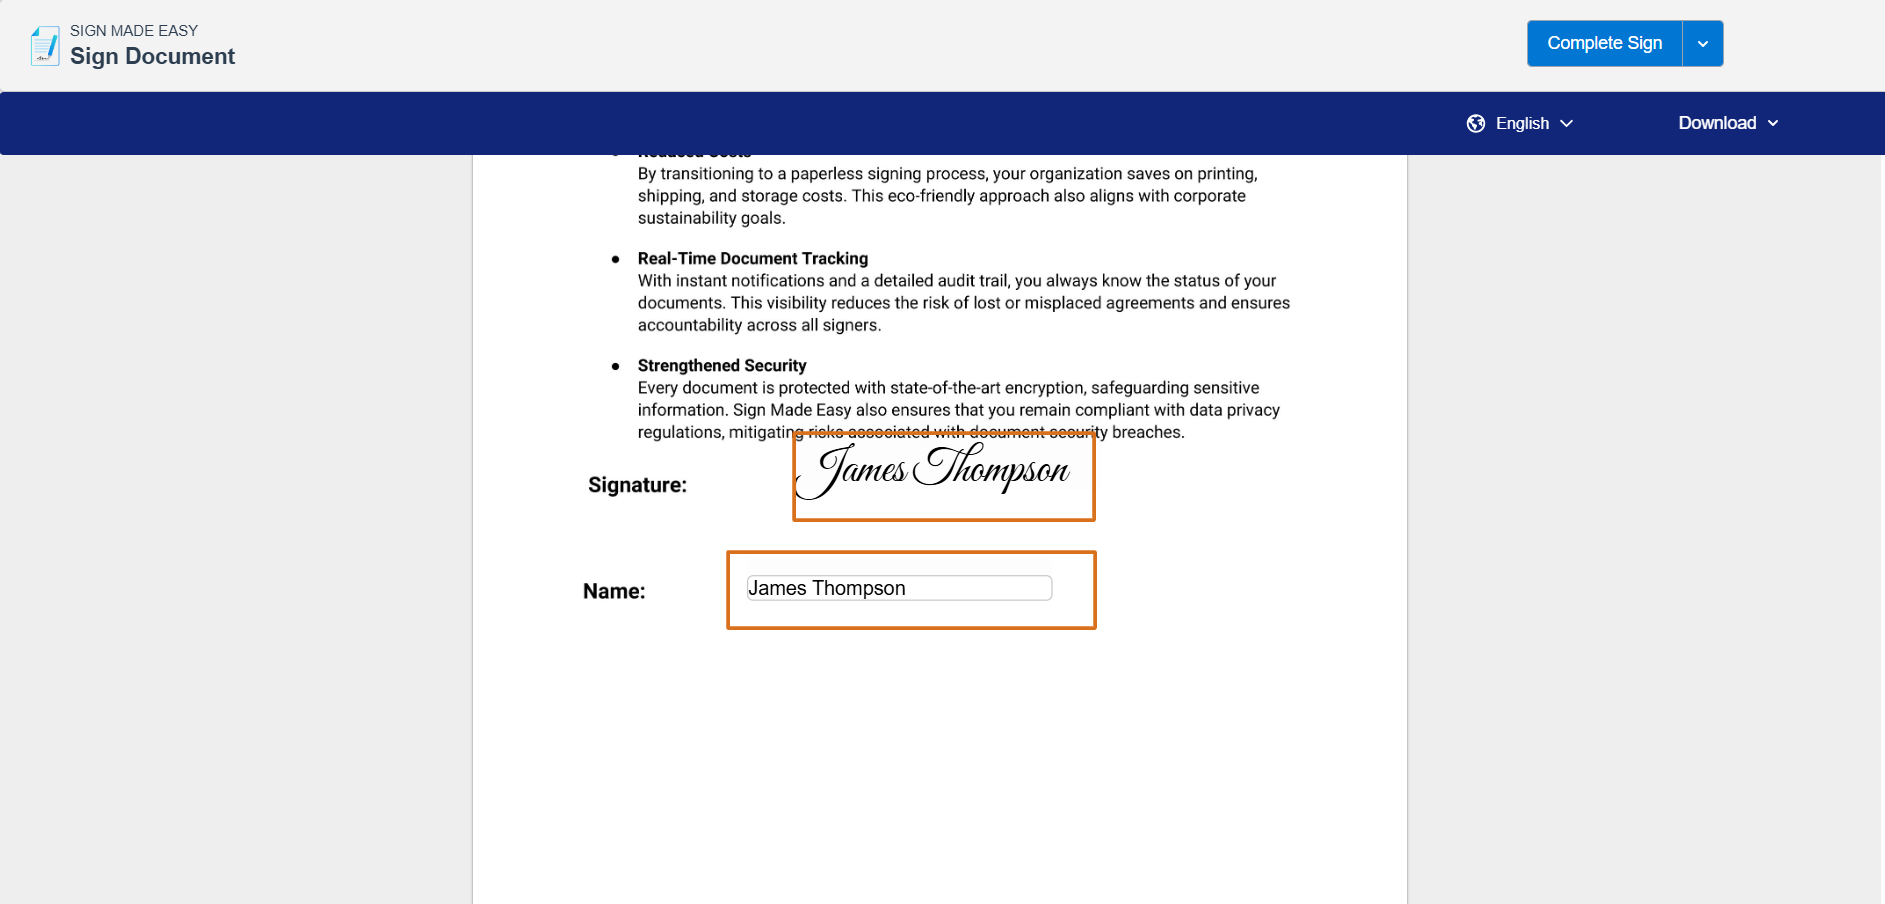
Step 10: Fill the data in required tags to complete the E-signing process.
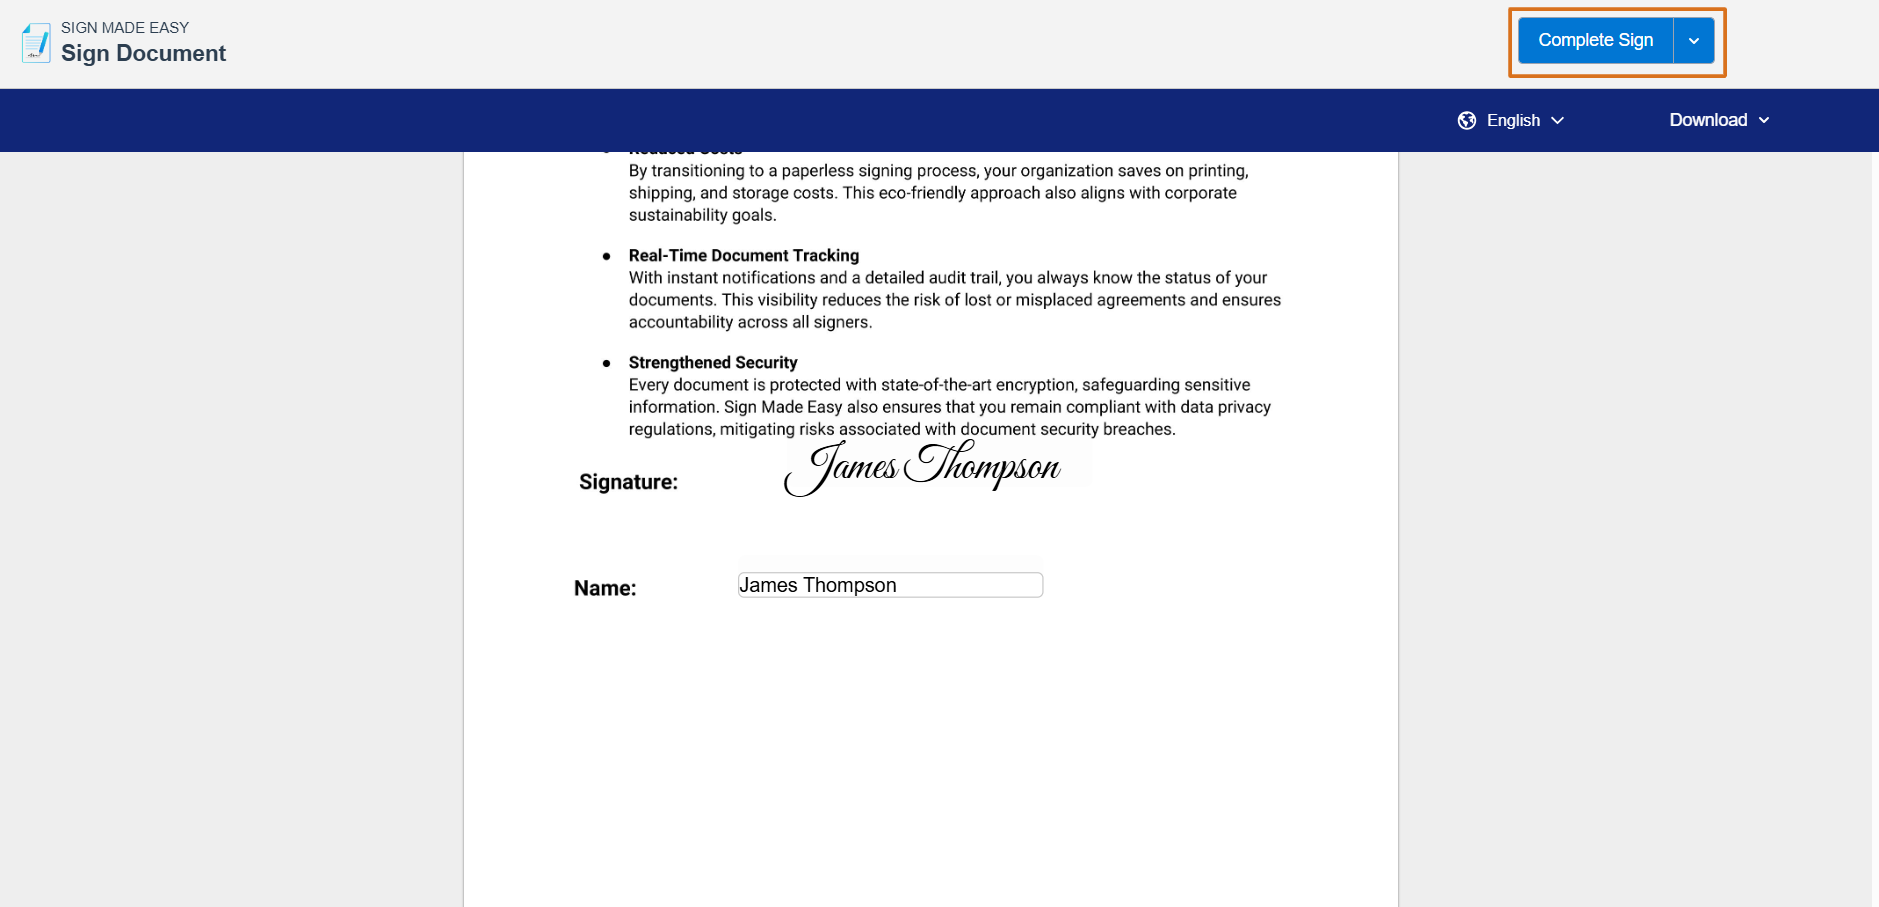
Step 11: Click on the “Complete Sign” Button to complete the transaction.
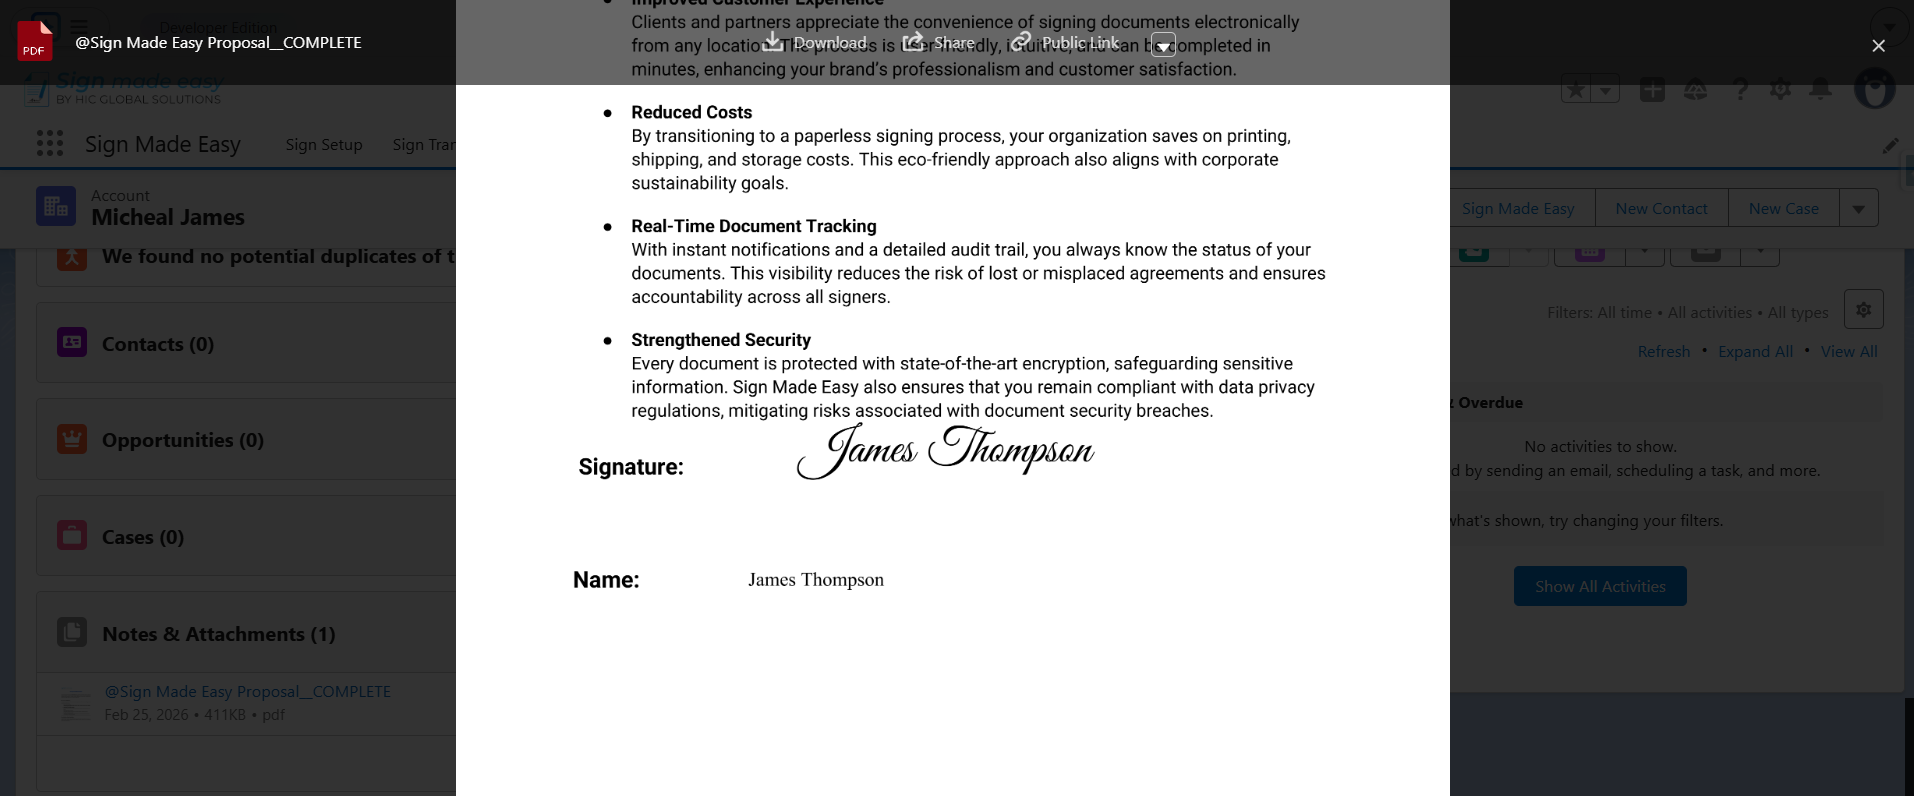
Step 12: The Signed document is Saved on the parent object record from which the transaction was sent.

Was this article helpful?
That’s Great!
Thank you for your feedback
Sorry! We couldn't be helpful
Thank you for your feedback
Feedback sent
We appreciate your effort and will try to fix the article