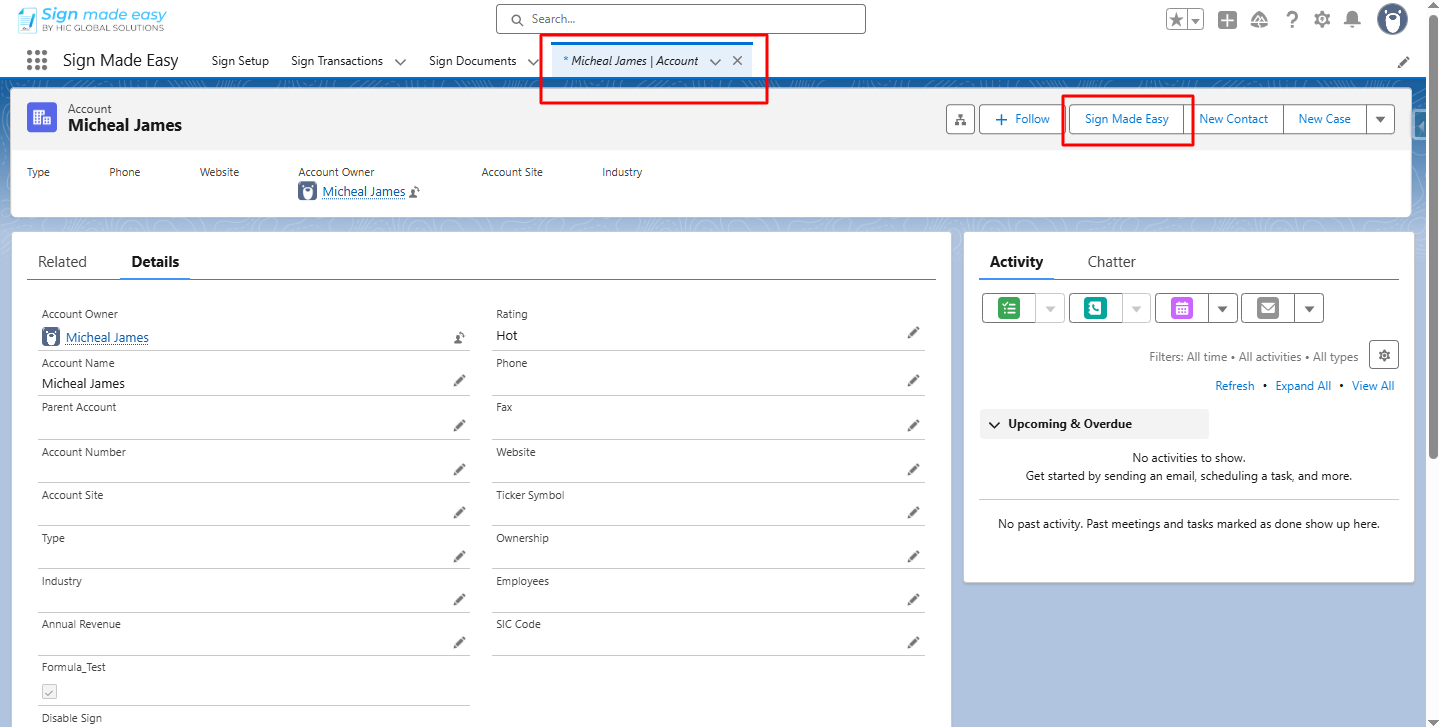
Step 1:- Navigate to the object’s record detail page, then click the custom button you created.
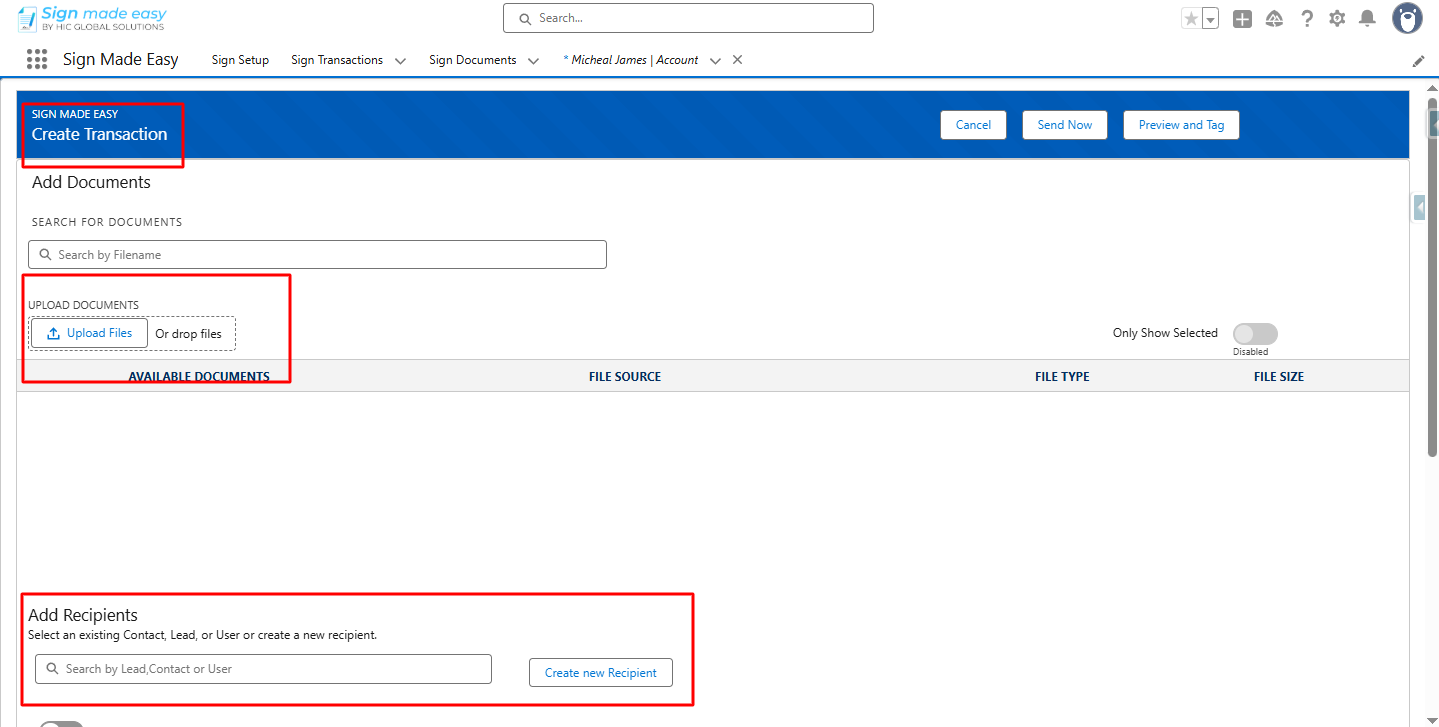
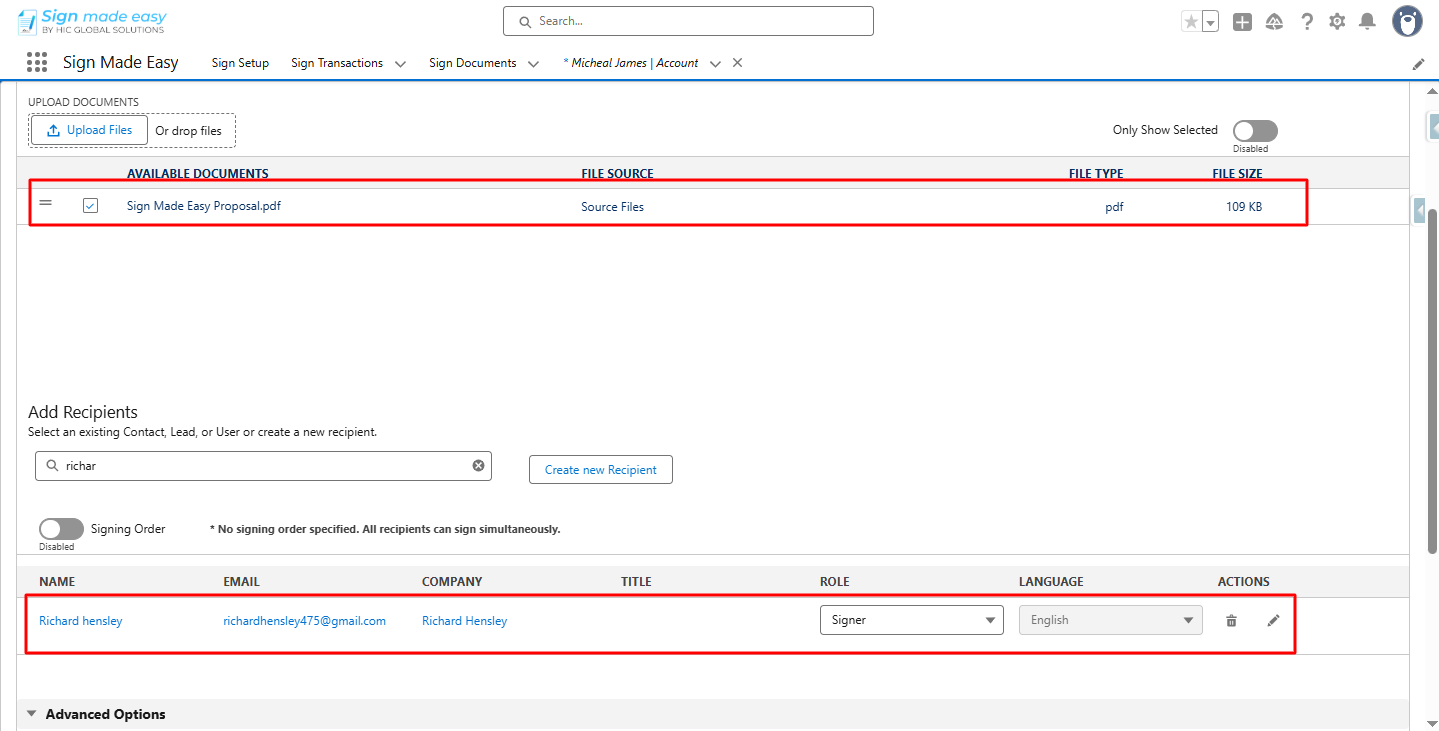
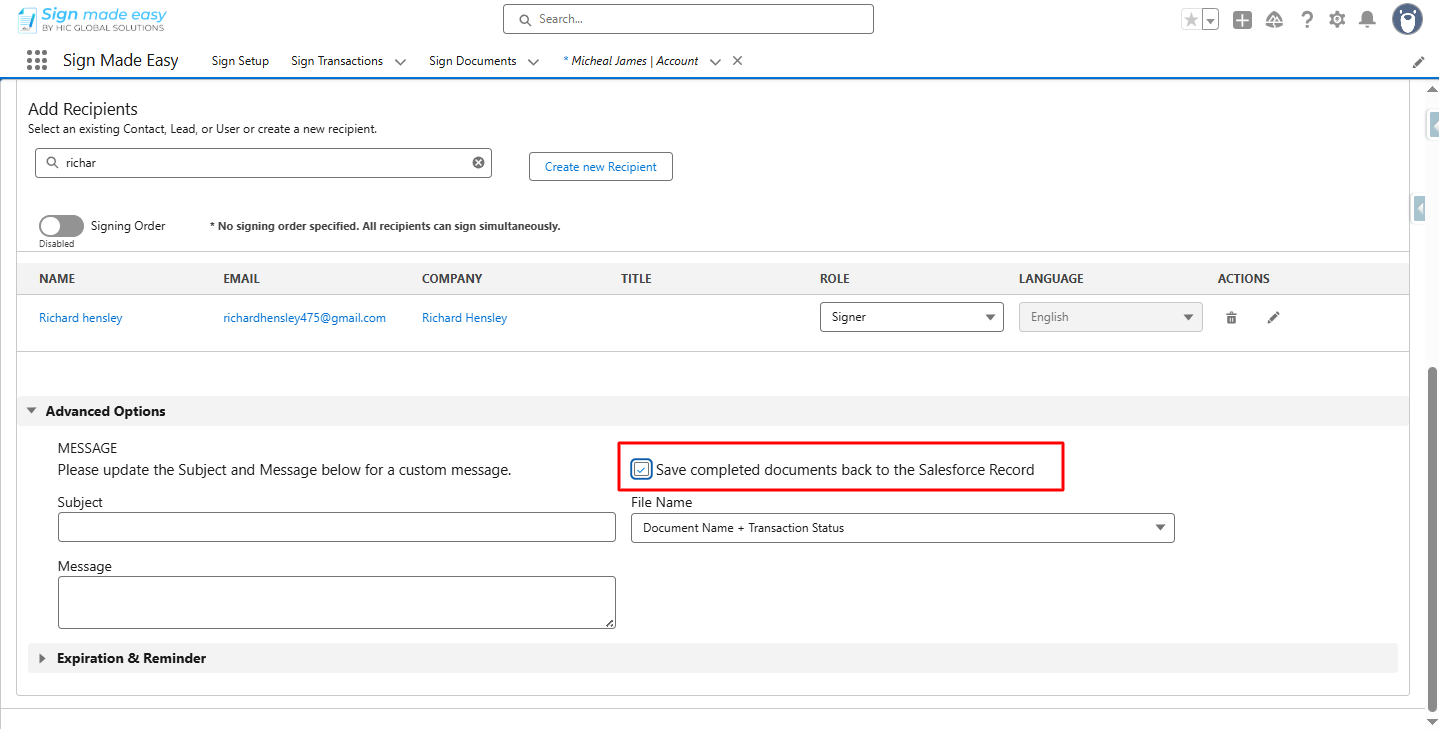
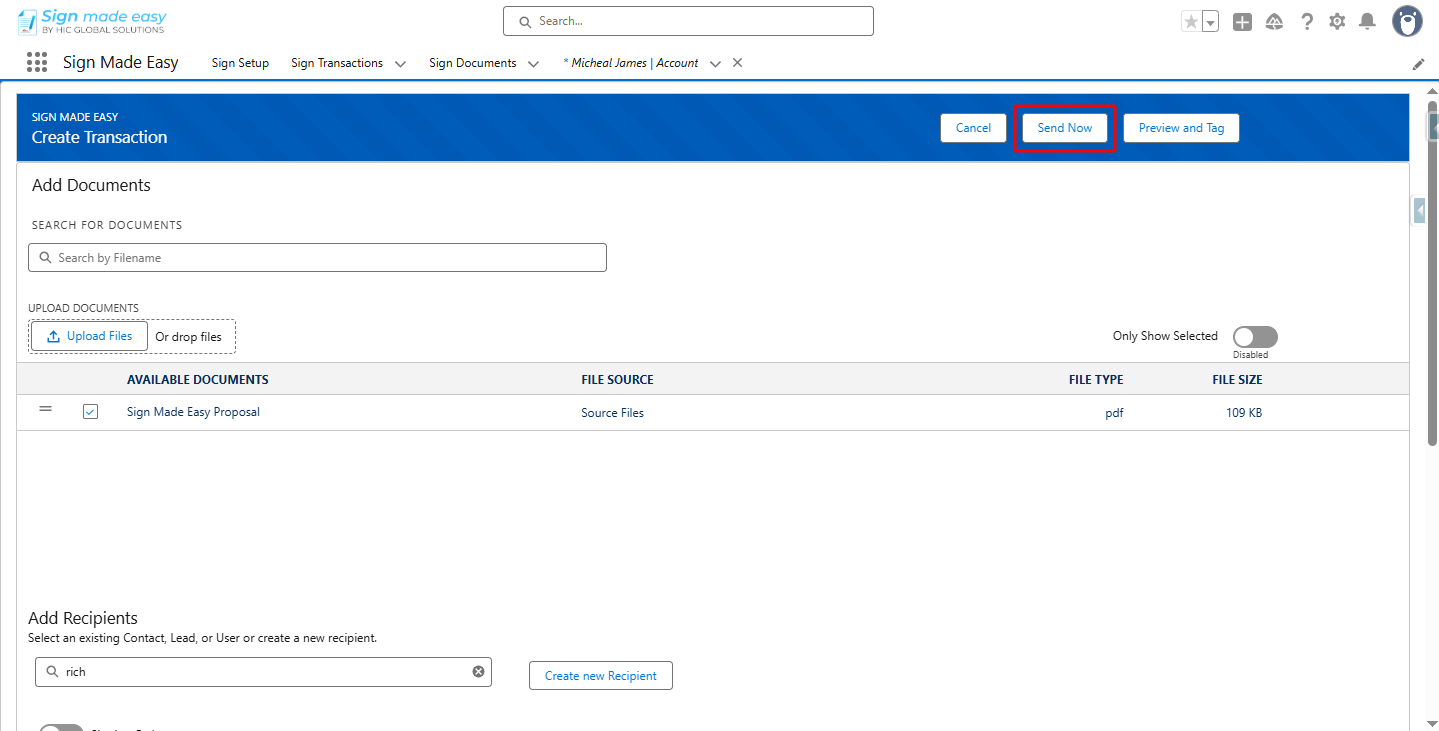
Step 2:- The Create Transaction page is launched. Upload the document and add Recipients.
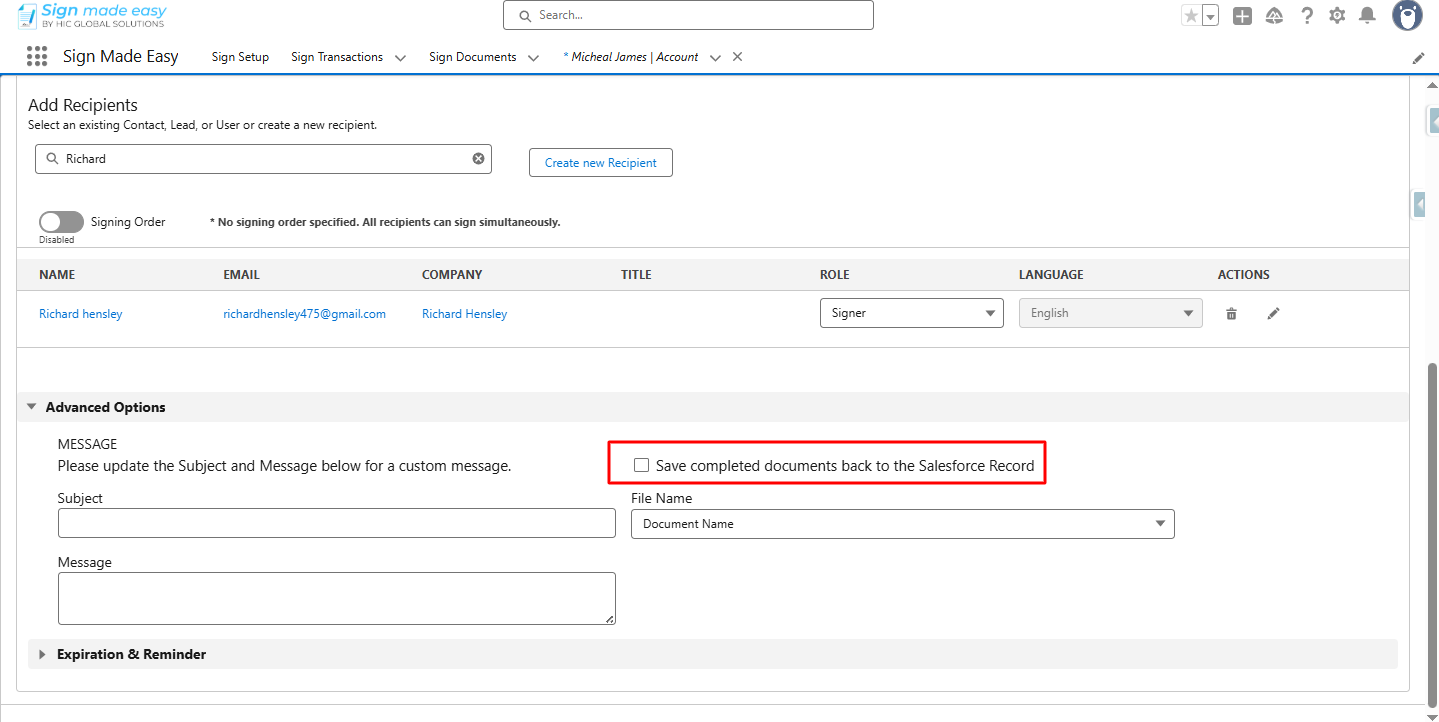
Step 3:- Select the checkbox to save completed documents back to the Salesforce Record.
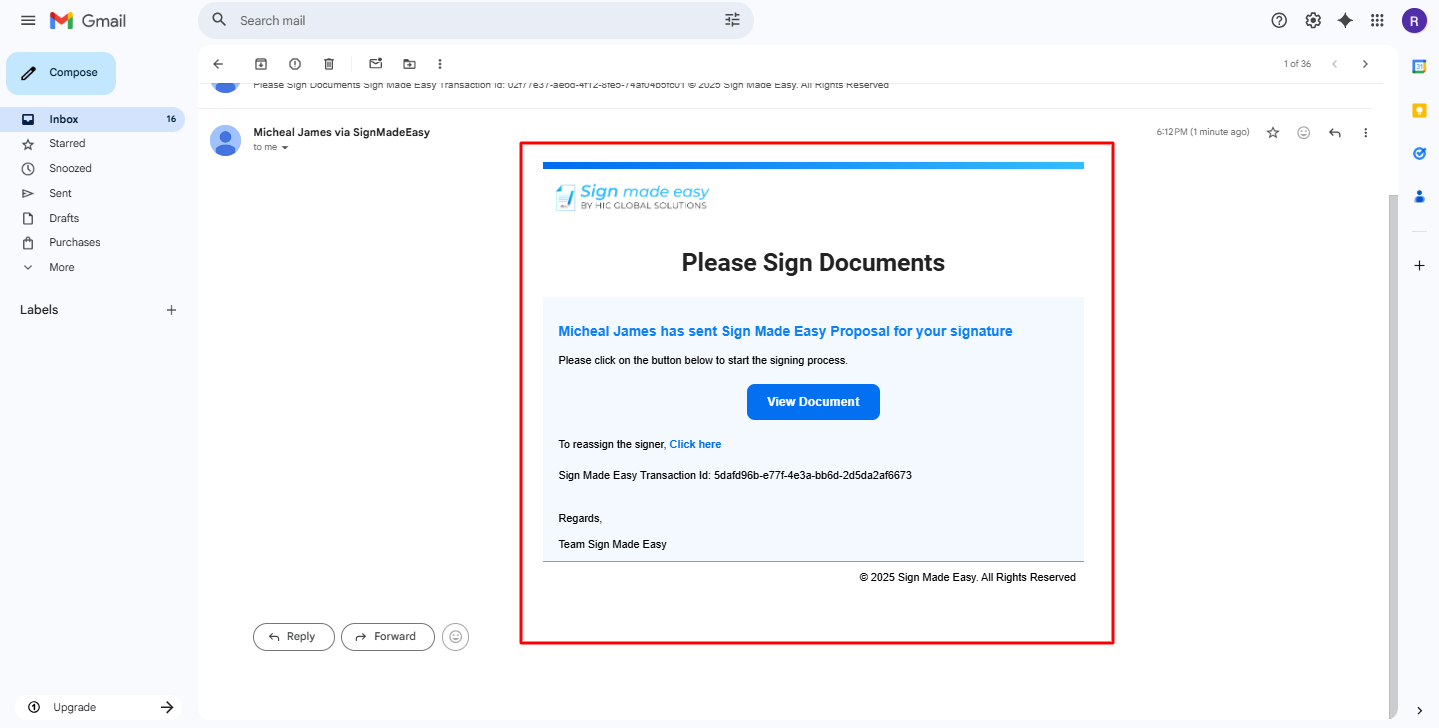
Step 4:- Click Send Now.
The email is sent to the selected recipient.
Step 5:- Complete the signing process, then click the Complete Sign button.
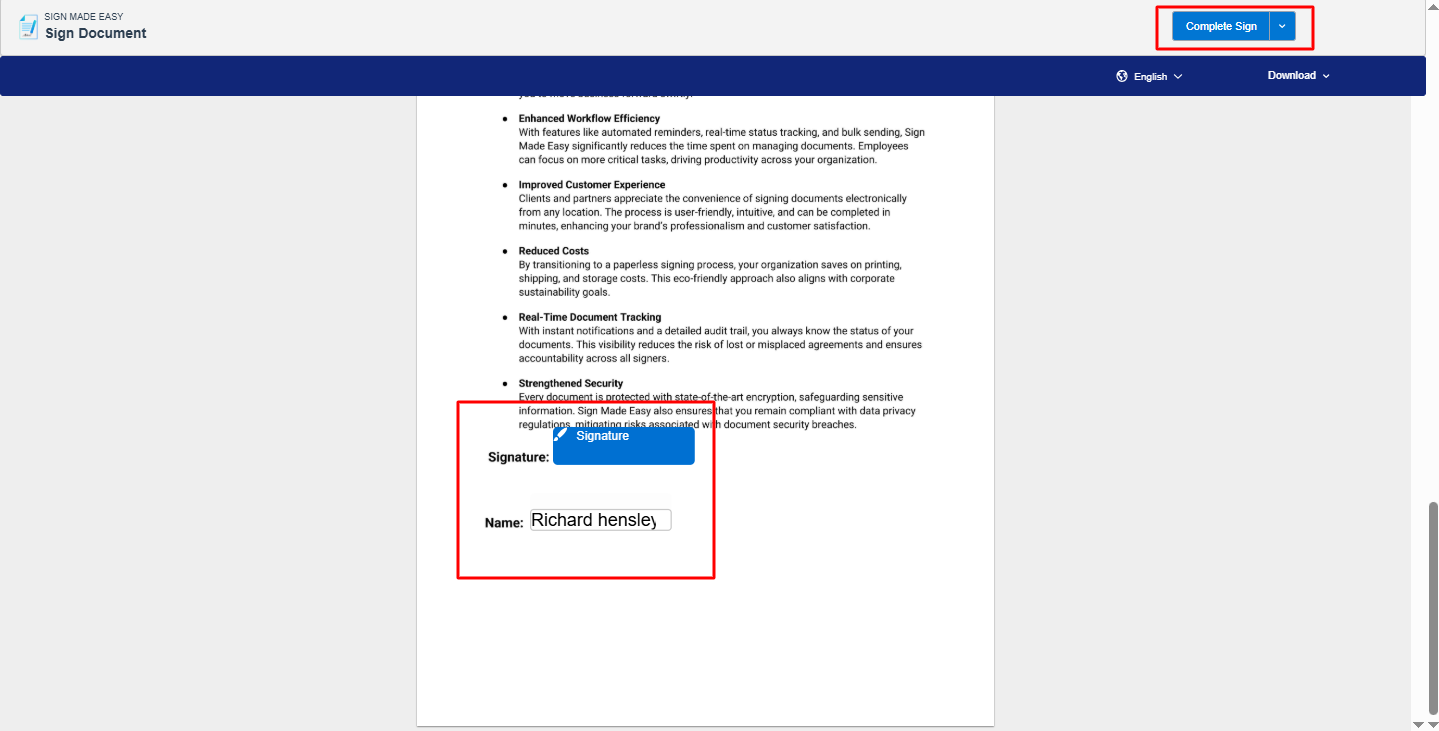
Step 6:- Upon completion of the Signing process, the document is stored in Salesforce

Was this article helpful?
That’s Great!
Thank you for your feedback
Sorry! We couldn't be helpful
Thank you for your feedback
Feedback sent
We appreciate your effort and will try to fix the article