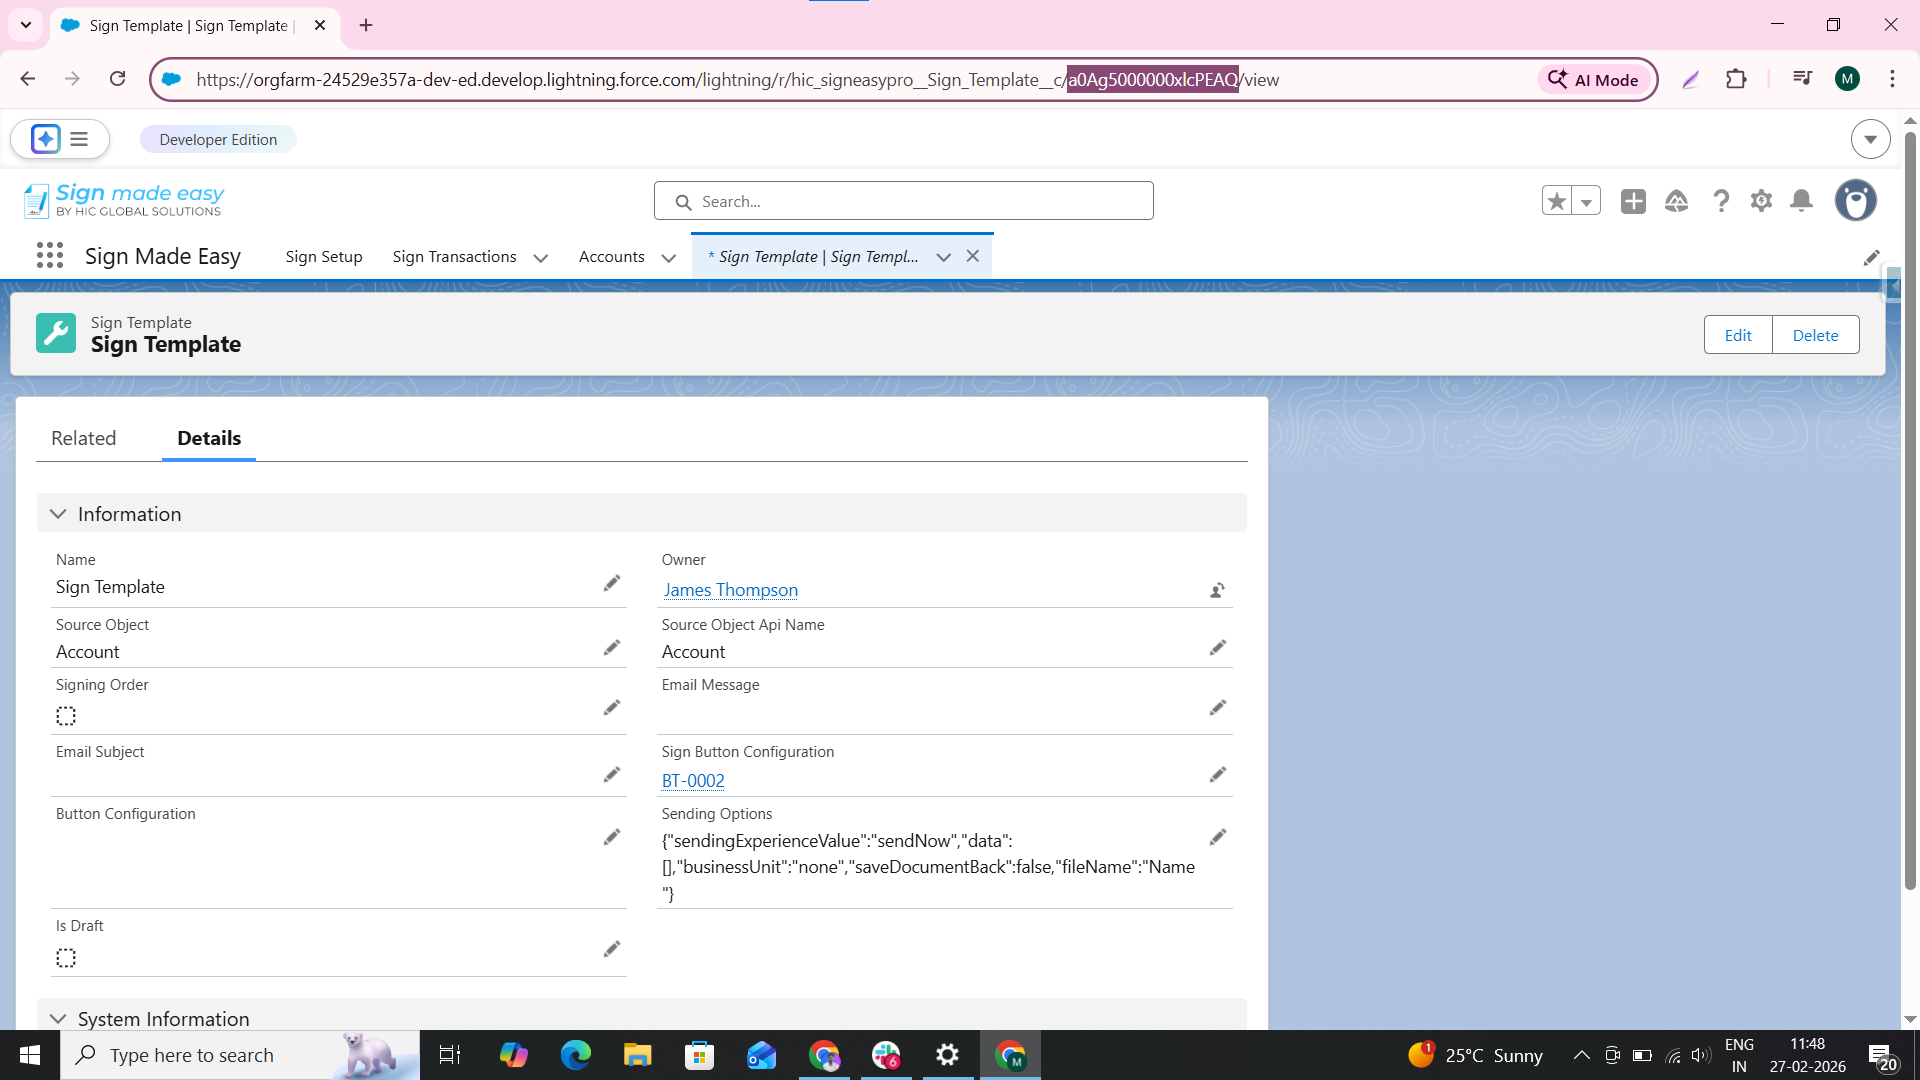
Step 1: Use an existing Sign Template or create a new one. If you haven’t created a template yet, click here.
Step 2: Copy the Sign Template ID.
Step 3: Type “Flows” in the Quick Find search bar, then select it to open the Flow Setup page.
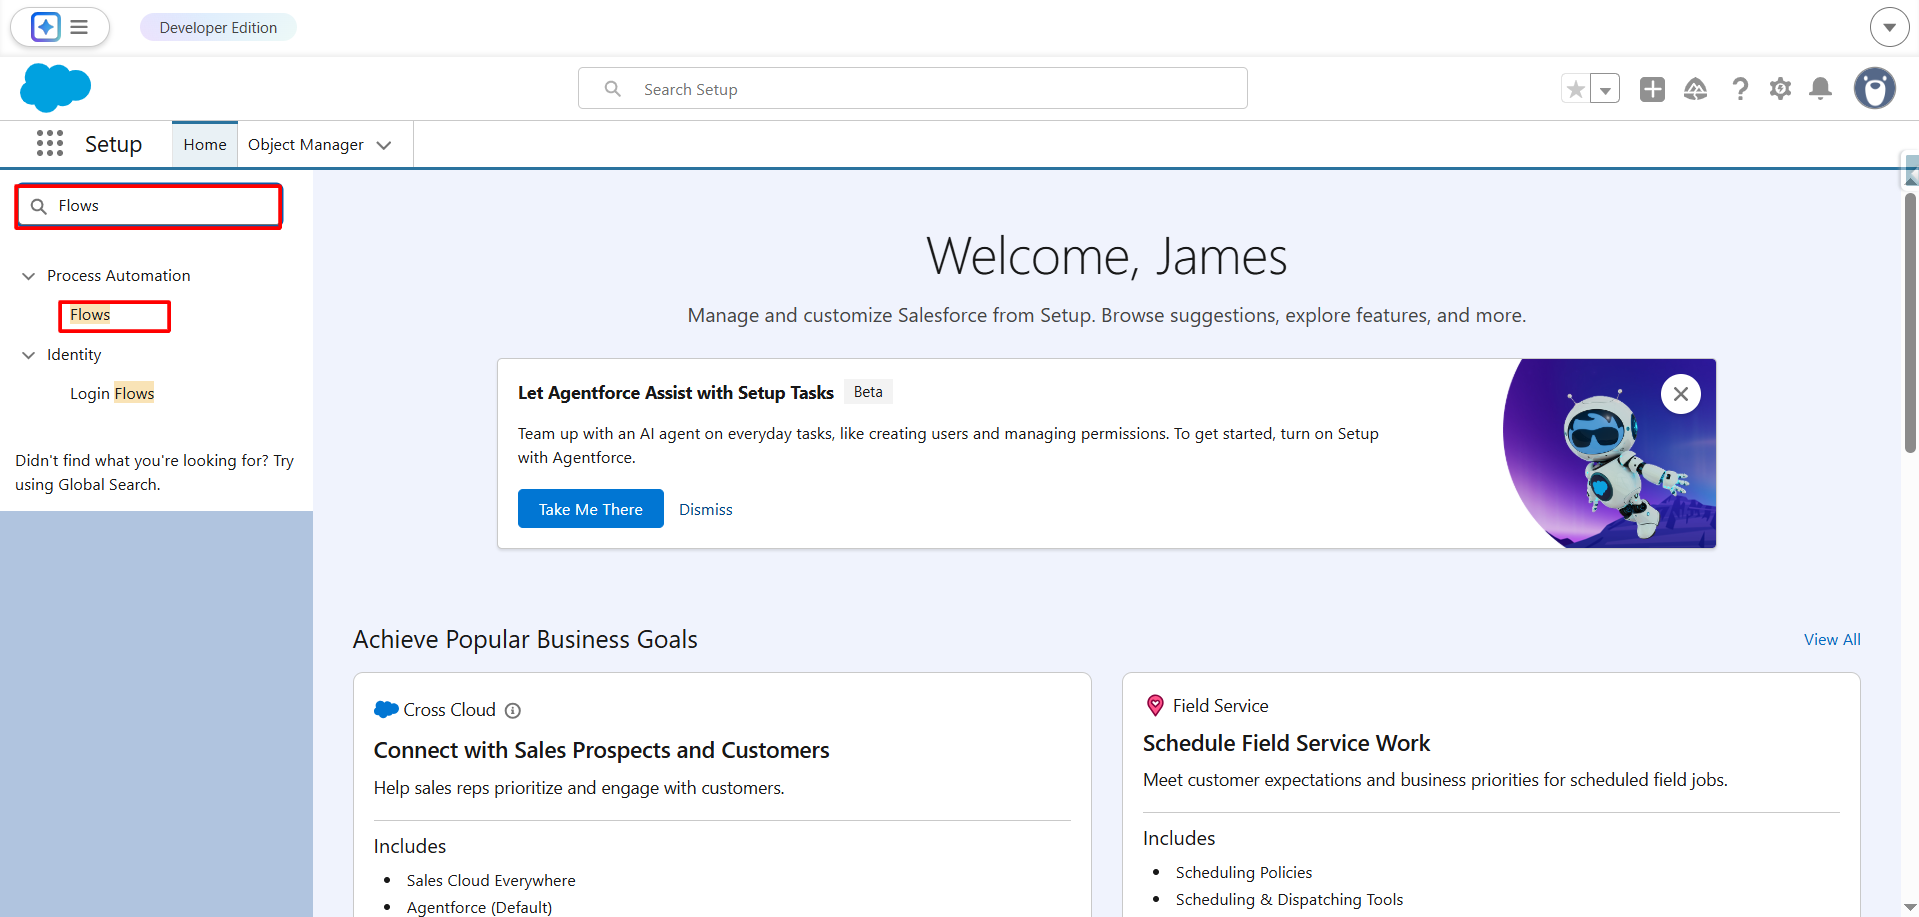
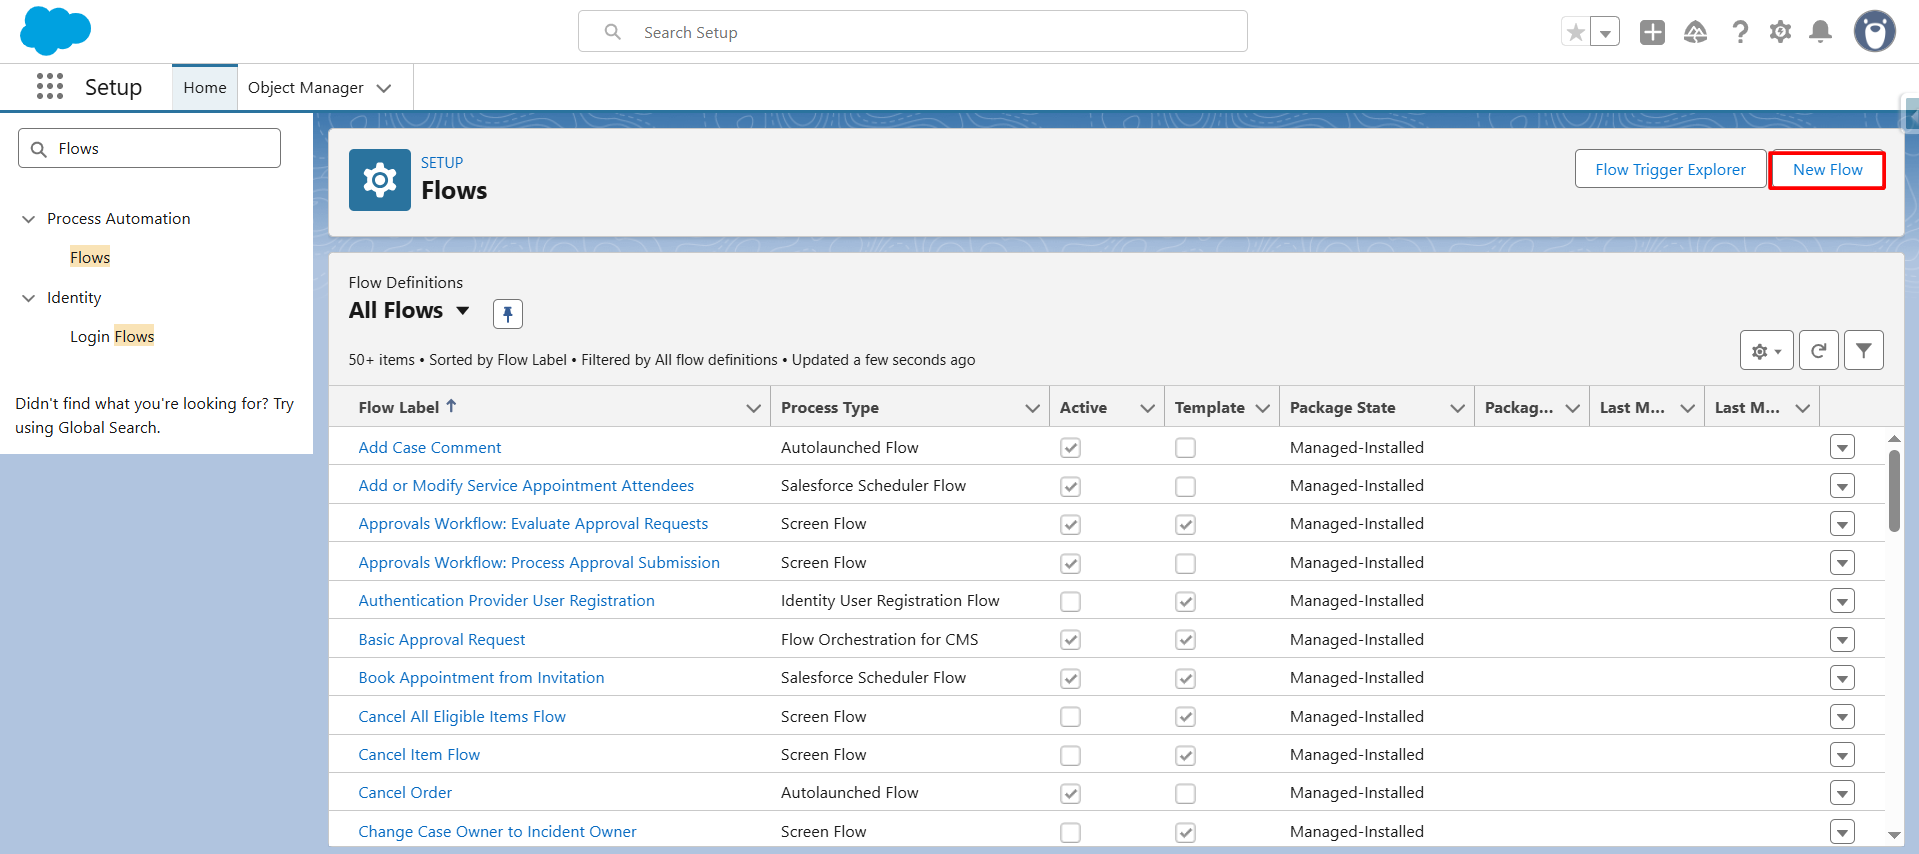
Step 4: On the Flow Setup page, click the “New Flow” button to create a new flow.
Step 5: Select “Record Trigger Flow”.
A Record-Triggered Flow in Salesforce is a type of automation that runs automatically when a record is created, updated, or deleted.

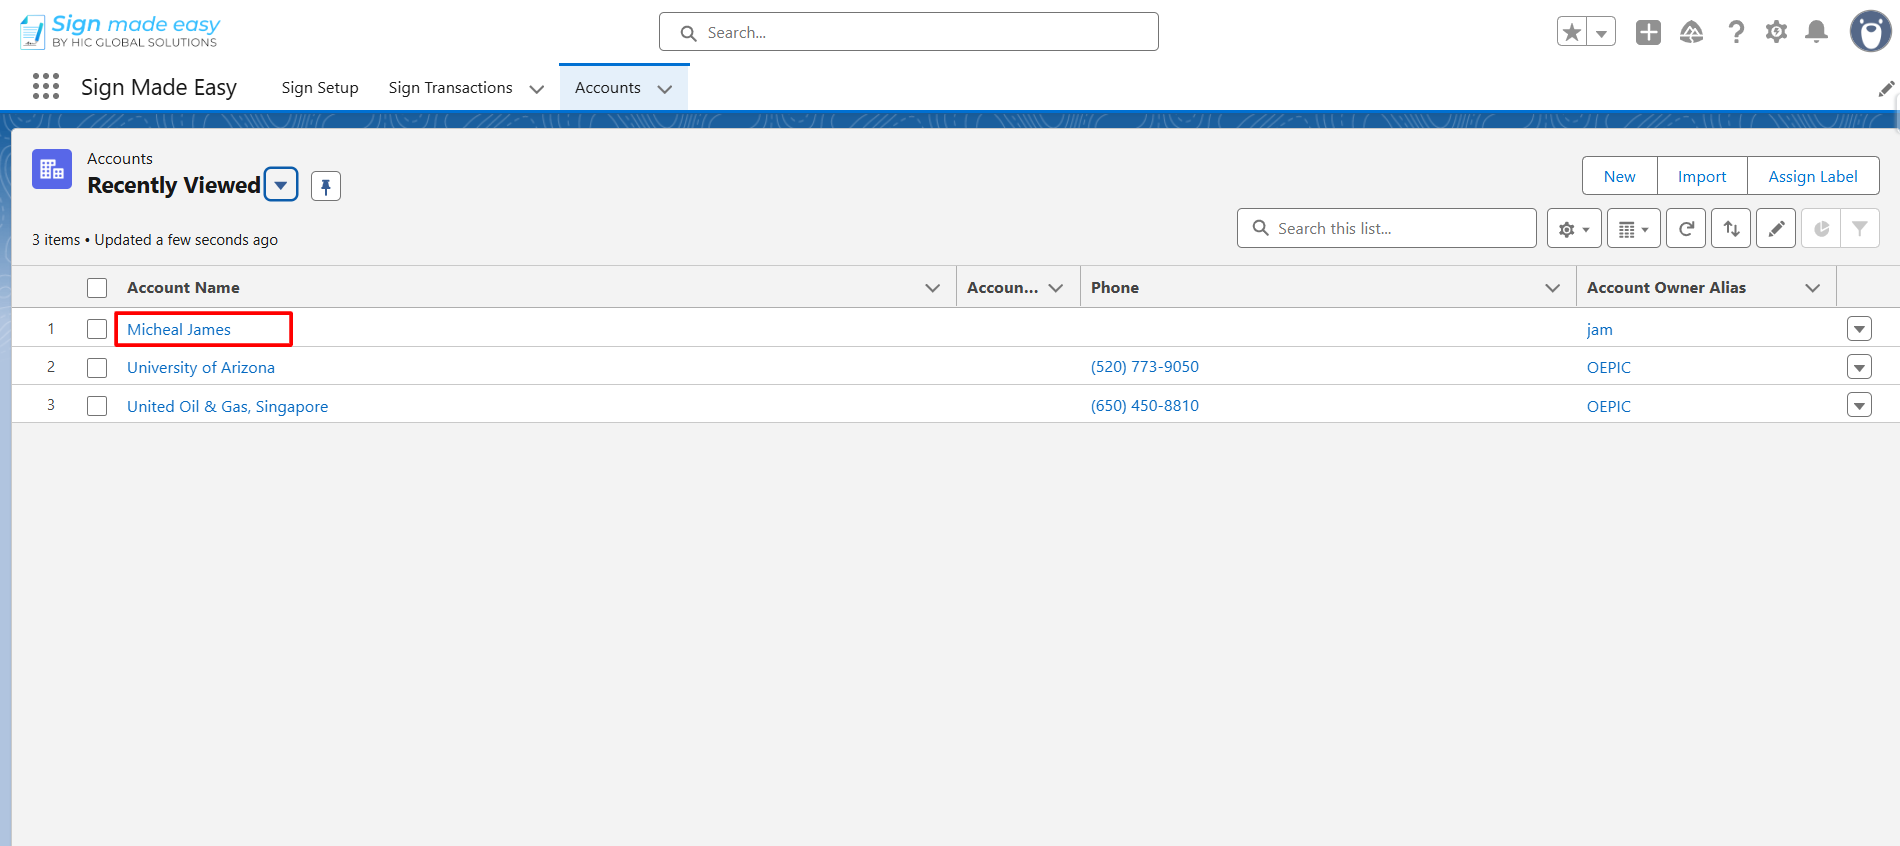
Step 6: Choose the appropriate object, then configure when the flow should trigger (e.g., when a record is created, updated, or deleted according to your business requirements).
Note: Choose the appropriate object (e.g., Account, Opportunity, or a custom object). Define when the flow should trigger (e.g., record creation, update, or deletion). Configure entry conditions based on your business requirements.
style="font-size: 16px;">Configure entry conditions based on your business requirements.

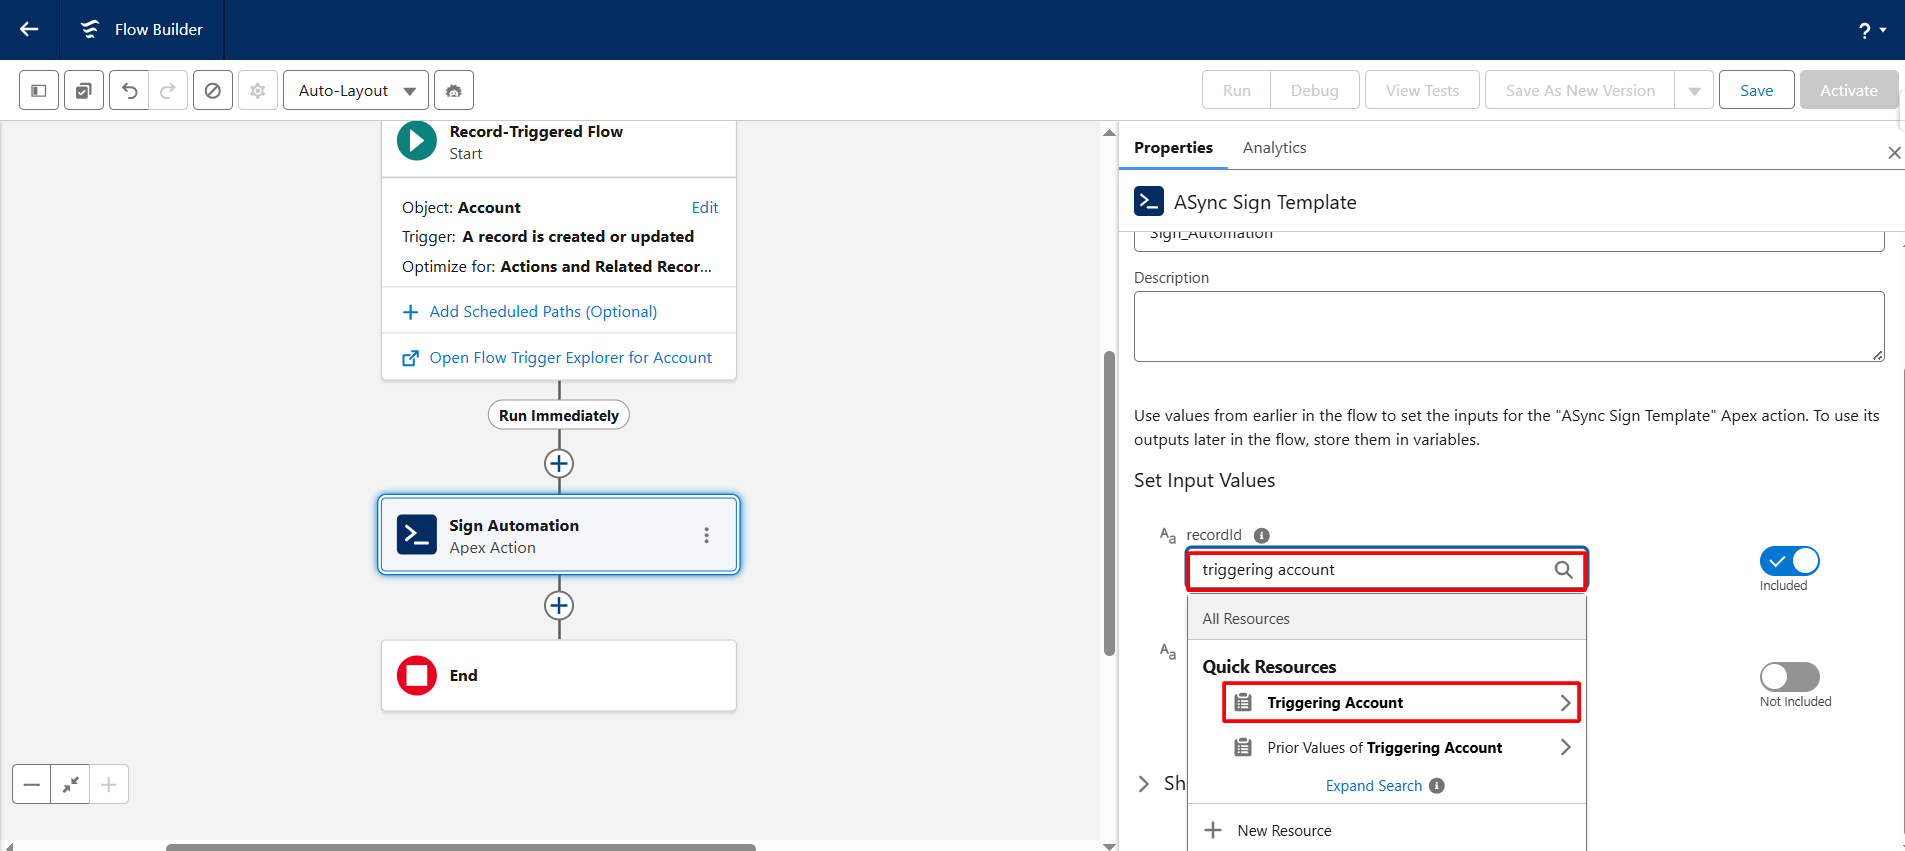
Step 7: Click “Add Element” in the Flow Builder, then search and select “Async Sign Template.”


Step 8: Enter the Label and API Name for the Async Sign Template element.
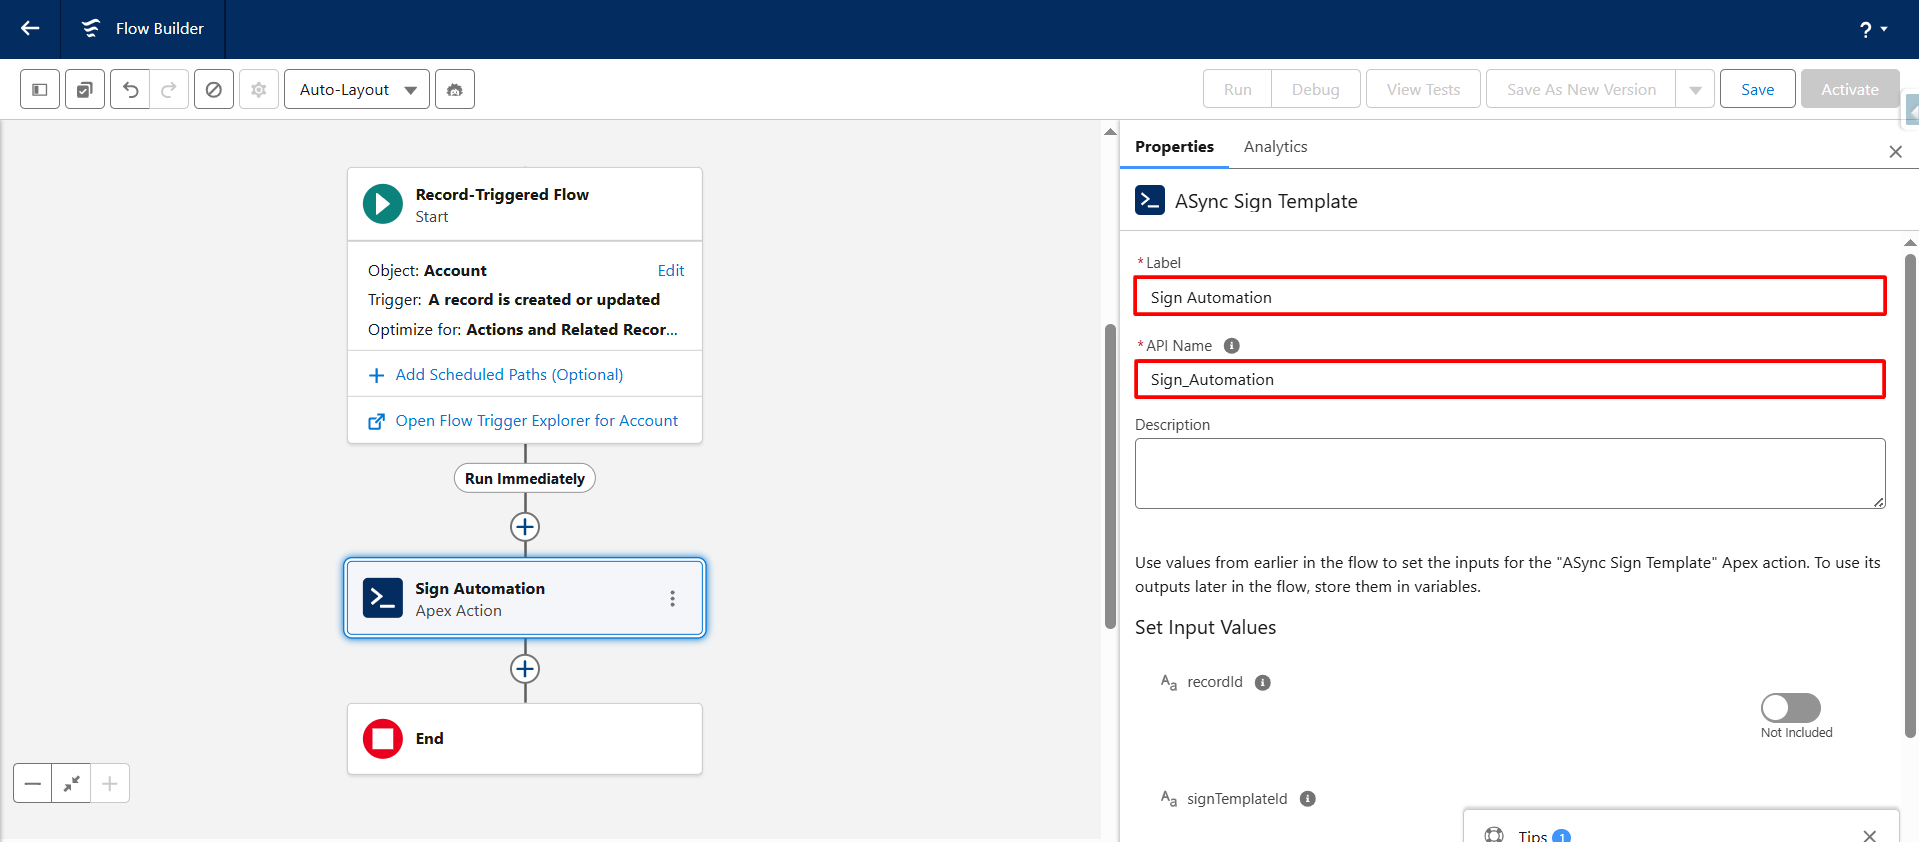
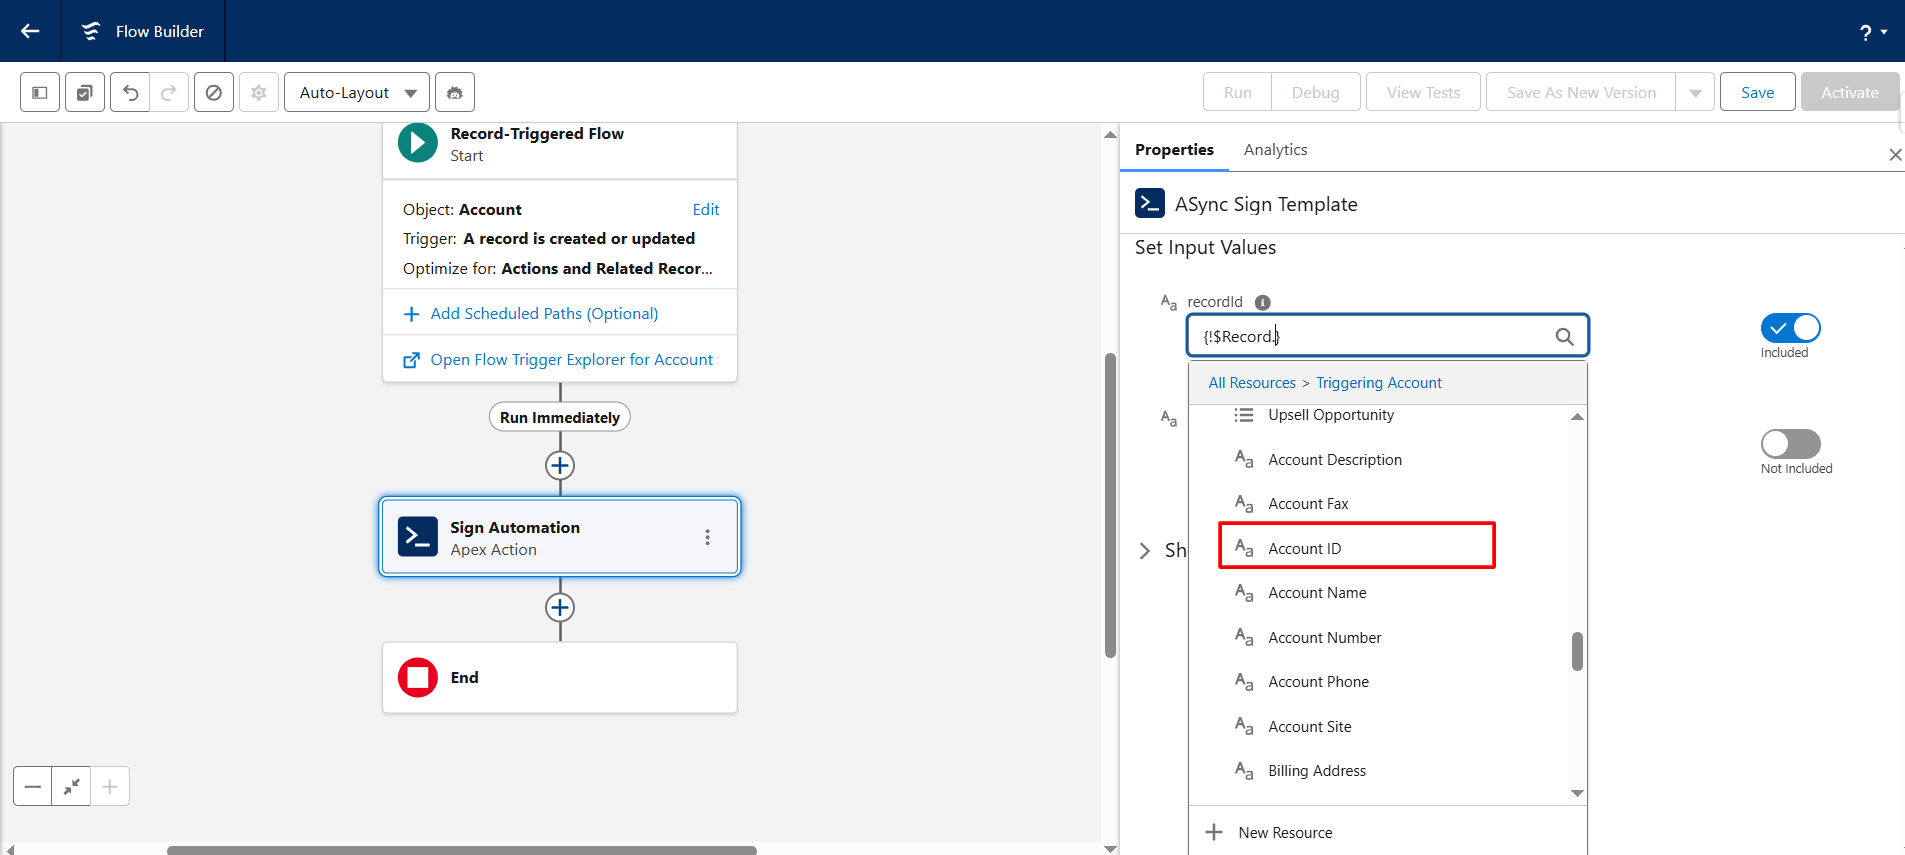
Step 9: In the Record ID field, search for the triggering record and select the appropriate object ID field.

Step 10: Enter the Sign Template ID that you copied in Step 2.
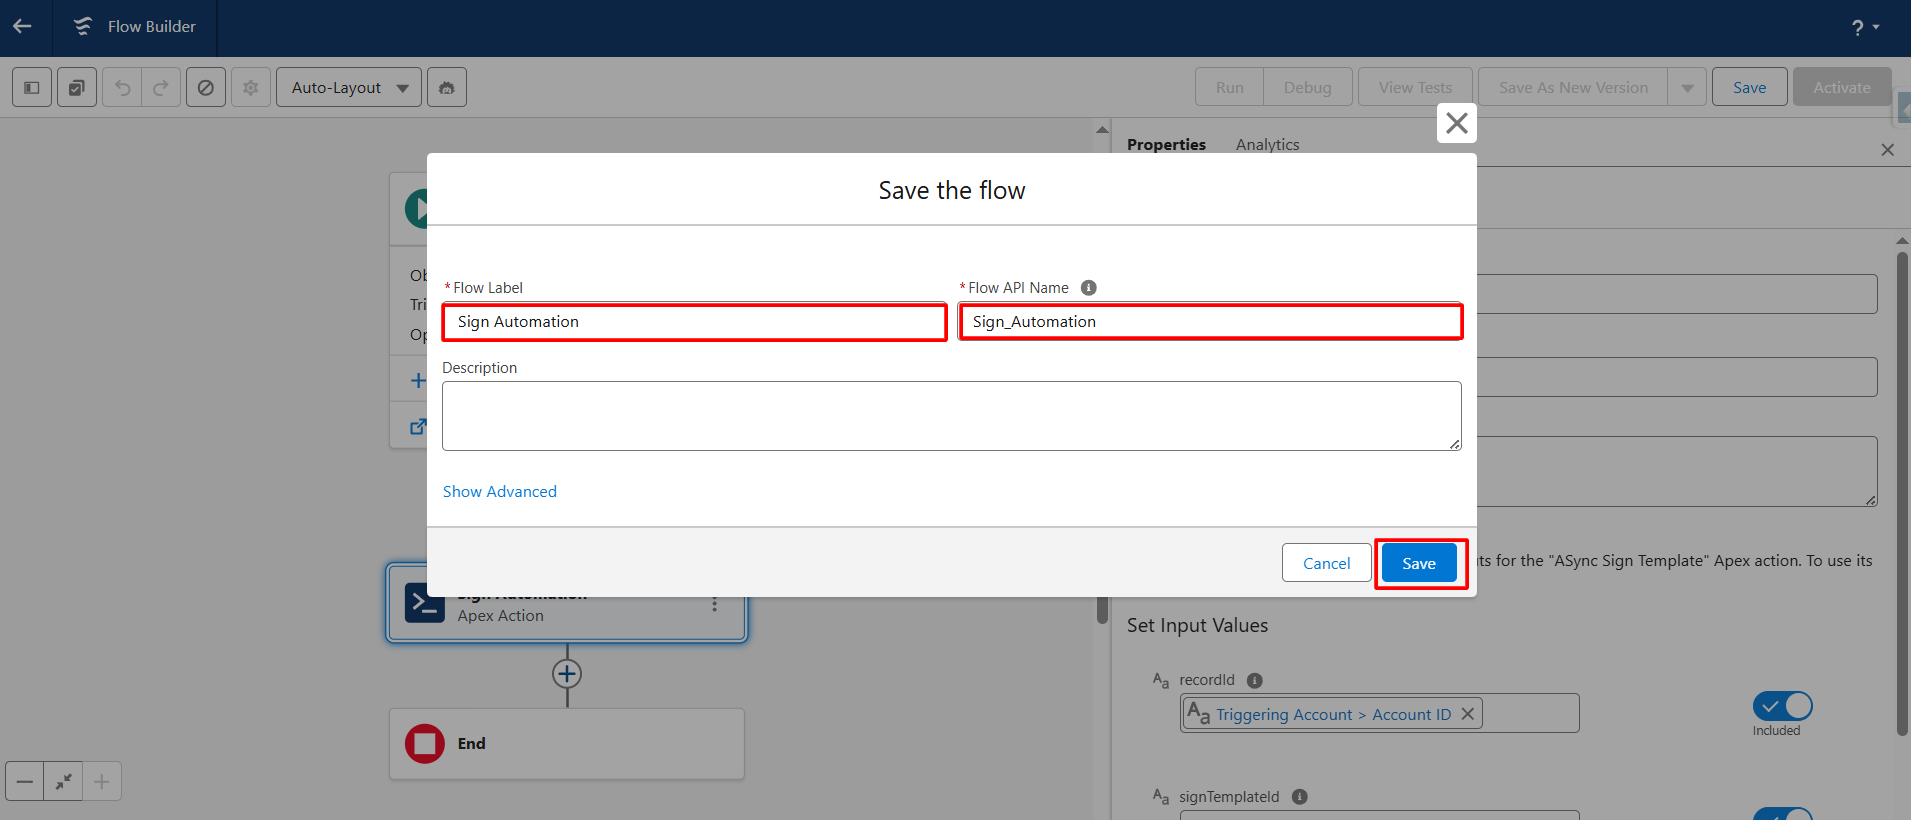
Step 11: Click Save, then enter the desired Flow Label and API Name for your flow.
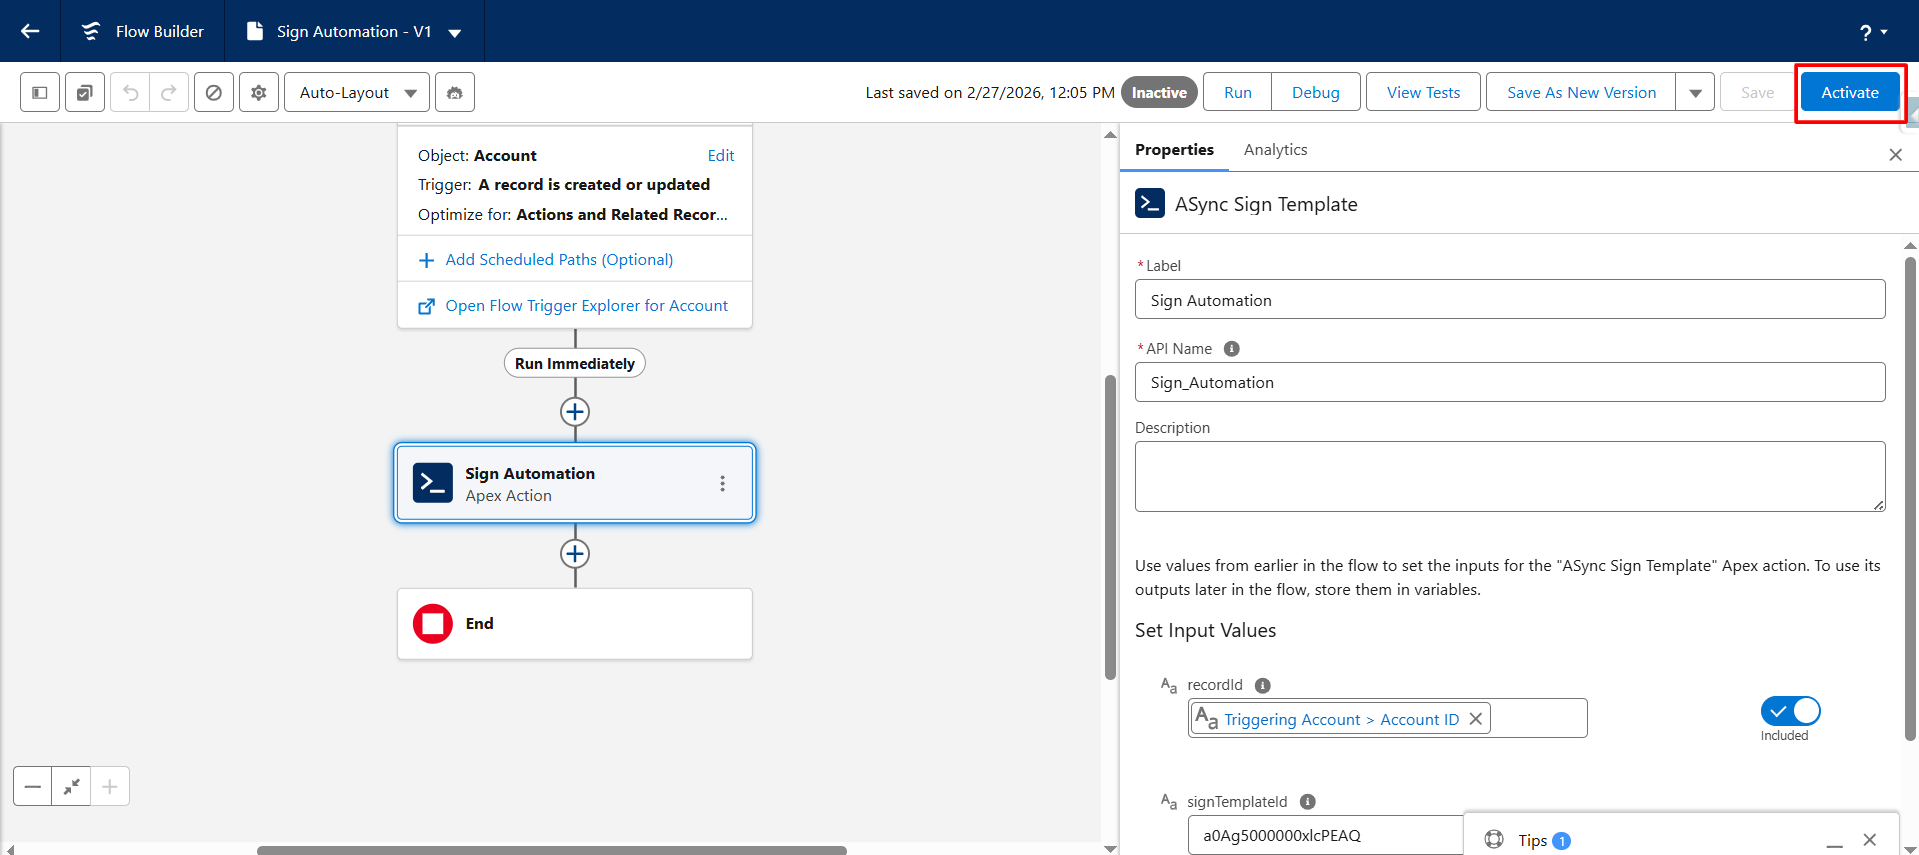
Step 12: Click the Activate button to activate the flow.

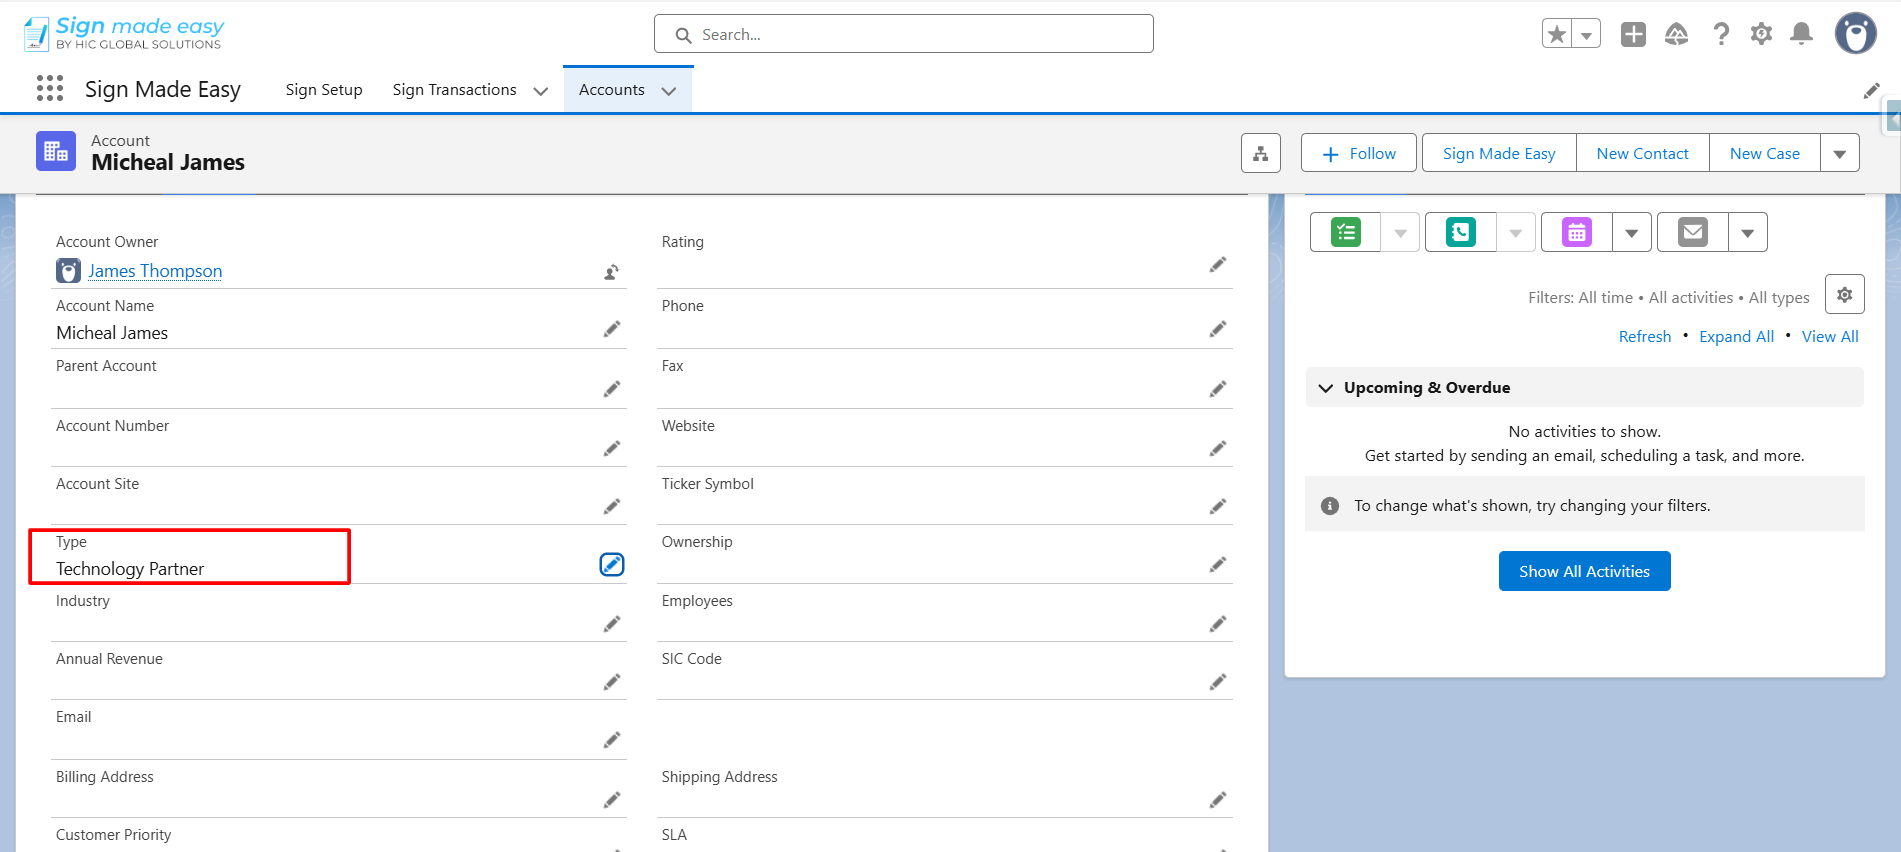
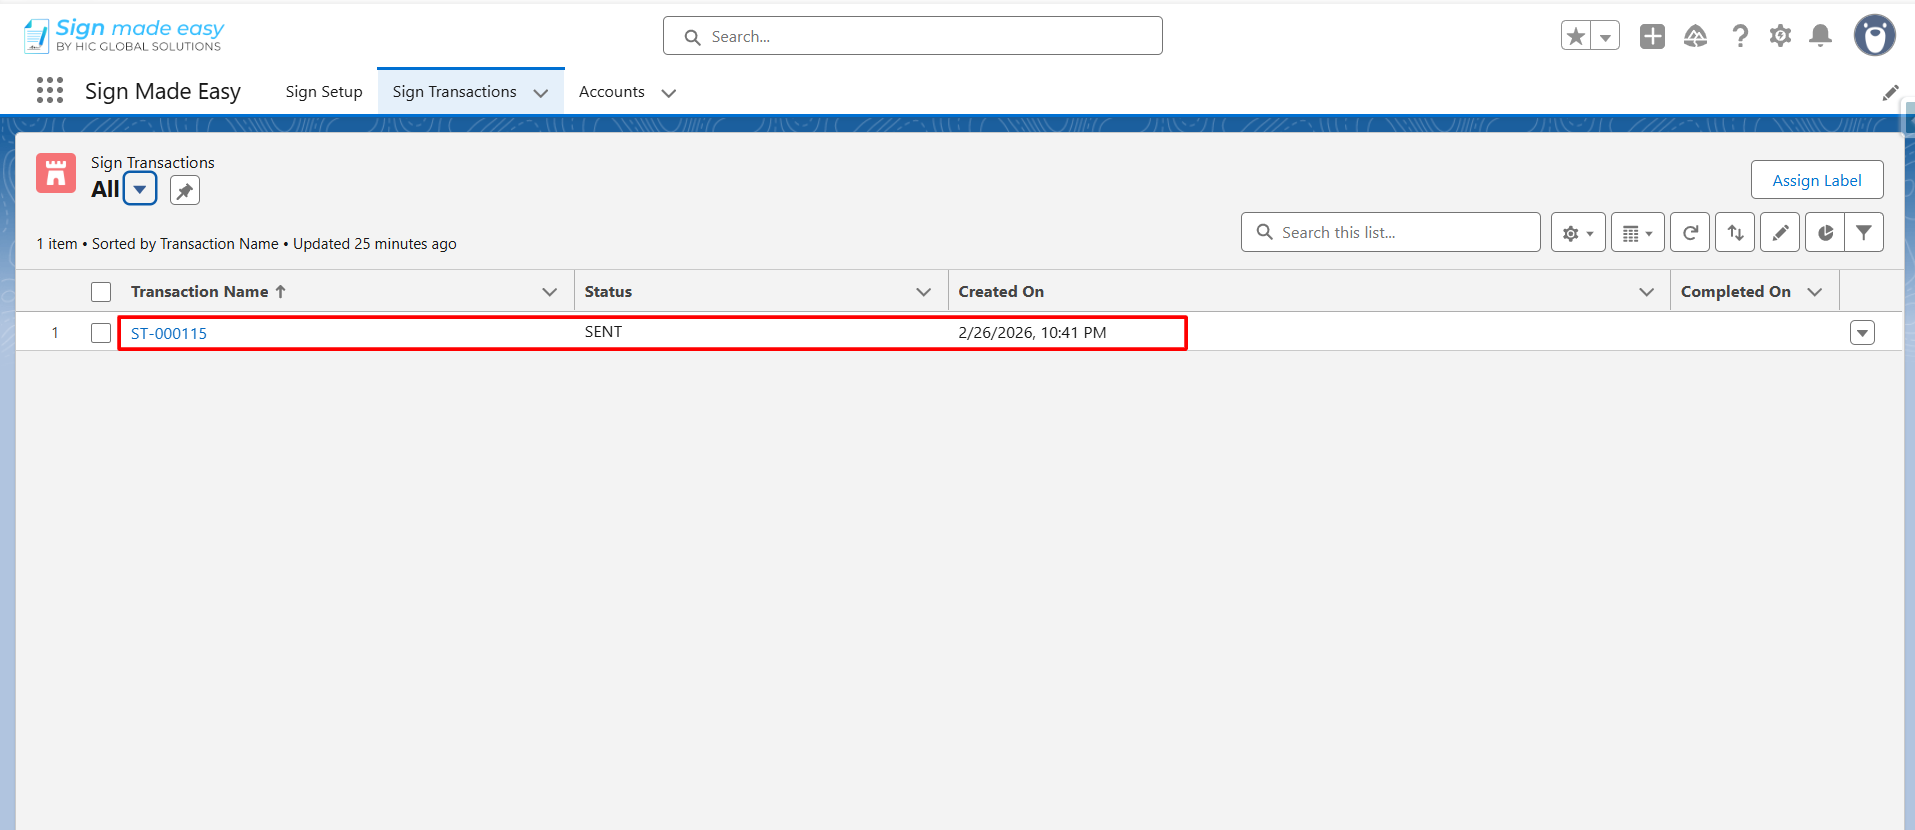
Step 13: Open the record and update it. Once the record is updated and saved, a new Sign Transaction will be automatically created and record saved in Salesforce.
Was this article helpful?
That’s Great!
Thank you for your feedback
Sorry! We couldn't be helpful
Thank you for your feedback
Feedback sent
We appreciate your effort and will try to fix the article