Step 1:- After configuring the SME, navigate to the ‘Buttons, Links, and Actions’ page and select the newly created button to view its details.
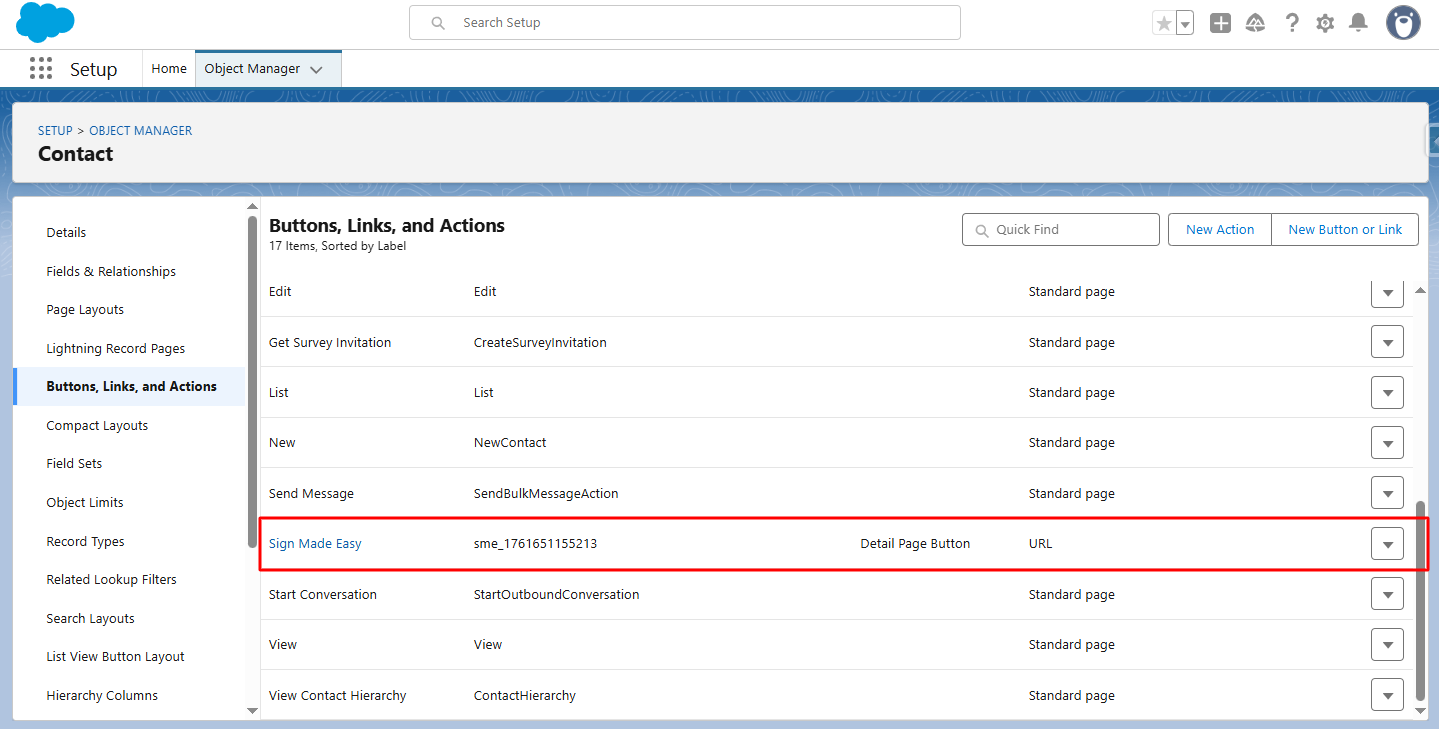
Step 2:- Click Edit.
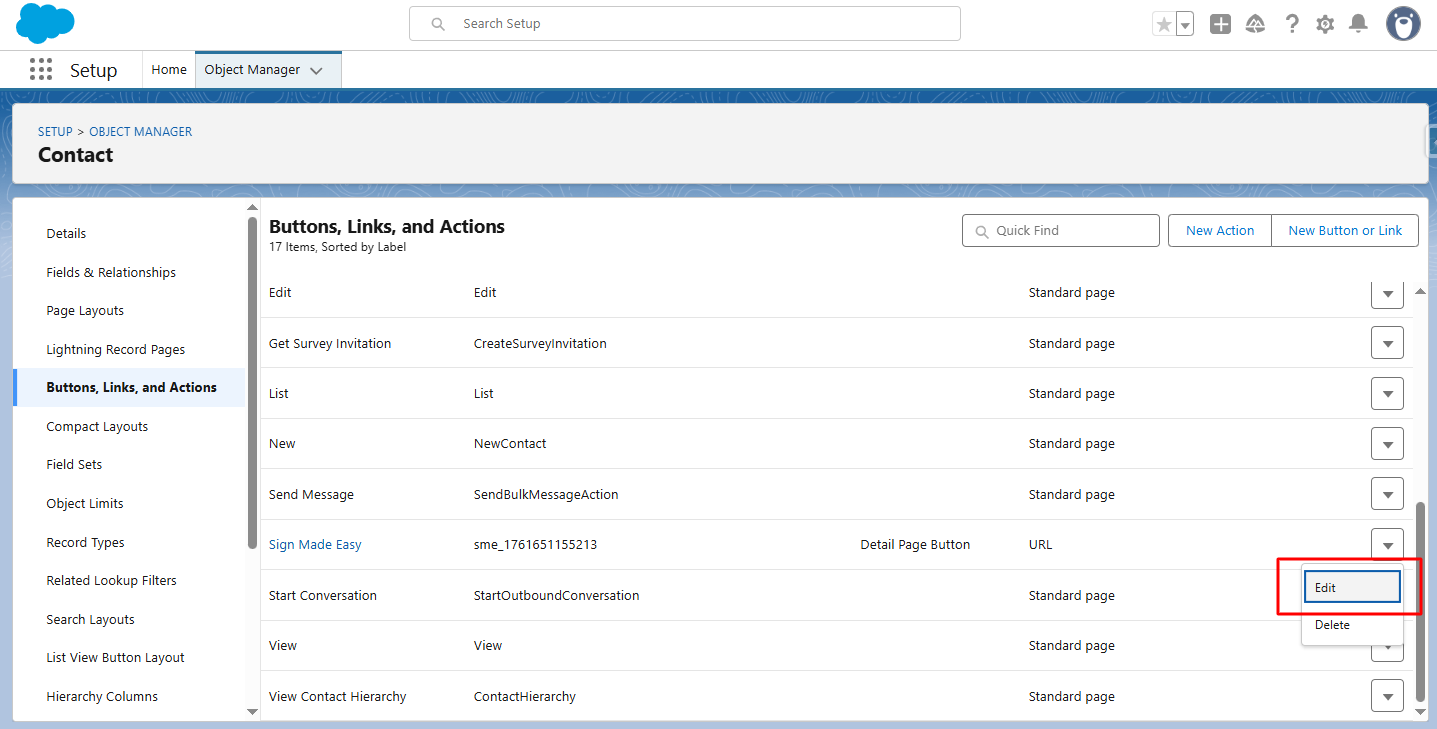
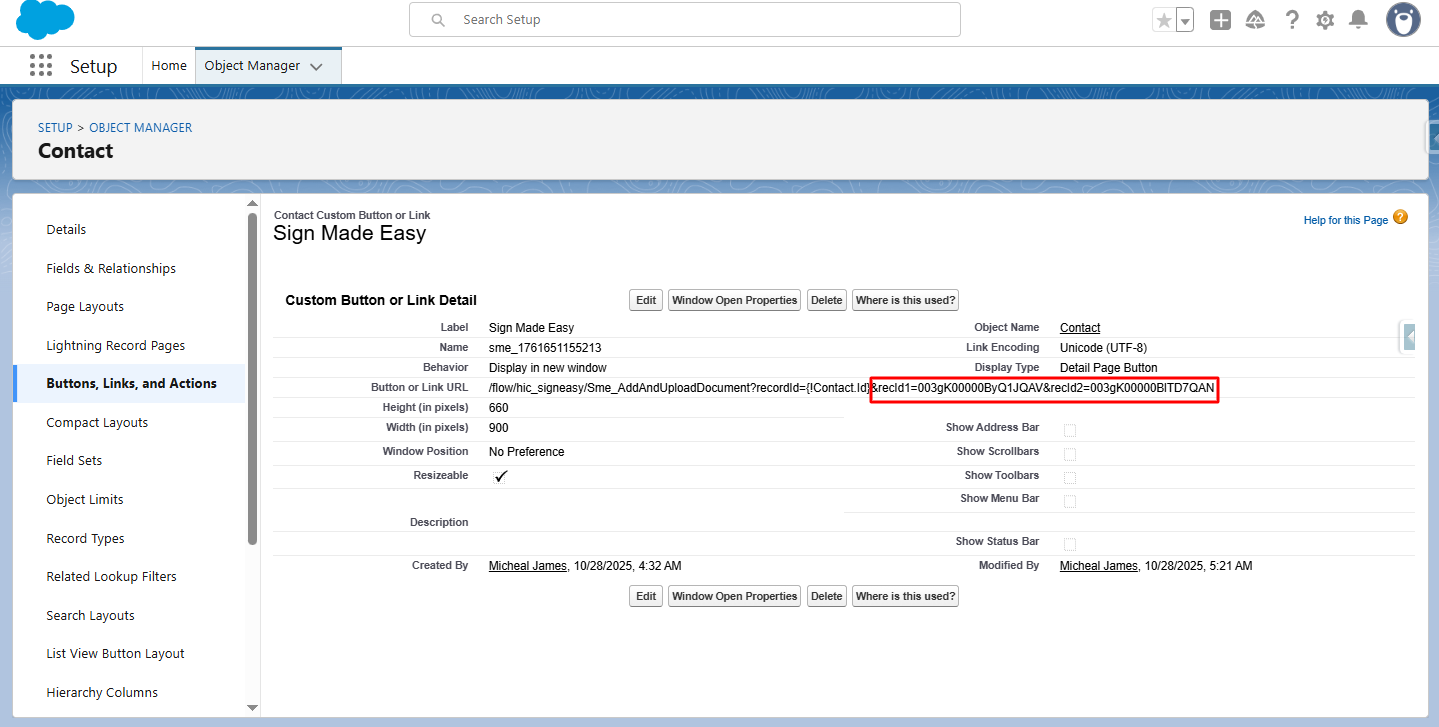
Step 3:- To add the Standard Recipient Using Sign parameters, edit the button link in the Custom Button or Link Editor.
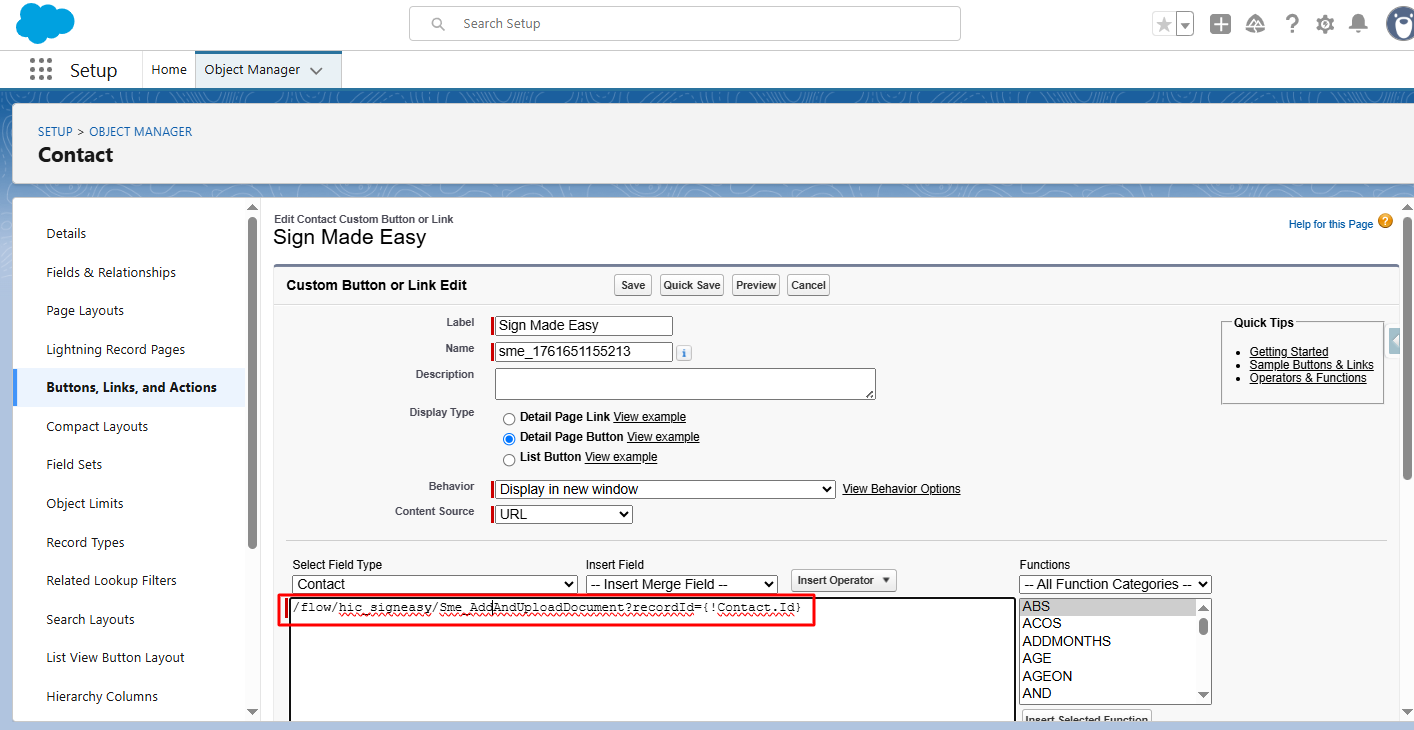
Step 4:- Add Standard Recipient Using Sign Parameters.
Parameter: &recId
Description: Automatically selects one or more recipients on the screen (up to 5).
Example: &recId1
Note: Use sequential numbering for multiple recipients (e.g., &recId3=003gK00000ByQ1JQAV )
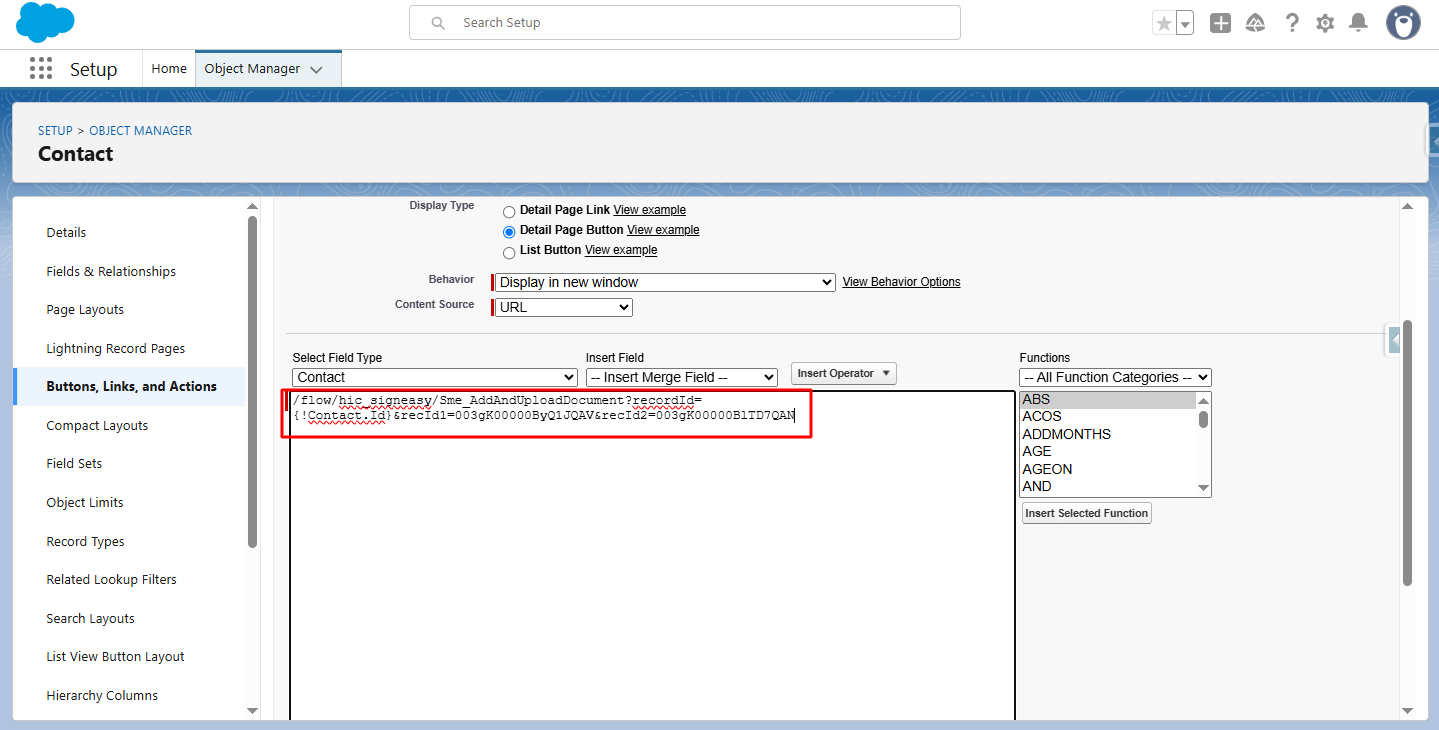
Step 5:- Click Save.

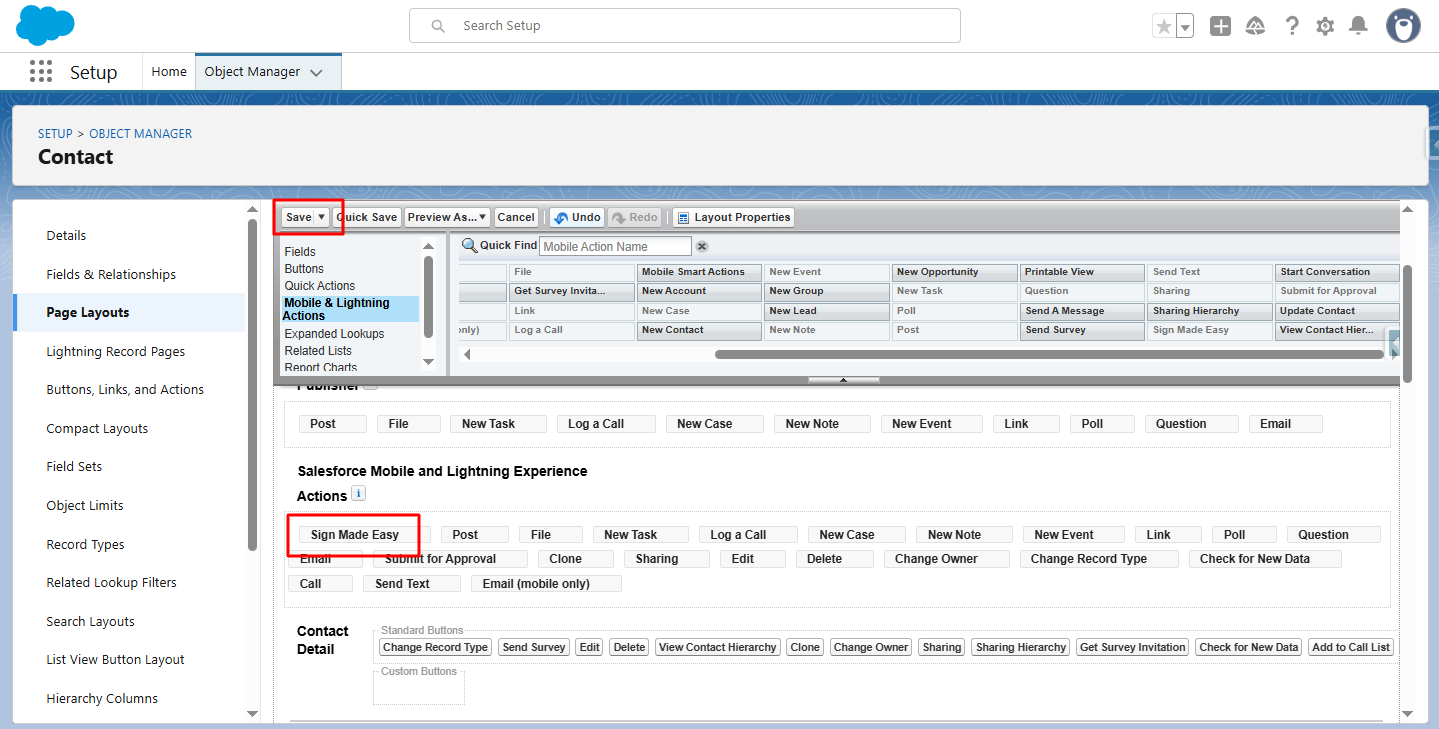
Step 6:- In Page Layout, drag the created button from Mobile & Lightning Actions to the desired section.

Step 7:- Click Save.
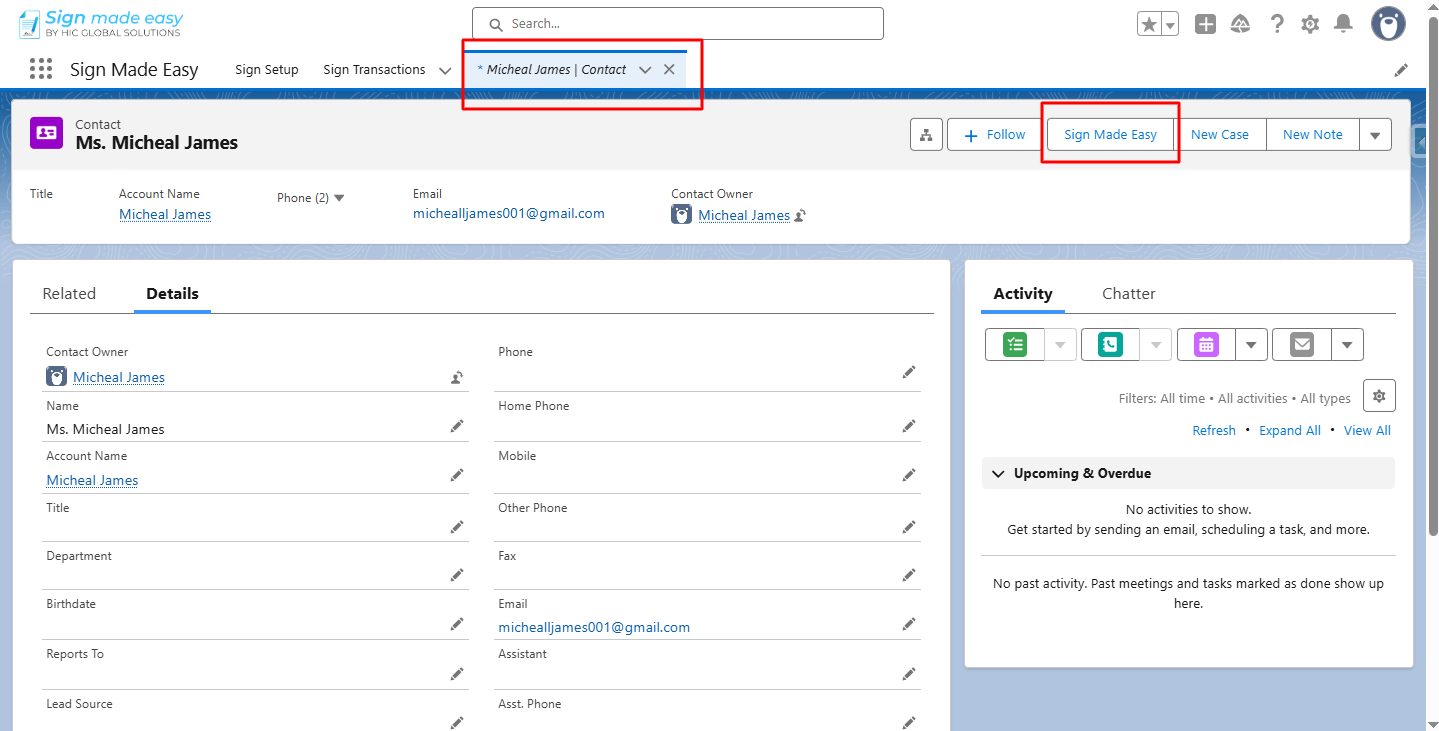
Step 8:- Go to the object’s record detail page and click the button you created.
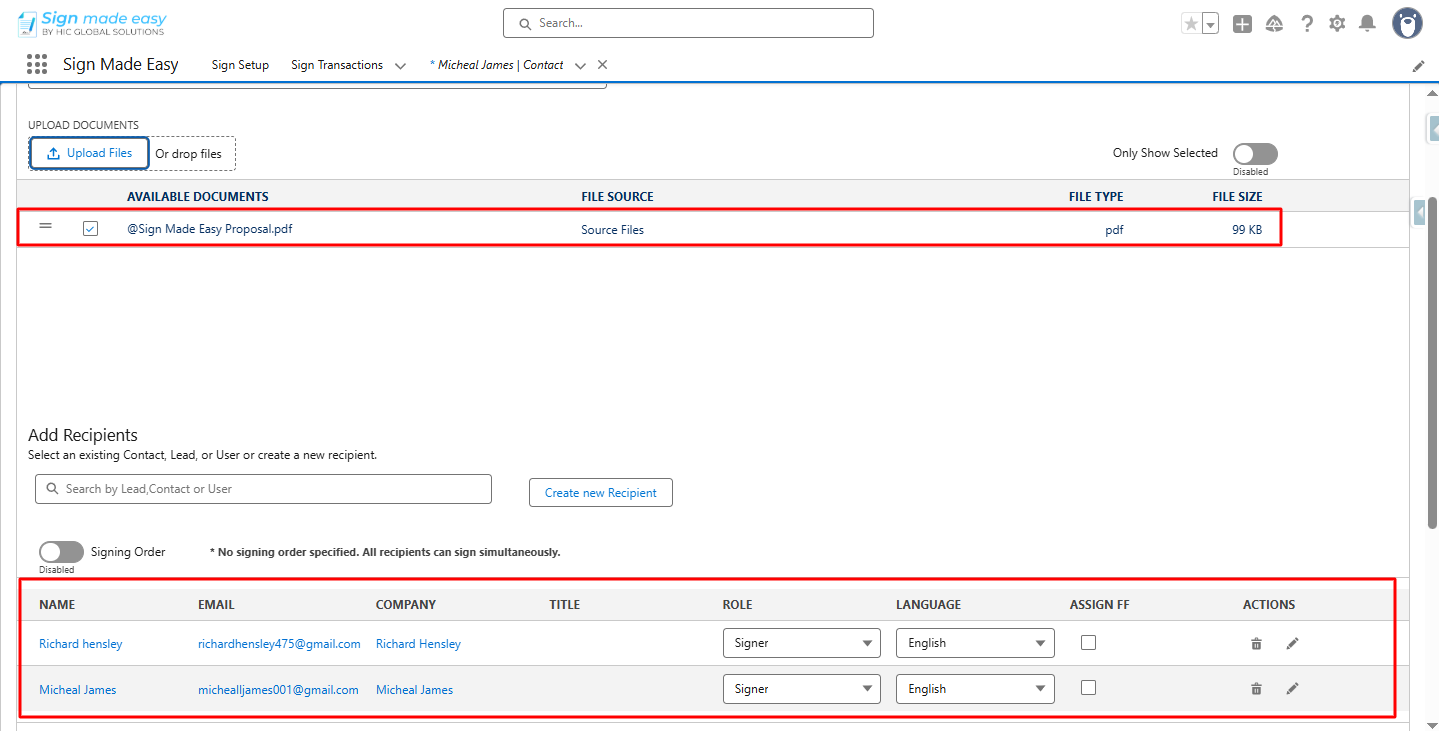
Step 9:- The Create Transaction page is launched. Upload the document.
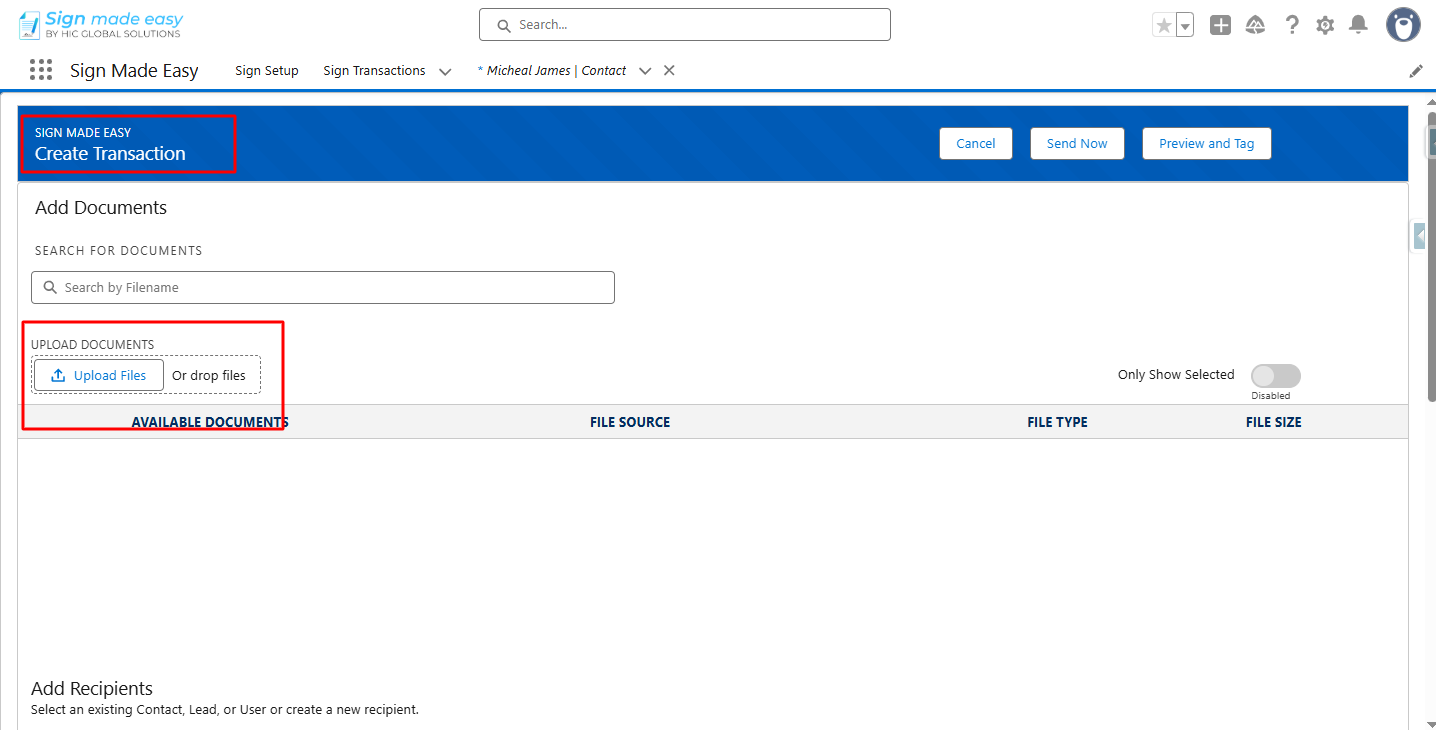
Recipients added through parameters are also visible
Step 10:- Click Send Now.
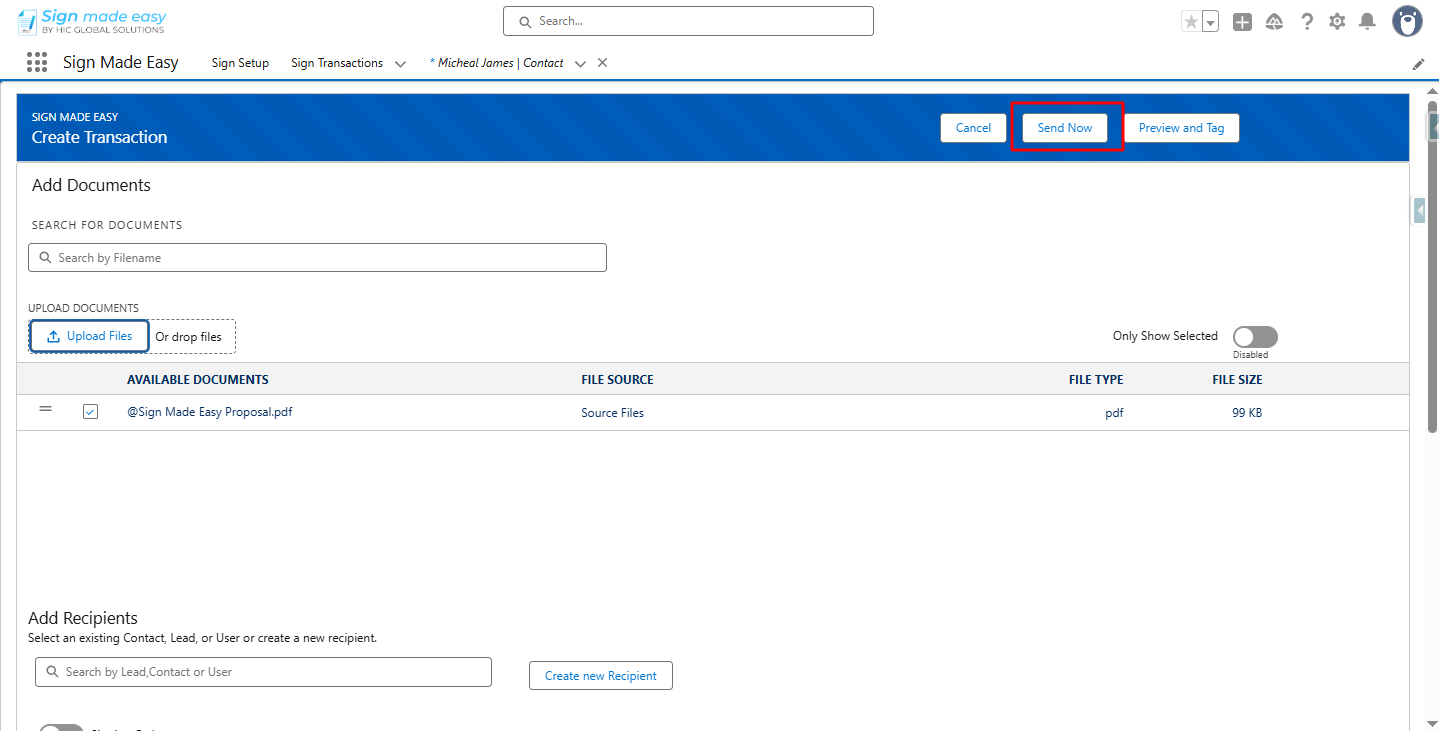
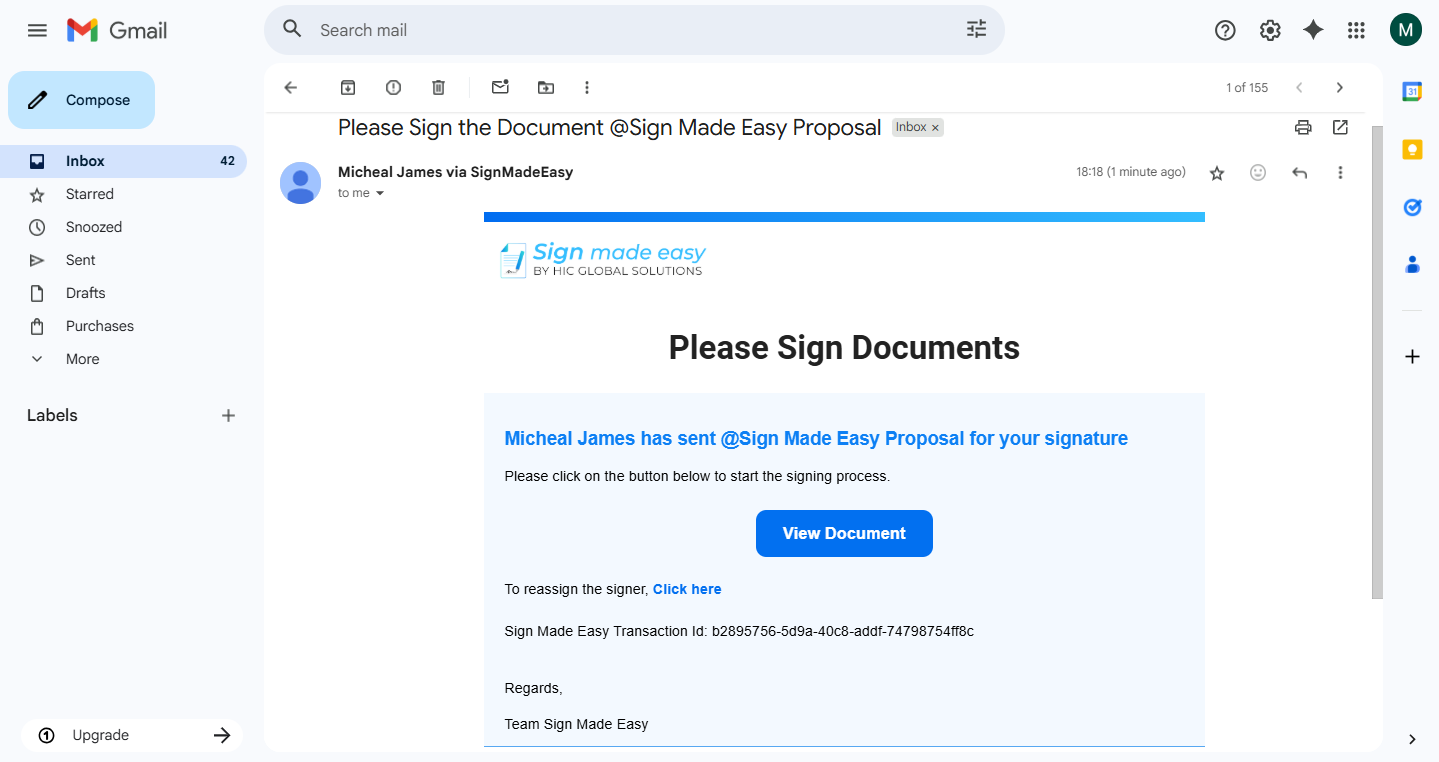
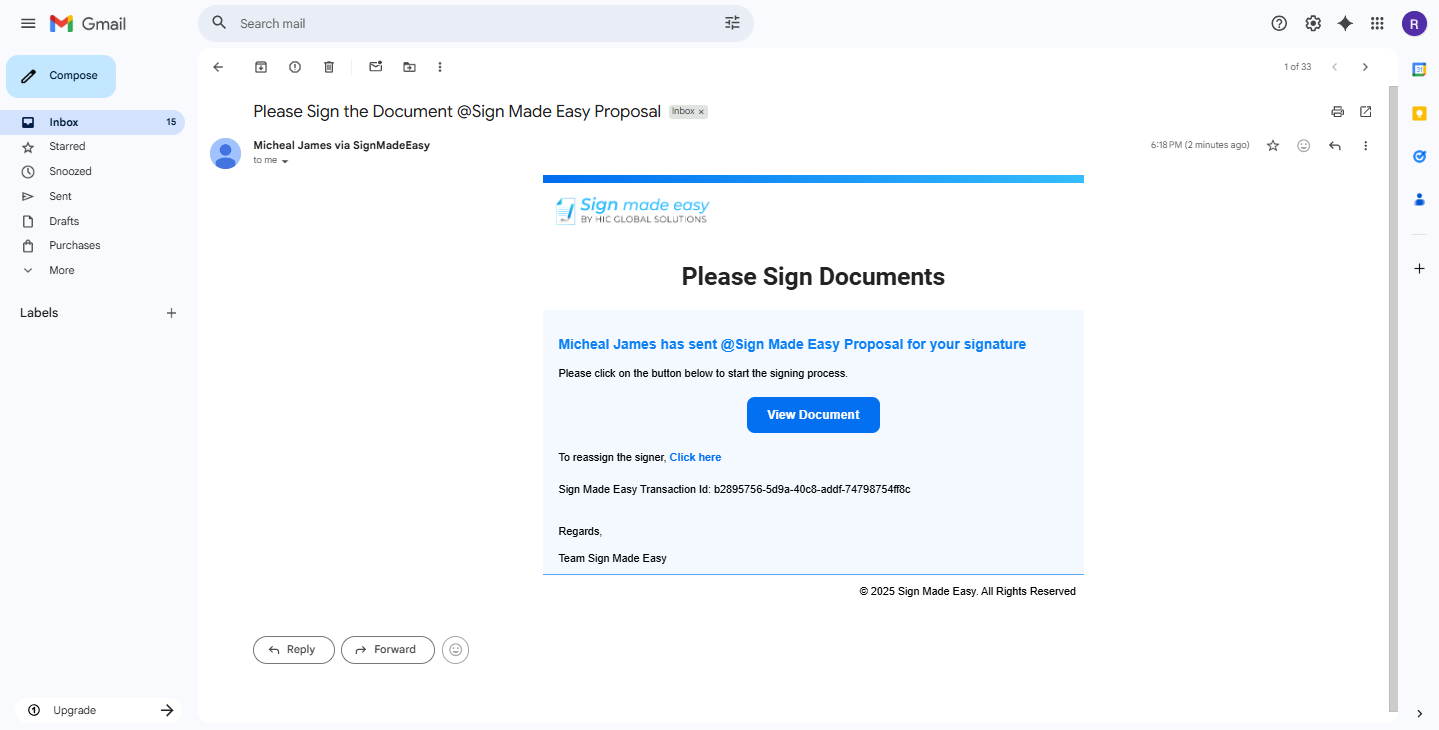
Now, the email is sent to the selected recipients.
Was this article helpful?
That’s Great!
Thank you for your feedback
Sorry! We couldn't be helpful
Thank you for your feedback
Feedback sent
We appreciate your effort and will try to fix the article